MEA 391209 at Peak Forest on 11/08/01. Photo coutosey of Steve Jones via Flickr.com
The Buzz Models MEA Wagon Kit
The Buzz Models MEA Kit is a great kit for a first venture into working with white metal. This kit has a price of £40 + £5 P&P & requires Solder, Wheels, Paint & Transfers to complete.
You can purchase these kits by sending an email to; - [email protected] or going to there Facebook Page. Alternately you'll be able to purchase from the Buzz Models trade stand at various exhibitions up and down the country.
You can purchase these kits by sending an email to; - [email protected] or going to there Facebook Page. Alternately you'll be able to purchase from the Buzz Models trade stand at various exhibitions up and down the country.
The Chassis
|
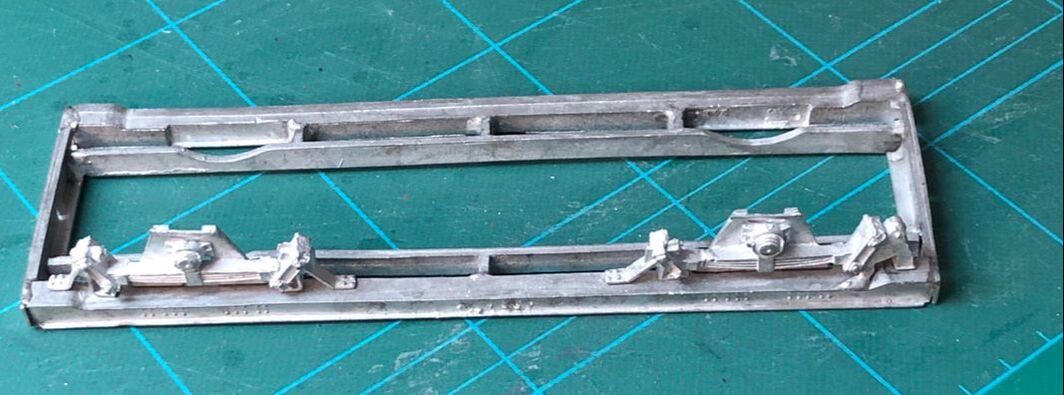
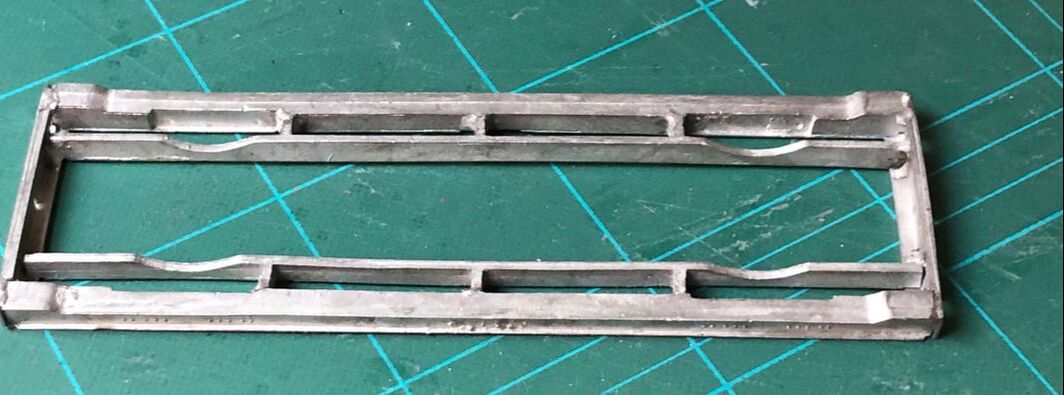
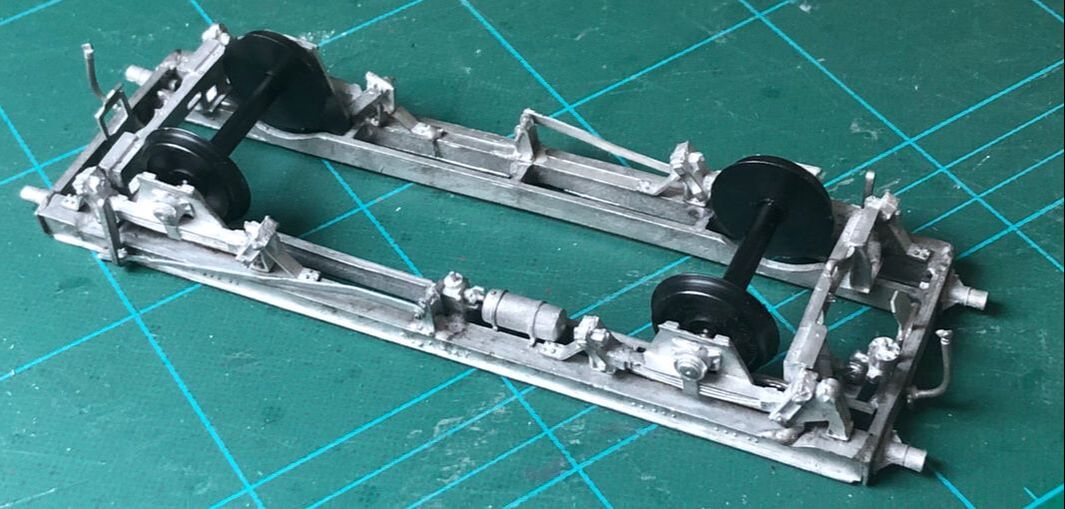
I laid out the inner and outer solebars and headstocks ensuring that they were flat and square, a little bit of filing is needed here again to ensure a good fit between the solebars and headstocks. A piece of flat glass is very useful here to keep all the parts flat and can be soldered on as well.
|
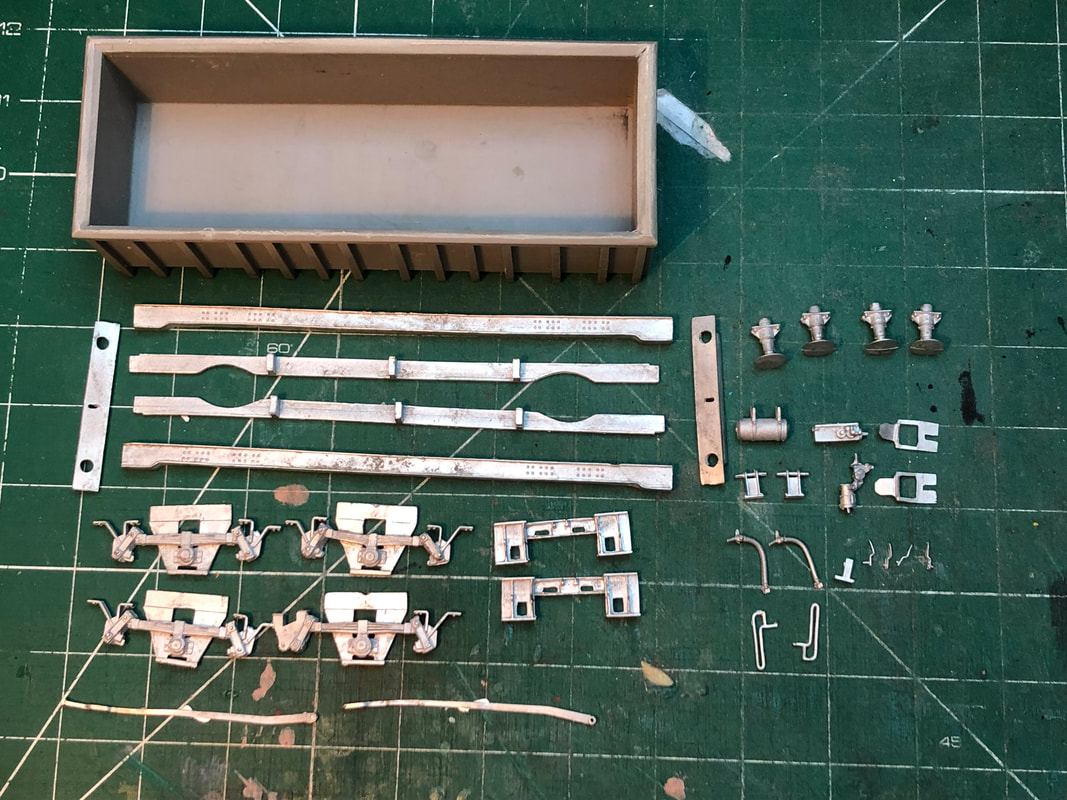
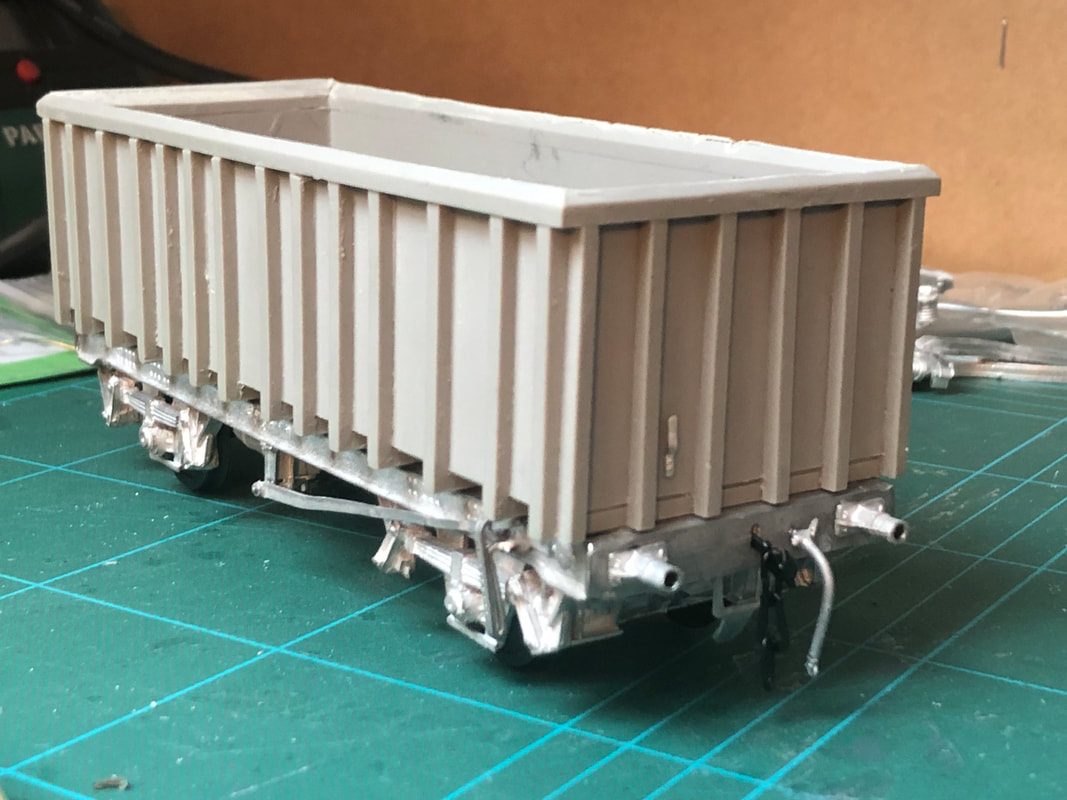
The MEA kit is made up of a resin body and white metal chassis parts. The white metal parts are crisp with a little flash in some places which needs filling off, the body also needs a little filing & filling
I prepared the ‘W’ irons by opening out the axle boxes to take the top hat bearing, fixing them in place with a small amount of super glue and gently bending them to a better shape. I did manage to break one of the springs here but it has been fixed with a little carful soldering. I fitted two ‘W’ iron’s to one side of the chassis using plenty of flux taking care with the soldering Iron.
|
|
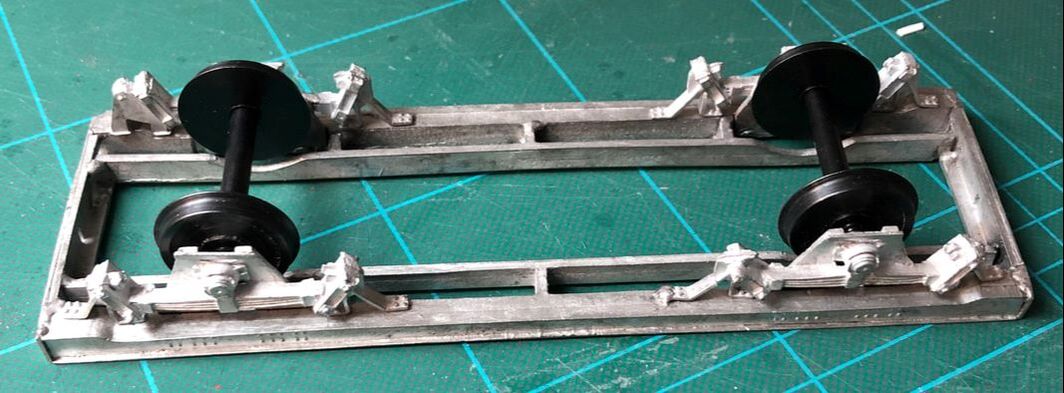
Peartree are becoming my go to source for wheels, here I am using their 3’1” plain disc wagon wheels. With one pinpoint axle placed in the W iron fixed to the chassis I put the other W iron on the opposite end and slid this into the opening in the back of the solebar. Before soldering in place it’s a good idea to make sure your wheels spin freely.
At this point all the other underframe details can be fitted as well as the buffers and brake pipe. I chose not to use the buffers supplied with the kit, they are perfectly acceptable representations but I wanted to fit sprung buffers so I opted to swap those supplied with the kit for NMRS wagon buffers (F019, BR general use OLEO type 'A' with 10mm heads). If using sprung buffers then a little of the chassis may needs to be drilled out/filed away. |
Body, Paint & Transfers
|
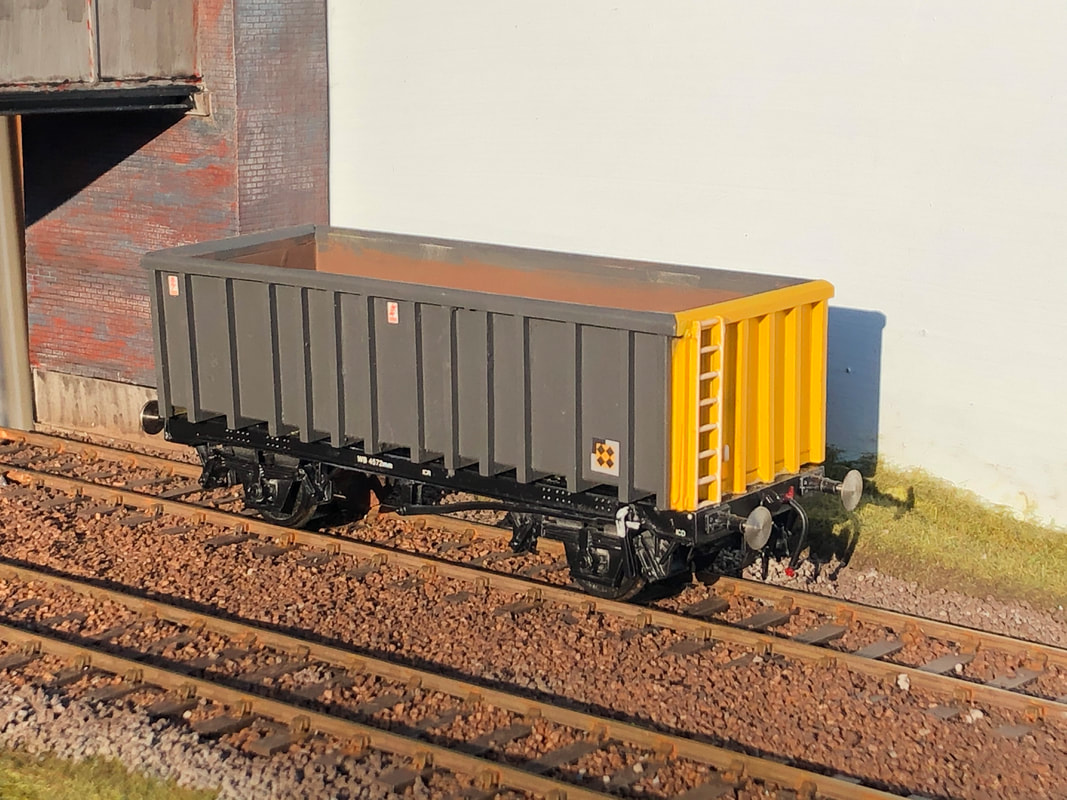
Now attention turns to the body and this is where pictures of you’re chosen wagon will be useful. Some MEA’s had ladders on both ends and some have also had them removed. This build will have a single ladder on one end. The position of lamp brackets also differs with some fitted to the headstock and others to the body of the wagon. There is a little bit of filing to do to the top raves of the wagons body and you may find some small bubbles which can be filled, though with the type of commodities carried in MEAs and the method of loading & discharging (mechanical grabs) they very quickly became quite battered.
|
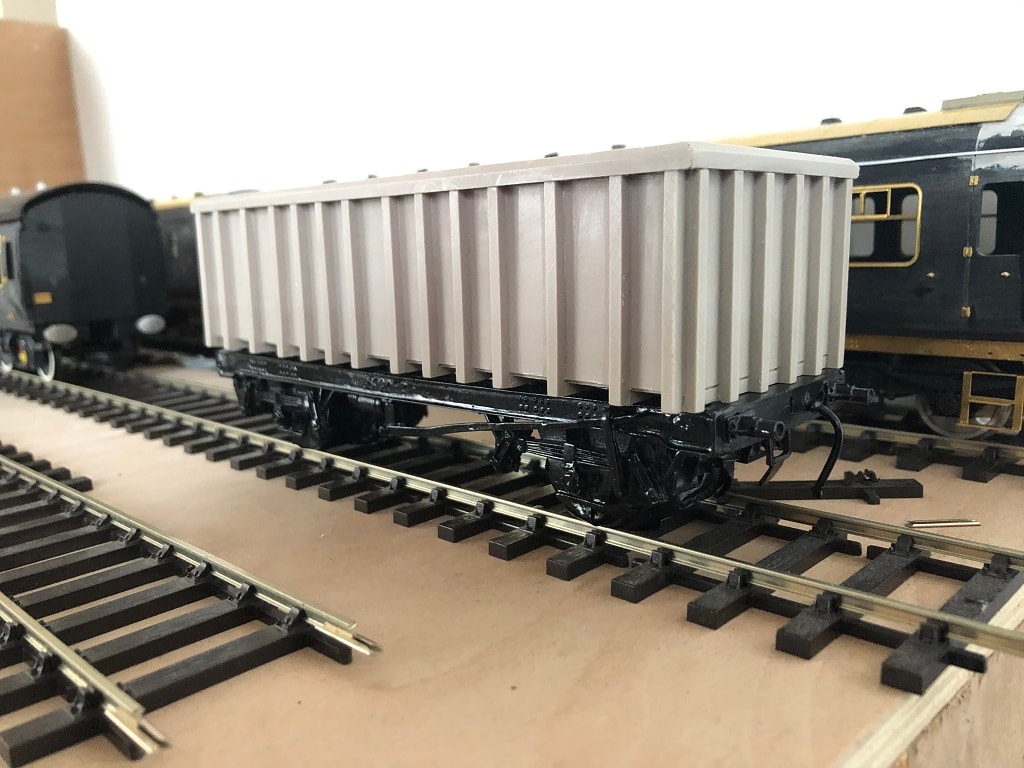
The chassis had two good coats of Halfords primer followed by two coats of a basic gloss black. For things like this I tend to use a cheap (Pound shop) gloss auto paint. Its always handy to have a couple of cans of black gloss in stock for jobs like this.
|
|
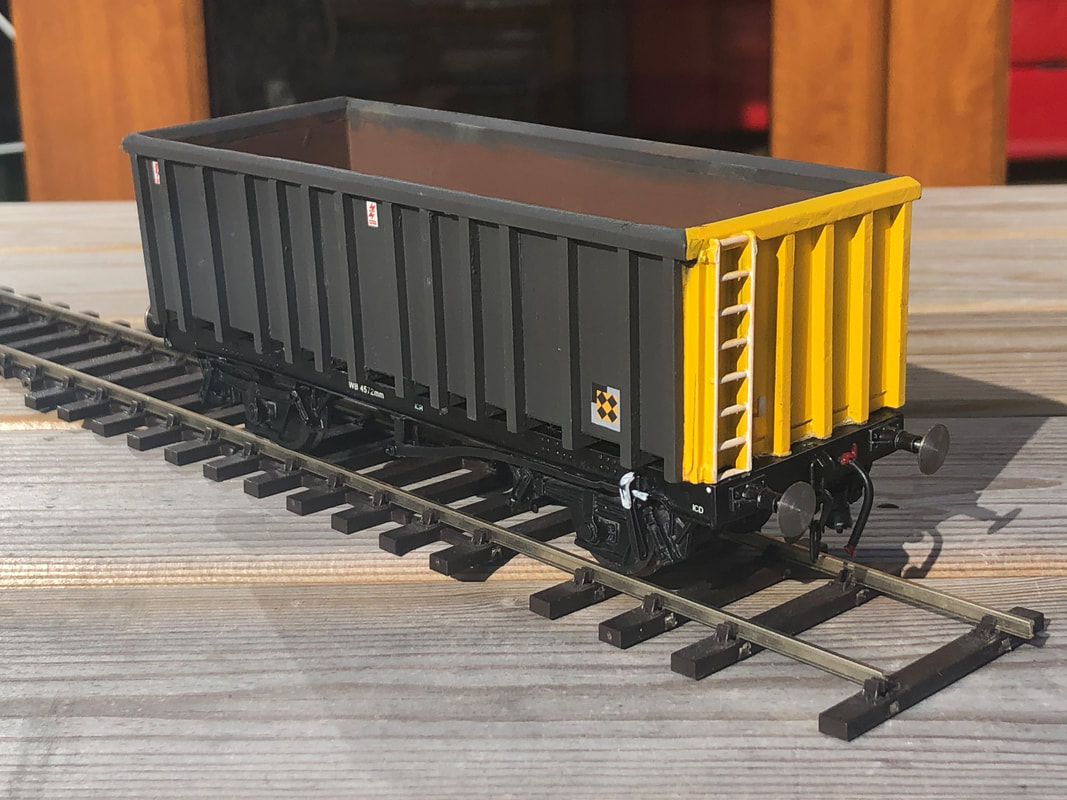
The body was painted separate form the chassis using Railmatch paints, (RM403 roof dirt and RM202 Warning Yellow with a rando in stock brown for the interior ) and finished with Railtec Transfers.
Finally the body was glued onto the chassis, buffers re-fitted and Dapol instanter type couplings added. I still need to source a white data panel but this will do for now. At the moment this is a one off but there may be a few more come through the workshops possibly in other colours. |
Conclusion
This is an ideal wagon for a either a small 7mm shunting layout with a dapol 08 or a bigger layout with a complete rake. With at least four main liveries there is plenty of variation to go at with multiple builds. As a first build using a white metal chassis, this is a great little kit. With a little time and care a great little wagon can be produced.
Items used in the above build have been supplied from the following:
http://www.nmrs-models.co.uk/
https://www.railtec-models.com/
https://www.dapol.co.uk/
http://www.modelrailwayparts.com/index.html (Peartree Wheels)
http://buzzmodels.net/
Items used in the above build have been supplied from the following:
http://www.nmrs-models.co.uk/
https://www.railtec-models.com/
https://www.dapol.co.uk/
http://www.modelrailwayparts.com/index.html (Peartree Wheels)
http://buzzmodels.net/
Proudly powered by Weebly
