56073 at Rewe with the 14.00 Riverside - Cardiff Tidal on 10/04/93. Image courtesy of Alan Tait.
Out of the Box
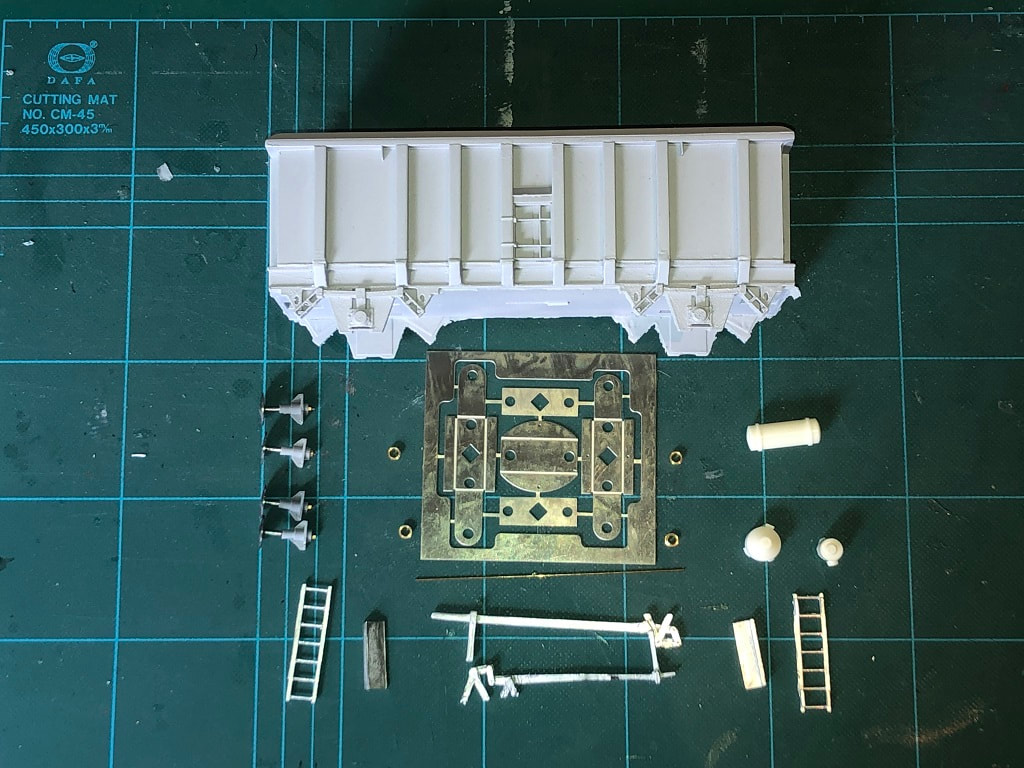
Out of the box you get a resin body, air tank, distributer and brake cylinder. White metal hand brake levers (including ‘V’ hangers) and angle pieces. Lastly a steel etch for the subframes along with brass bearing. You can also get the correct BR round buffers with the kit or order directly from NMRS.
Body prep
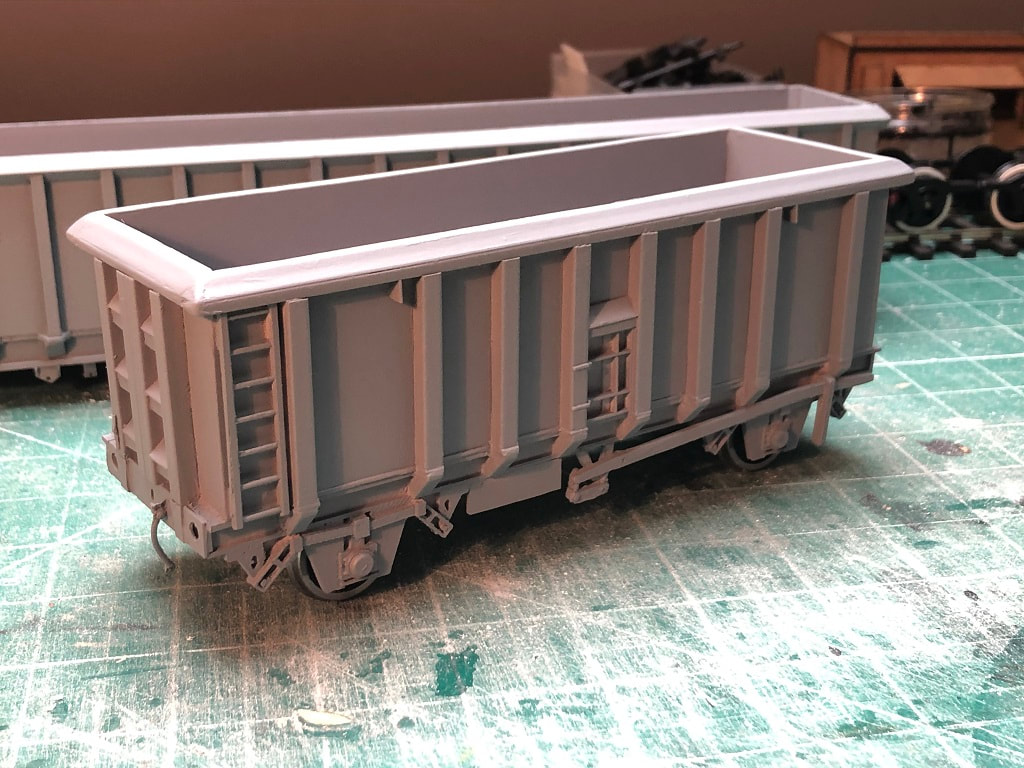
The body and main chassis details are all cast in one piece. There is some flash to clean off with a couple of files.
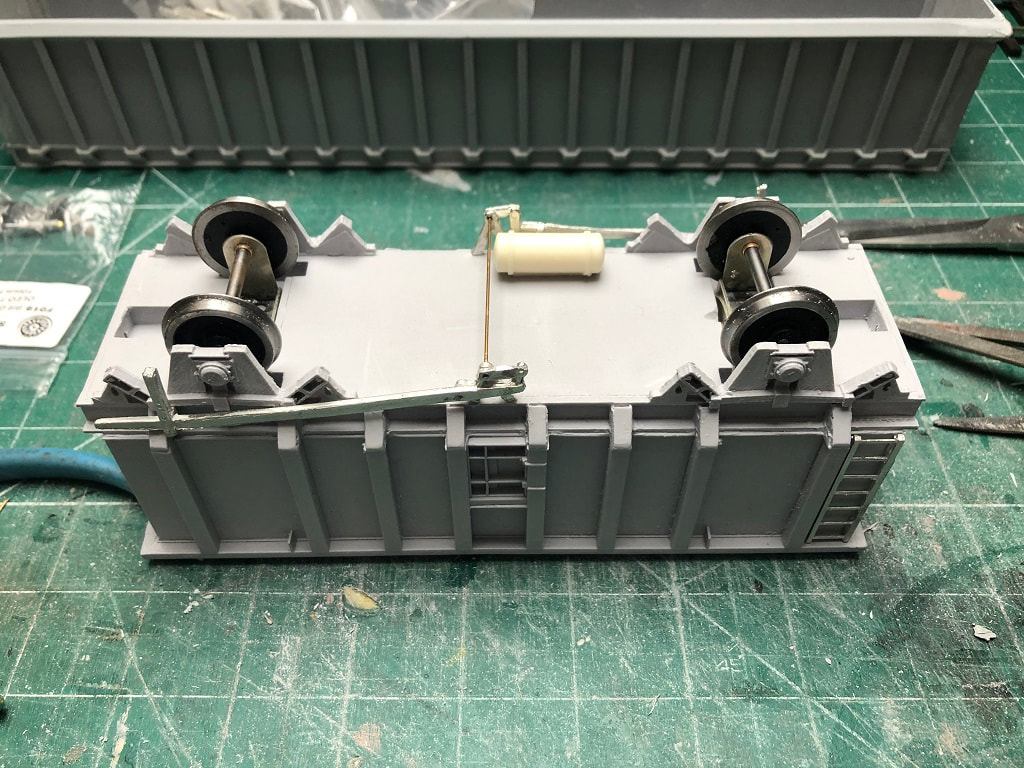
At this point it is worth drilling out the headstocks on the chassis to take your chosen couplings, buffers and brake pipes. The buffers Paul supplied with my kit have a 3.5m shank so I mark the position on the buffer beam, firstly drilling a 1mm pilot hole, then with a 3mm bit and opening out to 3.5mm. Remember to drill back far enough accept the back of the buffers once depressed. I also drilled out a slot centrally to take a set of Dapol instanter couplings and finally a 2mm hole to the right of the slot for the coupling to take an air brake pipe.
The white metal hand brake leavers need a little tidying up and very gently bending to shape so that they fit snugly to the side of the sole bars with the ‘V’ hangers just underneath and positioned centrally along the bodyside. You may need to file the ‘V’ hangers a little to square them up to fit to the underside of the body. I drilled a 1mm hole through the bottom of the large ‘V’ hanger to pass a piece of 1mm wire through to make sure both hand brake leavers are aligned correctly, I also glued this in place.
Chassis
|
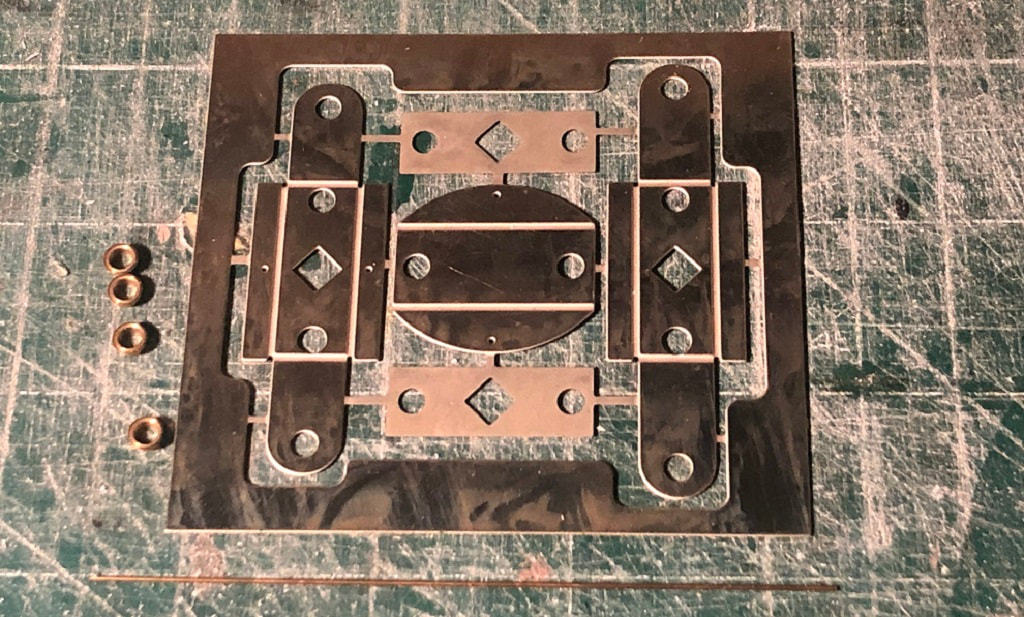
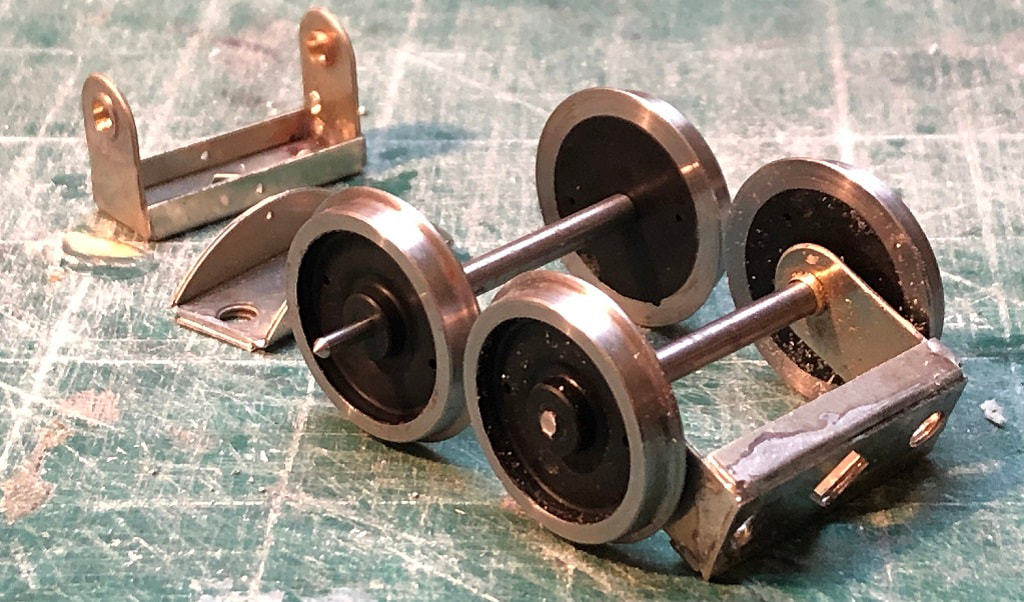
In terms of details most of the chassis is part of the one-piece body, however there are two subframes to put together for the wheelsets. These are a fold up etched steel frames for both axles, one of which is compensated. All parts were cut from the etch with a sharp scalpel and any burrs filed off. A hold & fold tool is invaluable for bending etched parts, I bought mine a couple of years ago and was only planning on buying a small cheap one (which is fine for these parts) but if you decide to invest, go for the largest one you can afford, you never know what one small kit might lead too. A basic small (2”) tool can be bought off ebay for under £20, but the likes of Eileens Emporium or Hobby Holidays can supply you with a more versatile piece of kit. You can of cause bend etched parts as I did initially with a vice and a pair of pliers but you do risk damaging them.
|
|
|
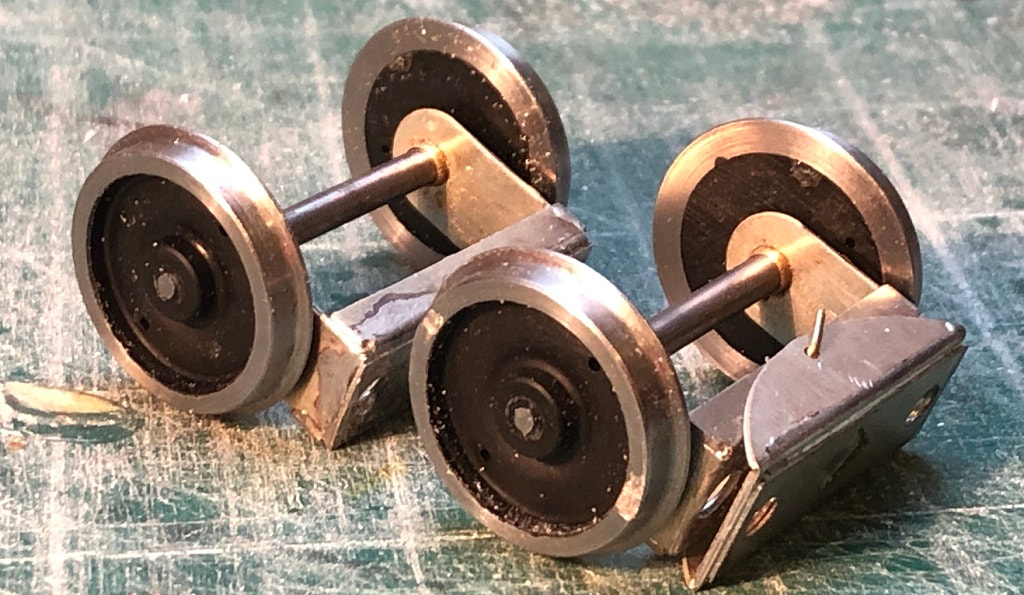
Ensure that the bearings fit in the holes in the etched parts and open out with a round needle file if need be, fold up the four sides of each frames the wheels sit in and the two side of the compensating unit. I soldered the four corners of the frames for stability and the bearings into the etch, I think you would get way without soldering them together but it makes the frames more rigid. The oblong piece is a spacer and can be soldered or glued to the back of the frame.
|
This kit uses Slaters 7122D disc wheels with the pinpoint axle end cut off. These wheels are on a slightly narrower axle than Peartree wheels. Once you have cut the pin point off you can pull the wheel pan off and slide the axle through the bearings. Make sure the axle spins freely at this point before you out the wheel pan back on. If the axle does not turn freely then run a round needle file through the bearings a few times, this is where soldering the bearings into the frames will help immensely! The shorter frame has two 1mm hole in each side which match up to the holes in the compensating unit, open these out with a 1mm drill bit in a pin chuck and then you can push the piece of 1mm rod through all four holes bending about 4-5mm of rod at right angles and cut the rod to length.
|
|
Paint, Transfers & Final Finishing
|
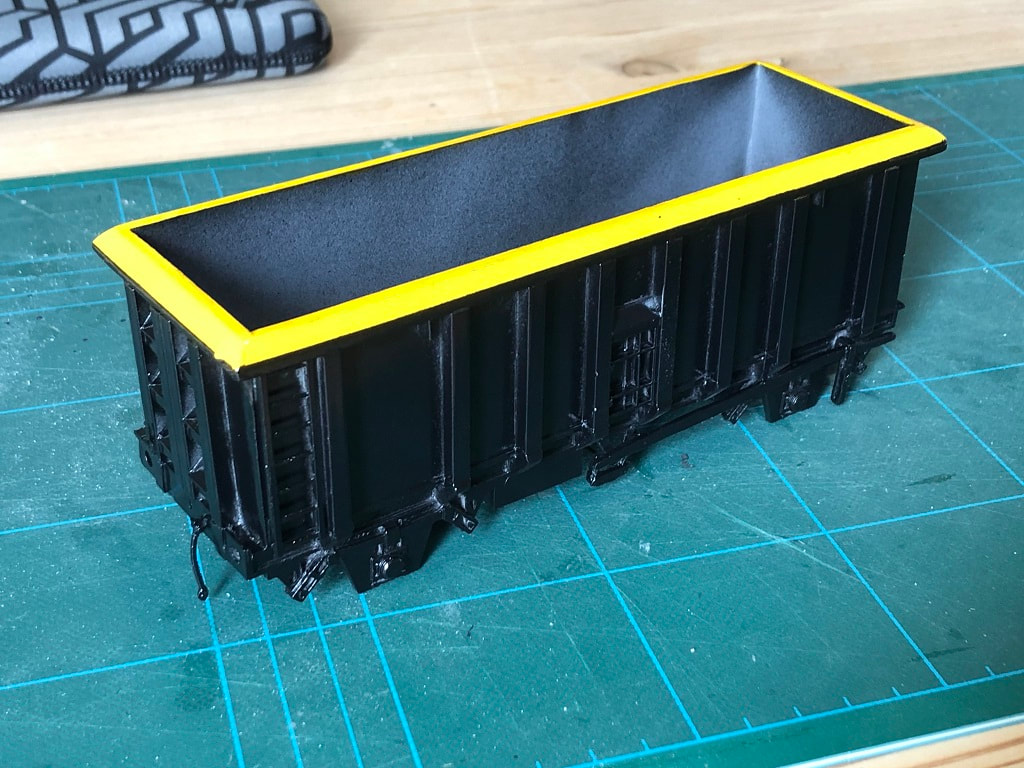
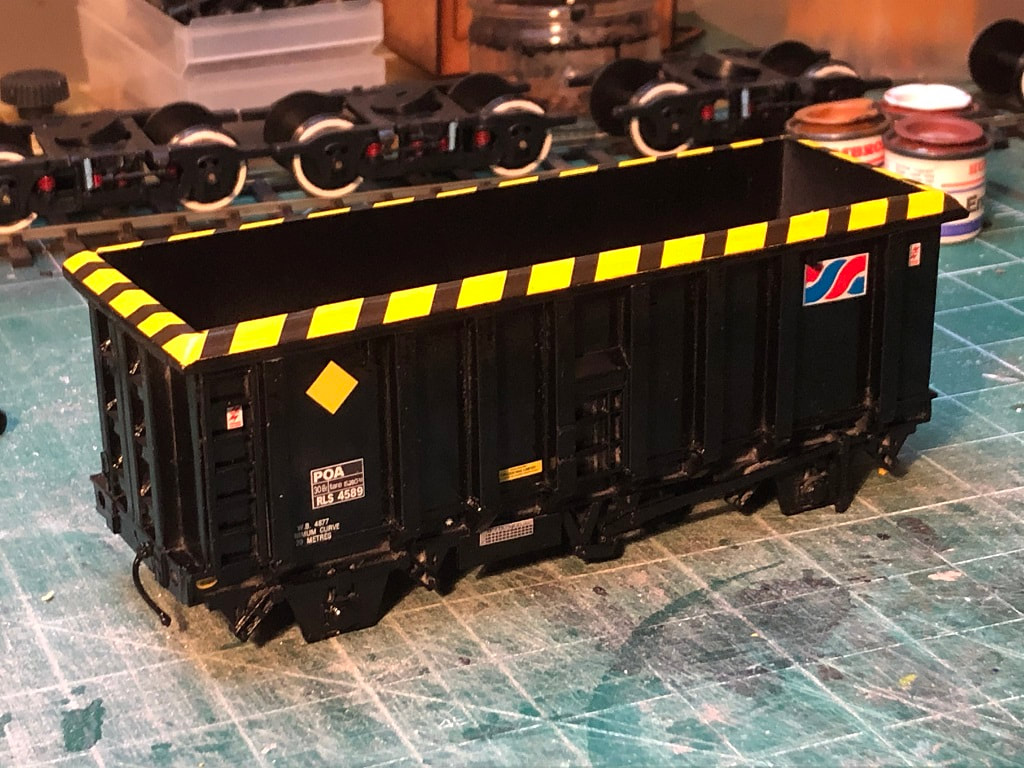
Paint for this wagon is a simple affair and easily achievable without the need for an air brush. Halfords Grey primer, pound shop auto gloss black and warning panel yellow are all that is required. After a good couple of coats of primer, I hand painted the raves with warning panel yellow (I had a tin of WPY acrylic in stock and couldn’t be bothered with setting the airbrush up), build up thin coats allowing to dry thoroughly in between. Once a nice deep yellow was achieved, I masked up the yellow parts with Tamya masking tape, the transfers for the chevrons are c8mm so I used two layers of 6mm tape. Make sure the rape is stuck firmly down and give the wagon multiple thin coats of gloss. Even though I used gloss to paint the wagon, I still gave it a couple of coats of gloss varnish once the paint had tried just to make sure the transfers would stick.
|
|
|
Transfers are readily available from Railtec range (8058 & 8059) for all the marking’s and the black chevrons for the raves. I used pictures from the net to give me a guide as to where the chevrons and other embellishments should go, Paul Bartletts site is a great resource for this. Most of the embellishments are relatively easy to fit, even down to the small ICD & Wagon plates. When you come to the chevrons however, take your time. When they are ready to fit, leave them another 30 second!!! I managed to split a couple of strips until I got the knack of it, I manipulated them round with a scalpel and a wet cotton bud until I got them where I wanted, once I was happy I rolled a dry cotton bud gently along the transfers to remove excess water, be careful as you may move the transfer slightly, if you do this (as I did) go back to the wet cotton bud and re-wet the transfer. Once I was happy with the transfers, I gave the whole wagon three coats of Satin Varnish, making sure each coat was dry in between.
|
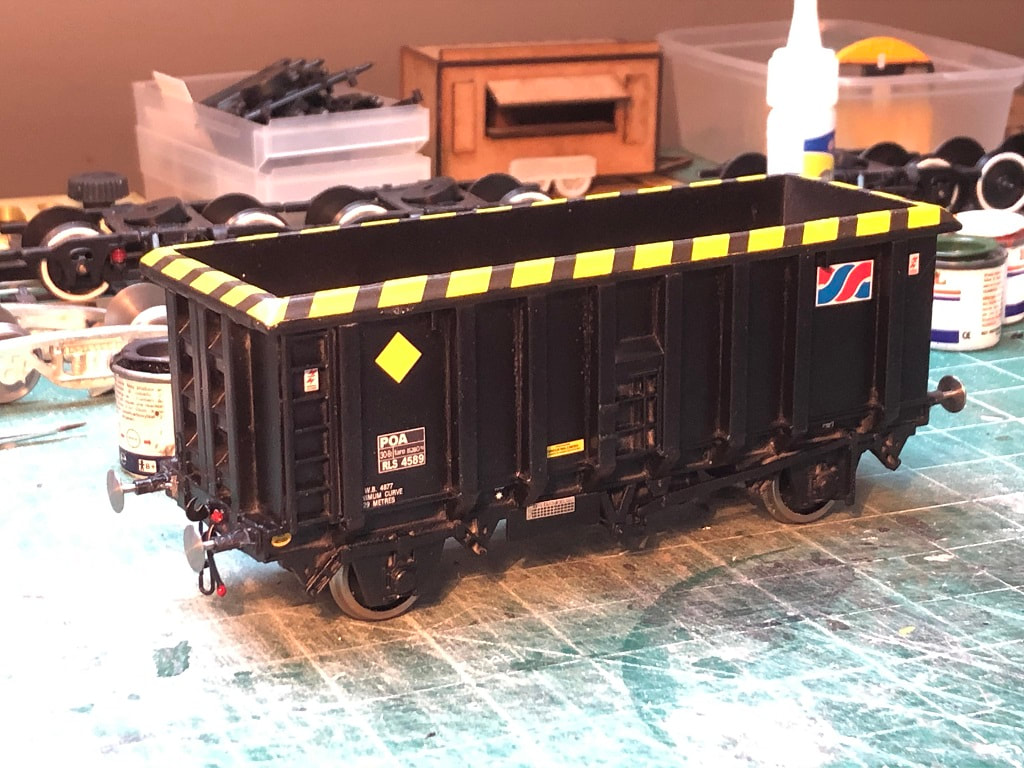
Buffers – I took the buffers apart to paint the housings, again given a couple of coats of primer then hand painted with Humbrol Matt Black 33. Once painted I re-built the buffers and set the travel of the buffer soldering the retaining nut on the end of the shank, once the buffers are fitted into the buffer beam you will not be able to get to it should it work its way loose.
Wheel sets were tacked in with Superglue and then firmed up with EvoStick Impact adhesive just to ensure they’re fixed firmly. Buffers were then dry fitted into the holes on the headstocks (some filing may be required around the fixings of the buffers or opening out the holes), then fixed home with Superglue, make sure the buffers still depress. Then lastly Dapol instsanter couplings we’re fitted, this is a little fiddly as there is not much space to slot the pin back into the coupling, I would be tempted to replace the pin with wire for future builds to make it easier.
Wheel sets were tacked in with Superglue and then firmed up with EvoStick Impact adhesive just to ensure they’re fixed firmly. Buffers were then dry fitted into the holes on the headstocks (some filing may be required around the fixings of the buffers or opening out the holes), then fixed home with Superglue, make sure the buffers still depress. Then lastly Dapol instsanter couplings we’re fitted, this is a little fiddly as there is not much space to slot the pin back into the coupling, I would be tempted to replace the pin with wire for future builds to make it easier.
In Conclusion
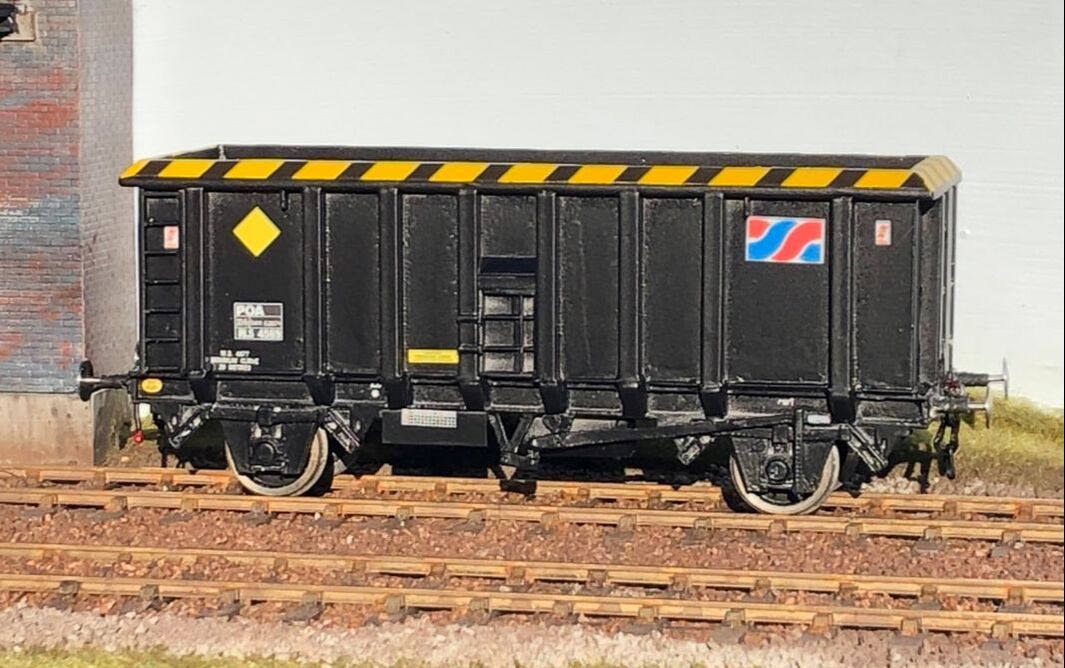
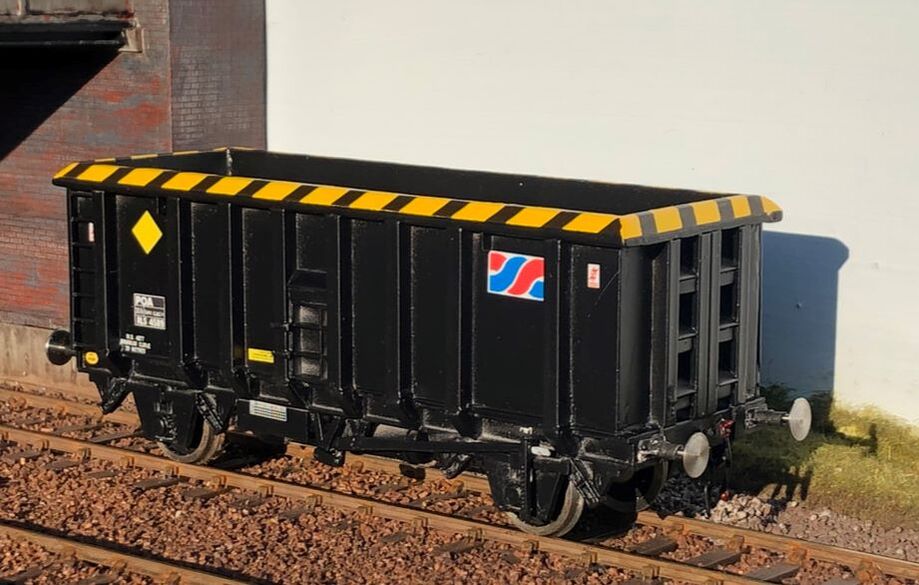
Paul’s intention with his kits is to allow the average modeller maybe looking at a first venture into O gauge from OO or N to achieve a good representation of the chosen prototype with as little effort as possible. With being a simple one-piece resin body and very little in the way of etched parts, a great little model can be achieved with very few skills. I will certainly be adding a few more of these to my wagon fleet (In fact I have already ordered another three from Paul!).
To buy Paul's kits either email: [email protected] or search ebay for n4turol.
http://www.nmrs-models.co.uk/
https://www.railtec-models.com/
https://www.dapol.co.uk/
http://modelrailwayparts.com/
To buy Paul's kits either email: [email protected] or search ebay for n4turol.
http://www.nmrs-models.co.uk/
https://www.railtec-models.com/
https://www.dapol.co.uk/
http://modelrailwayparts.com/
|
|