During the construction of the Channel Tunnel, as well as a Grain - Shakespeare Cliff service, which delivered tunnel lining segments, there was also a Snowdown to Sevington service (which could also call at Shakespeare Cliff Sidings en route). This was a fairly lightly-loaded once-a-day service which although booked for a class 33 a class 73 could normally manage quite comfortably. Because of the propelling move required over Willesborough Crossing there was always a brakevan on this service. Image courtesy of Andrew Veitch.
Out of the Box
|
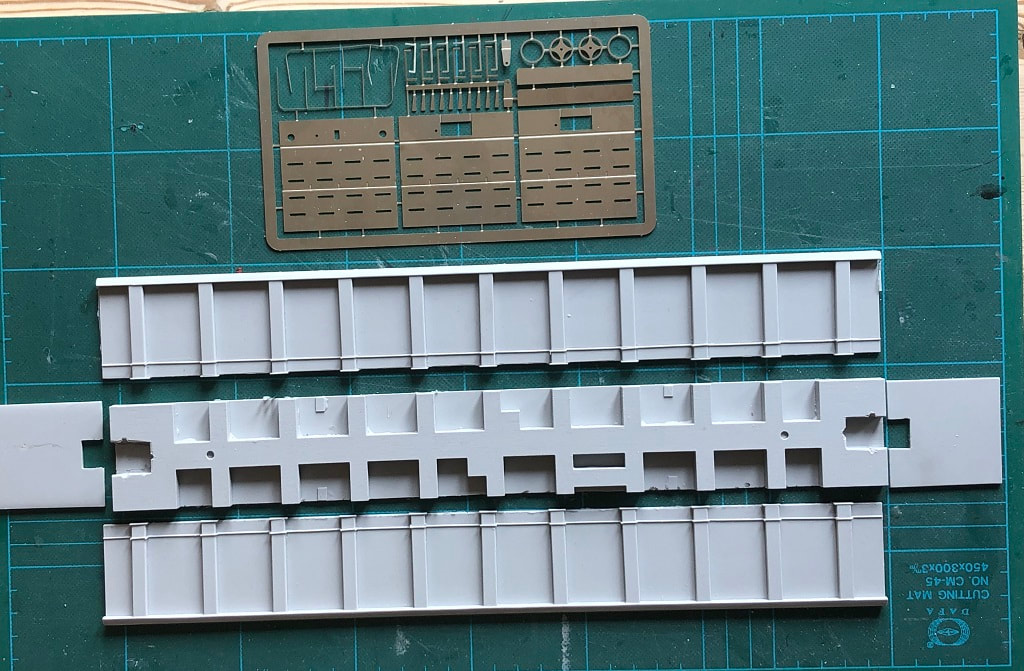
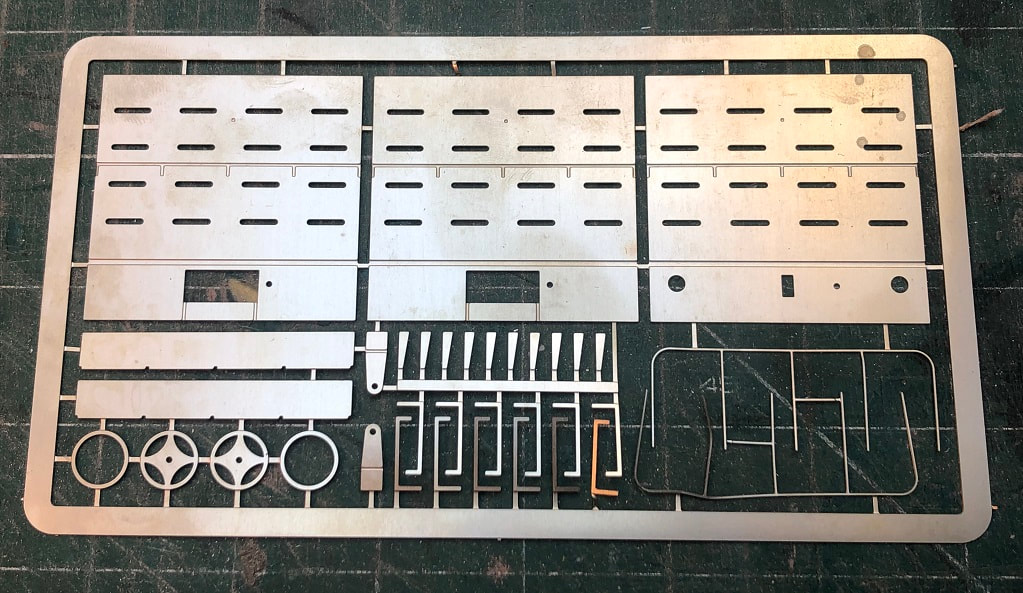
The PXA/KEA come as a 5-piece resin body with a detail etch and white metal Gloucester bogies. Wheels, paint, transfers, couplings and buffers will need to be added dependent on the version you are building. The kit can be built as an inner (Kadee’s either end), or an outer (Kadee’s one end with conventional draw gear and buffers the other), there are also a small number of wagons from a later build with conventional draw gear and buffers both ends but you would need to either modify or acquire a spare outer end etched part. For this build I’ll be making a pair of outers.
|
|
Wagon Body.
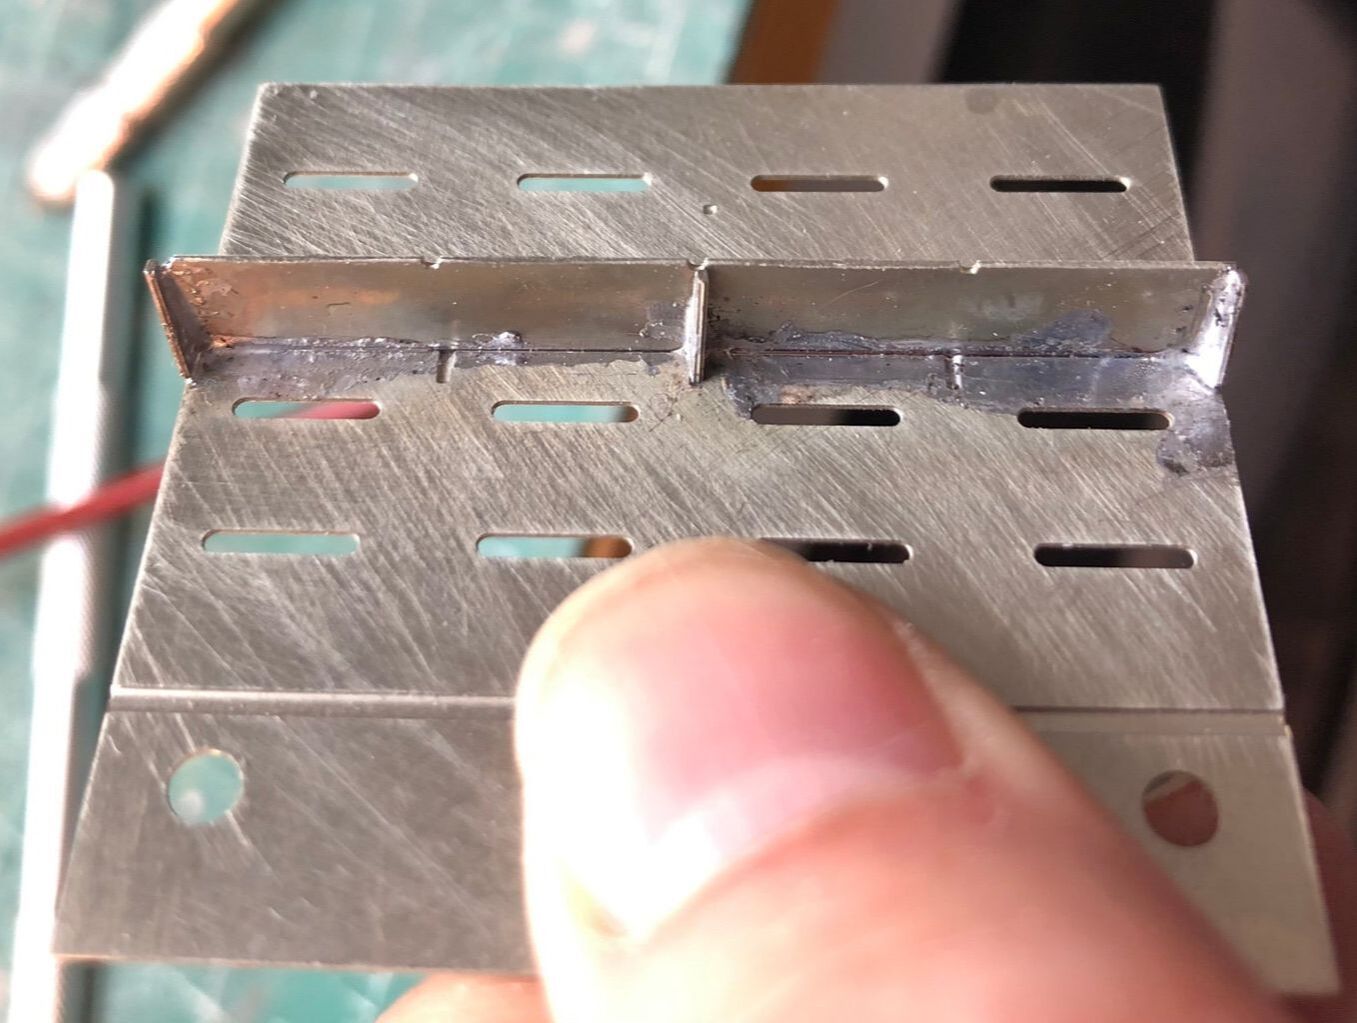
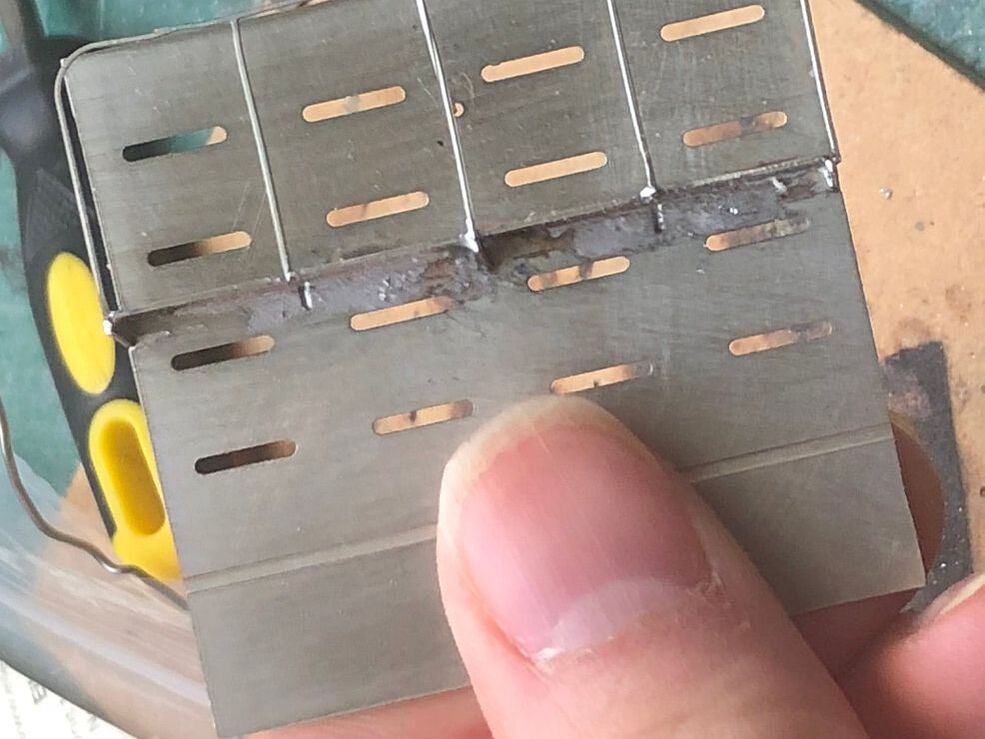
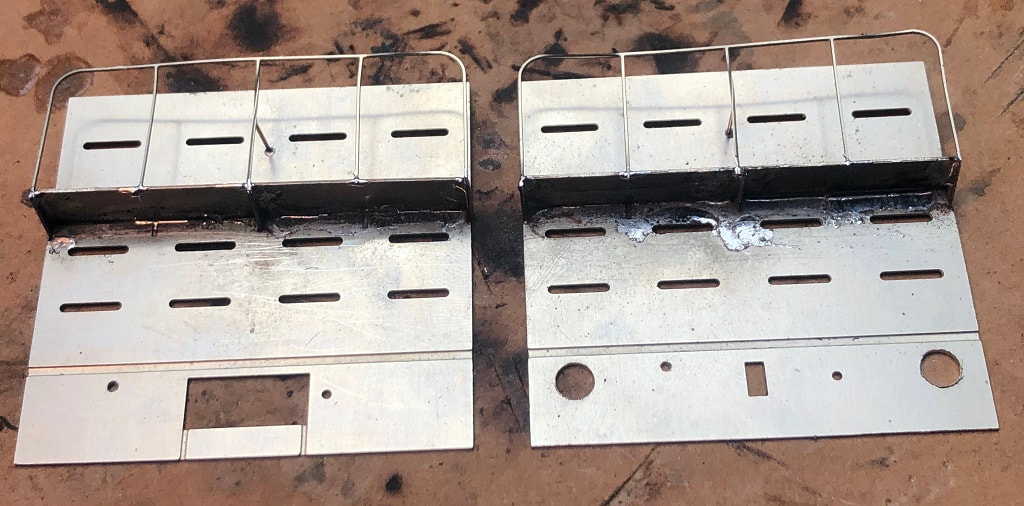
The PXA/KEA wagon is very similar in terms of build to the JNA, where it differs is the provision of an etched overlay and steps for the ends. Having offered up all the resin parts and looked at the etch I decided it was best to build up the platform on the etched end before gluing them to the resin and finally building the ‘box’ of the wagon. The platform slots into a half-etched grove in the end plate with up to five triangular fillets holing it up. Most pictures I have found on the net only have three fillets so that is all I will be fitting. I first tacked the platform to the end before adding the fillets then soldering along the platform.
|
The etch has two very fine hand rails which are easily bent so care is required when cutting these from the etch and handling them. There is a support which when bent around 90 degrees drops into a half-etched mark in the end plate. I decided the hand rail would be easier fitted if I drilled through the half etch mark, it can be soldered up later.
|
|
|

|
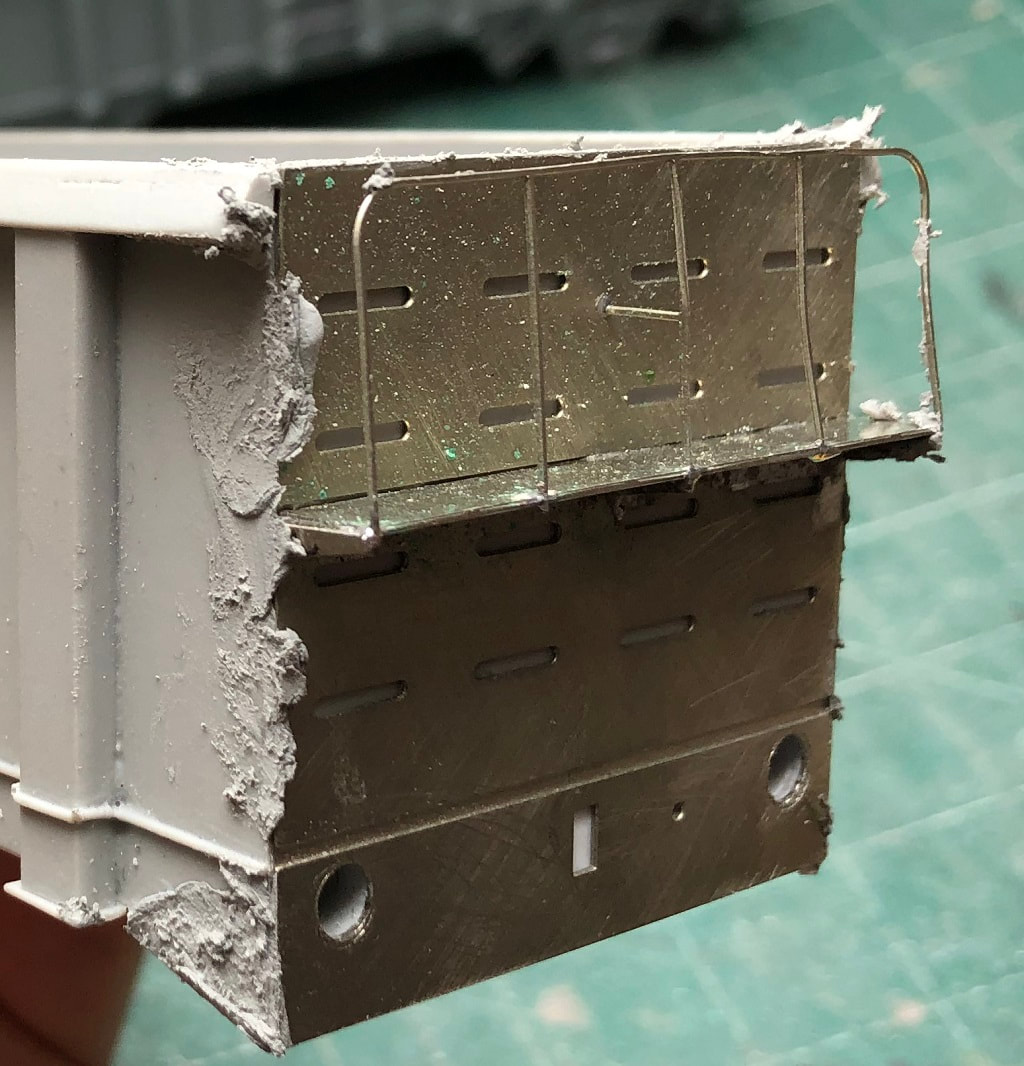
With the etched parts all soldered together I offered it up to the resin end, ensuring the the top edges were level and that the etch overhung both sides of the resin part I stuck them together with superglue holding them with a pair of clamps.
|
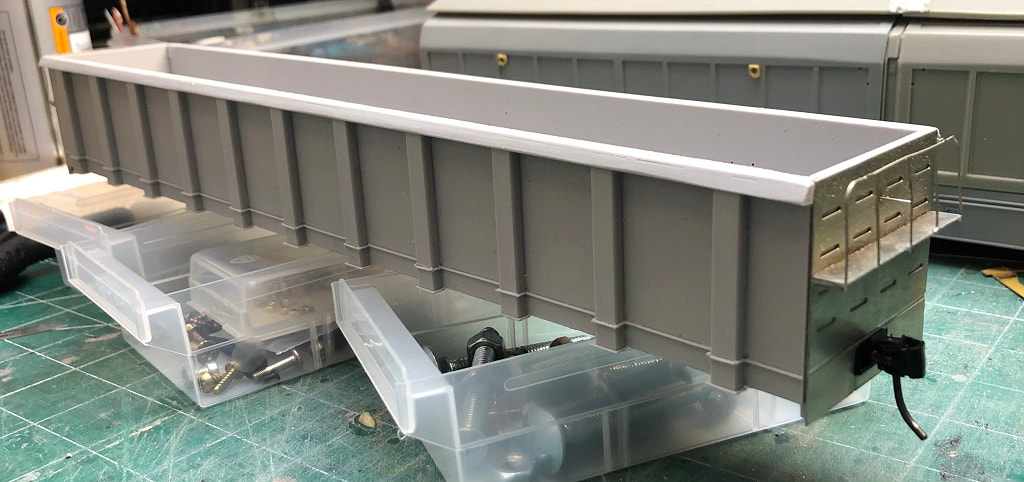
Once I was happy with all the parts I started to offer the sides and ends up to each other. Where the JNA was built from the chassis up, the ends of the PXA/KEA hang down below the sole bar level, for that reason I built it up-side down from the raves up. Firstly, fitting both ends to a side, using the chassis part to ensure they we’re square. Then once both ‘L’ shaped sides and ends had set I glued together to form a box, again using the chassis as a guide to keep the box square. When this was all dry the chassis needs fitting, to ensure the chassis and the sides were level I sat the wagon on a couple of draws out of my parts store (a couple of blocks of wood would suffice) to allow the ends to overhang.

|
|
|
Outer version of the PXA have a triangular fillet behind the buffer beam with buffers and conventional draw gear which are not found on ends fitted with knuckle couplers. The kit does not provide for these so two scraps of square plastic rod were cut, formed and fixed to the chassis. I also fitted a scrap of plastic behind the hole for the coupling as that in the etched end is too big for the Dapol couplings I intend using. Filler was then applied around the etched ends, these fillets and the raves to fix any imperfections.
|
|
If you intend on fitting buffers to one or both ends it is now probably the best time to drill out a recess in the chassis of your wagon body, I would normally choose to drill parts out before putting them together as it is easier with a single part. The buffers on the PXA however go through the etched end (this already has holes for the buffers) the resin end and the chassis. GJH plant supply the correct pattern (GJH024, Modern Cast Head Freight) buffers for this wagon. The fitting for these buffers is 4.2mm in diameter so the etched holes in the end plate need opening out as well as the chassis part to take them. Be sure to drill enough out of the chassis to take the back of the buffers once depressed. I also opened out a hole under the chassis to allow access to the bolt which holds the buffer heads in place, this will help later on when ensuring the buffers are level.
The underframe equipment is a very basic affair and can be added to if required. Paul provides Brake Cylinders, Air tank and Distributer are all cast in resin and need a little tidying up, these again are fixed with superglue using pictures and drawings as a guide.
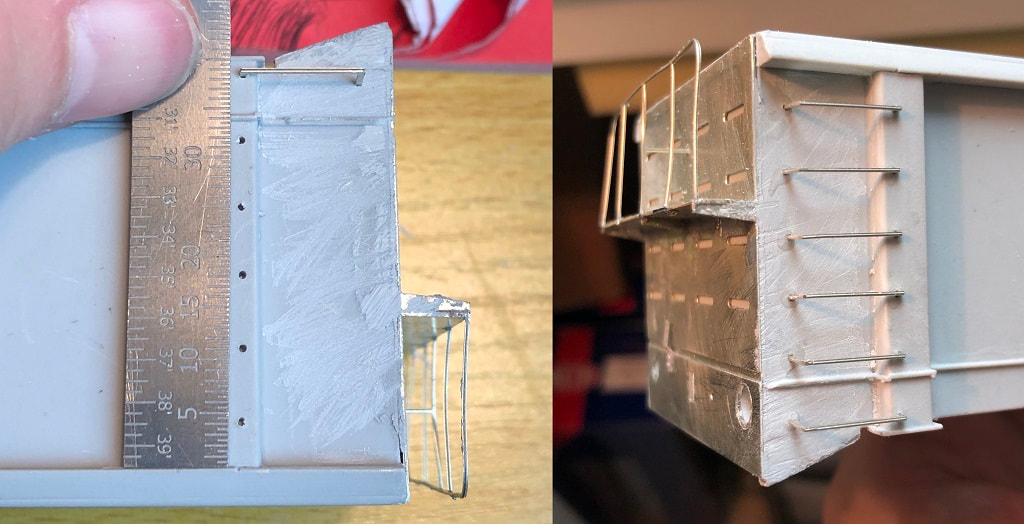
The last job for the PXA body before paint is to fit the distinctive hand rails at the left hand end of both sides. Working with the wagon upside down I drilled a series of 0.7mm holes (4mm, 11mm, 18mm, 25mm, 32mm & 39mm from the raves). I then used each hand rail to mark the opposite end drilling another 7mm hole, but ensuring they are level.
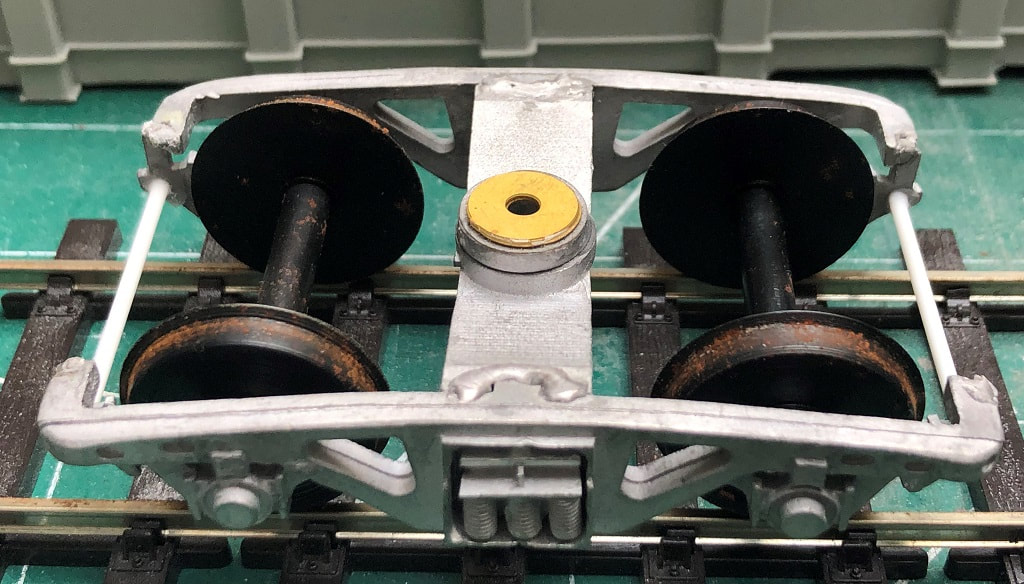
Bogies.
|
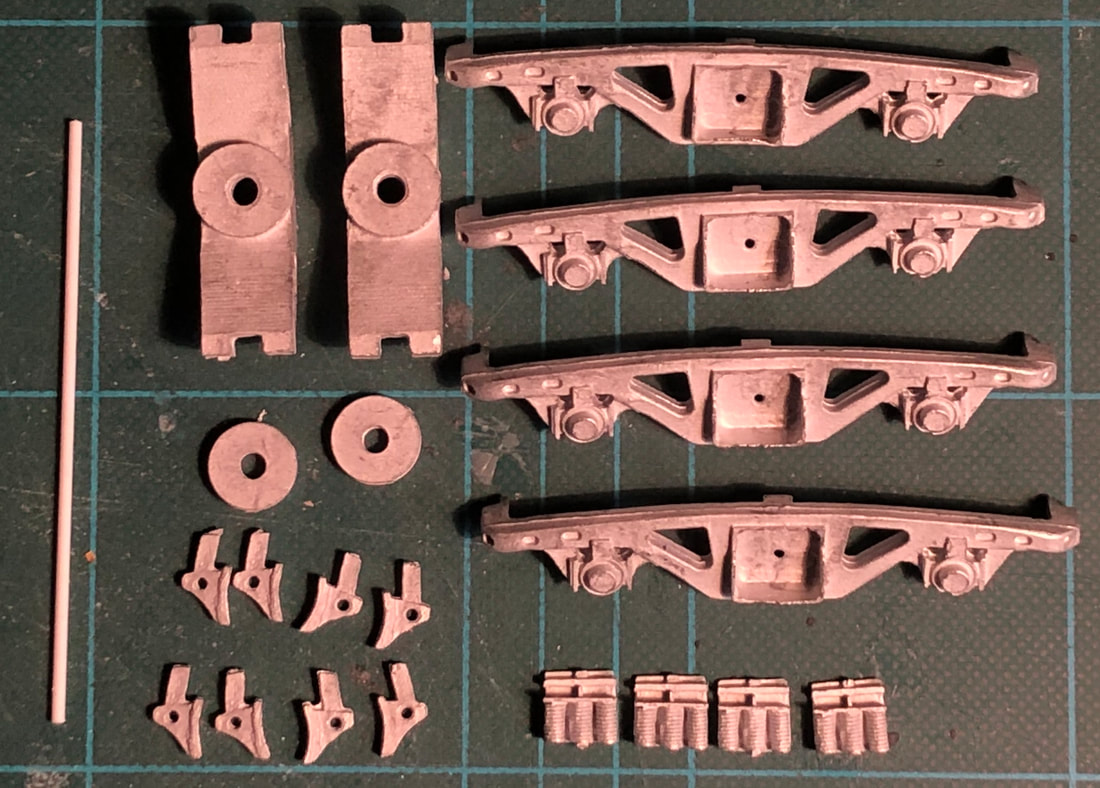
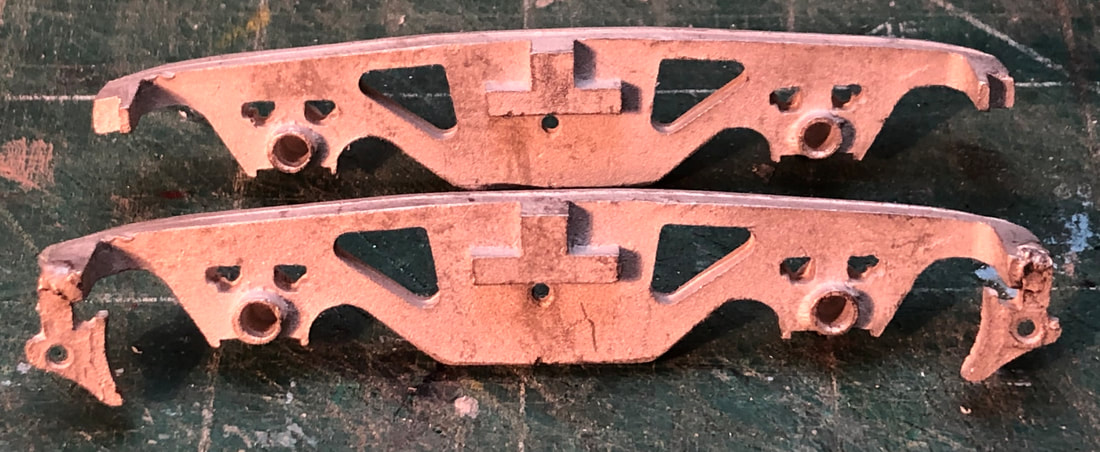
Paul now supplies GJH plant’s ‘Davis & Lloyd Freight Bogies’ with the PXA kit. These are a collection of white metal castings and plastic rod. Two sides, a central bolster, a mounting boss, 4x brake shoes & hangers and a piece of plastic rod. The bogie side frames need little tidying up but may need the holes for your choice of bearing to be fitted, as has become standard on my wagon build’s I am again using Peartree 3’1” wheels which come with a 2.5mm (OD) bearing. The bearings are tacked into the side frames with a little superglue, but not too much, you just want them to stay put. It is worth having a dry run to ensure all fit as you would expect, some filing may be required to ensure the central bolster fits correctly in the side frame.
|
|
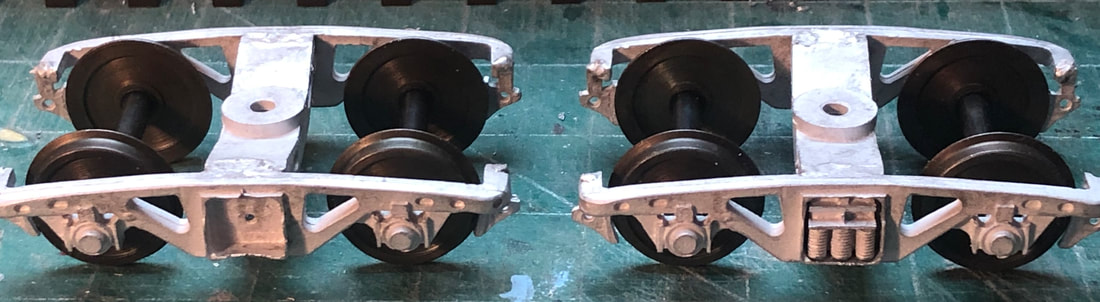
The instructions suggest building the bogie then adding the brake shoes, I figured it would be easier to add them to the sides first then build the bogie up. The brake shoes are handed so ensure you have a correctly handed pair, castings were tidied up and the hole for the plastic rod opened out to end sure a snug fit. Once soldered up next its time to add the bolster to one side of the frames, this needs to be square to ensure free running of the bogies. Place the wheels in one side frame then fit the other side frame to the central bolster & solder together. All being well you should now have a nice free running bogie!! Last job is to cut and fit the plastic rod, this should fit through the two brake shoes with c1mm poking out each side to represent the bolt heads.
|

|
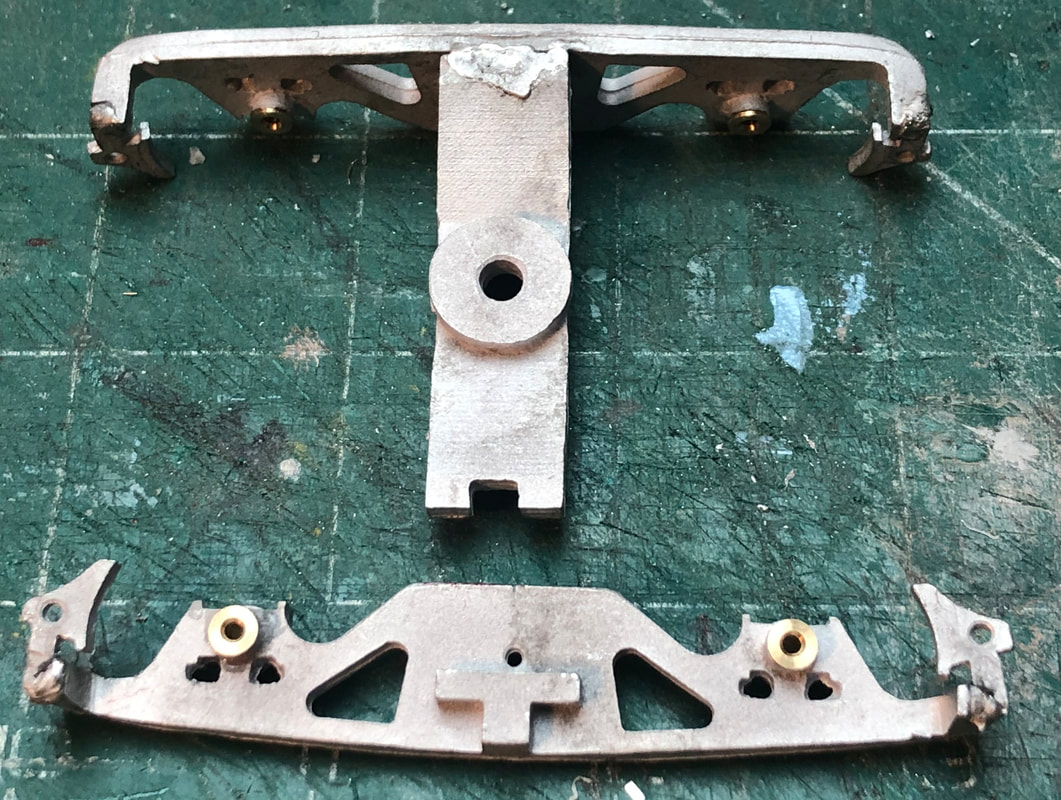
This is the point where there is a little trial and error, due to the shape of the central bolster of the bogies this is much lower than the mounting point on the wagon body, these bogies come with a white metal boss to raise the mounting point. I loosely placed this boss on the bogies and sat the wagon body on top only to find that the wheels still fouled the underside of the wagon & it was a little low. I had some spare brass washers from another kit and some steel ones in a box. I trialled a number of combinations and found that two brass washers and a steel washer brought the wagon up to the correct height (buffers measured against a loco) and the wheels would turn freely. Once I was happy with the ride height, I glued the white metal boss and brass washers to the central bolster with super glue, I have left the steel washer free and will just add this loosely when fitting the bogies to the wagon body.
Paint & Transfers
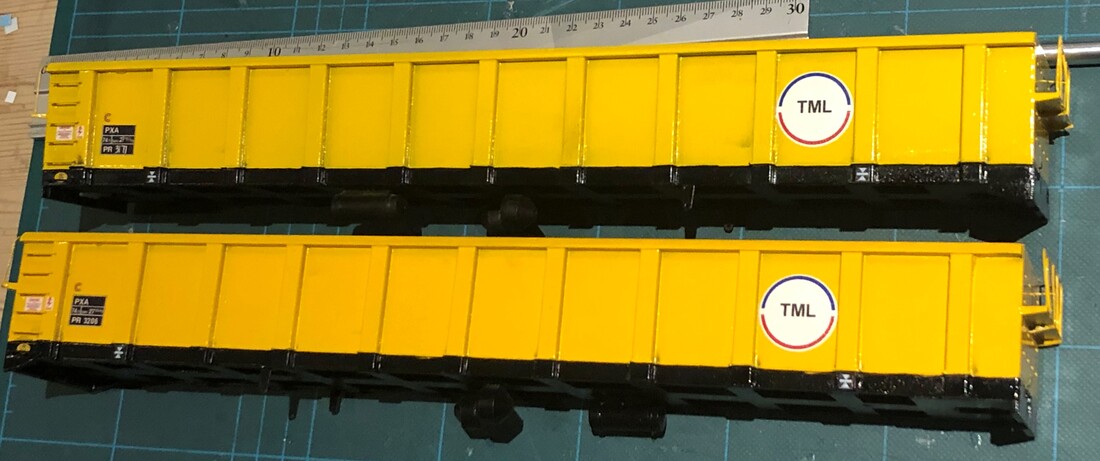
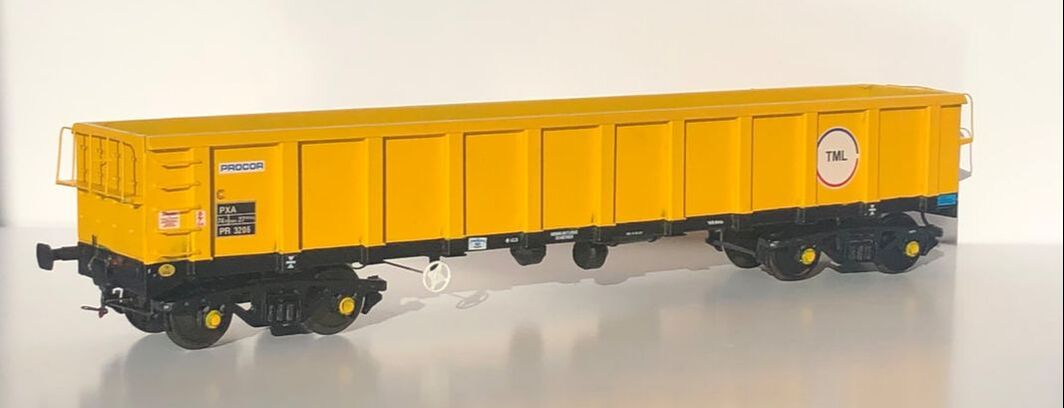
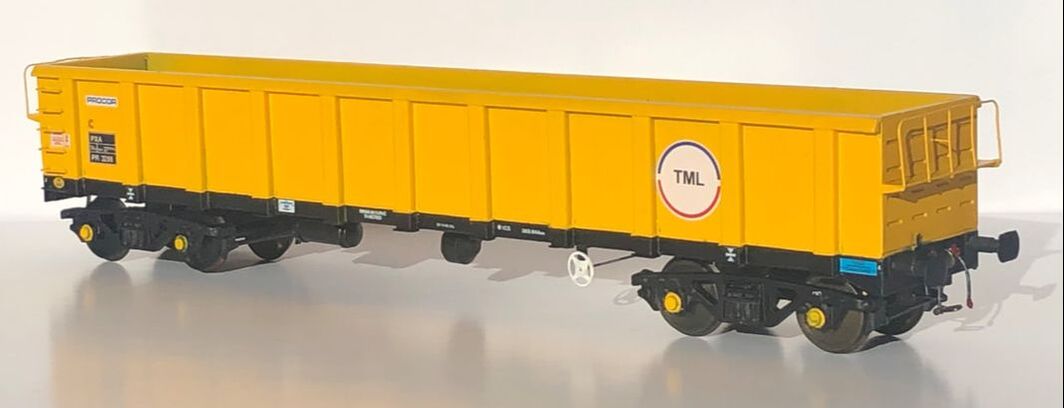
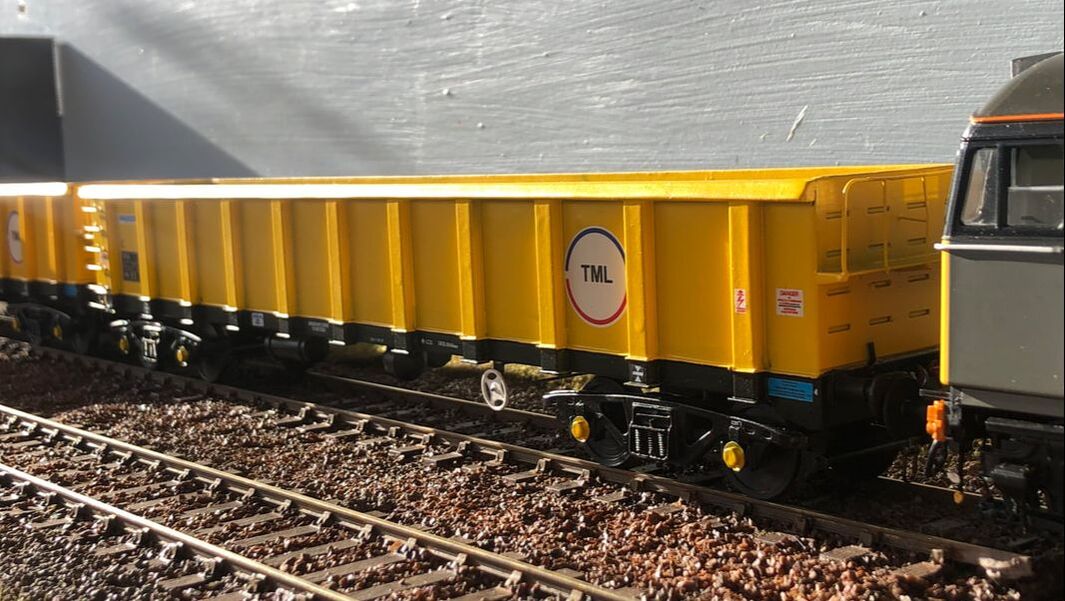
There are a number of liveries these wagons have carried over the years including the original TML Yellow & Blue liveries as well as variations of Yeoman & ARC. I chose to model this pair in the original Yellow and Black TML livery from their initial use carrying concrete segments for building the Channel Tunnel. Steve at Railtec offers three packs of transfers for these wagons:
7mm-7856 – PXA TML Bogie Wagons
7mm-7857 – KEA ex-TML Bogie Wagons
7mm-7820 – TML Logos
Both the KEA & PXA packs contain four sets of numbers, two each for inners & outers, I will be using 7856 & 8720 packs for this build.
7mm-7856 – PXA TML Bogie Wagons
7mm-7857 – KEA ex-TML Bogie Wagons
7mm-7820 – TML Logos
Both the KEA & PXA packs contain four sets of numbers, two each for inners & outers, I will be using 7856 & 8720 packs for this build.
|
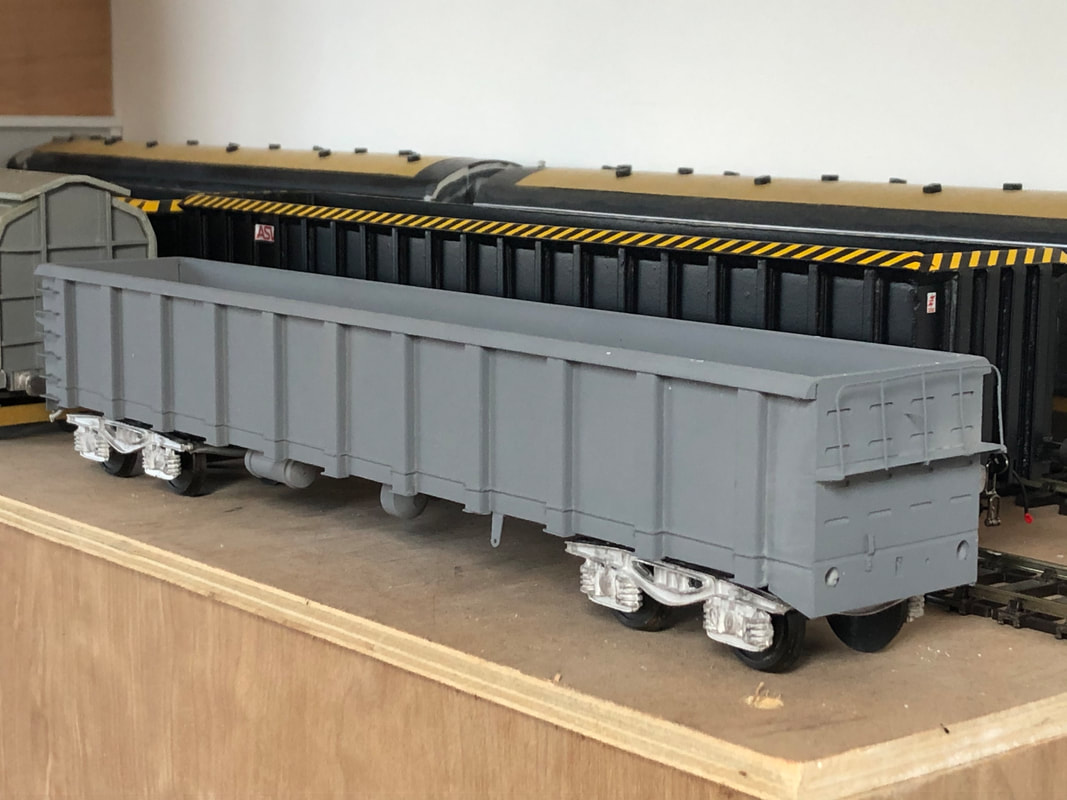
Paint for this wagon is not too difficult an affair and is easily achievable without the need for an air brush. I first gave the wagon bodies and bogies a good wash and when fully dry a couple of coats of Grey primer, I normally use Halfords Primer but ran out during lock down so found a new source and these have been done with Tetrosyl Trade Spray grey primer which seems to be a good substitute, I’ve also used this to prime a couple of Heljan loco bodies and seems to be as good as Halfords own.
|
|
|
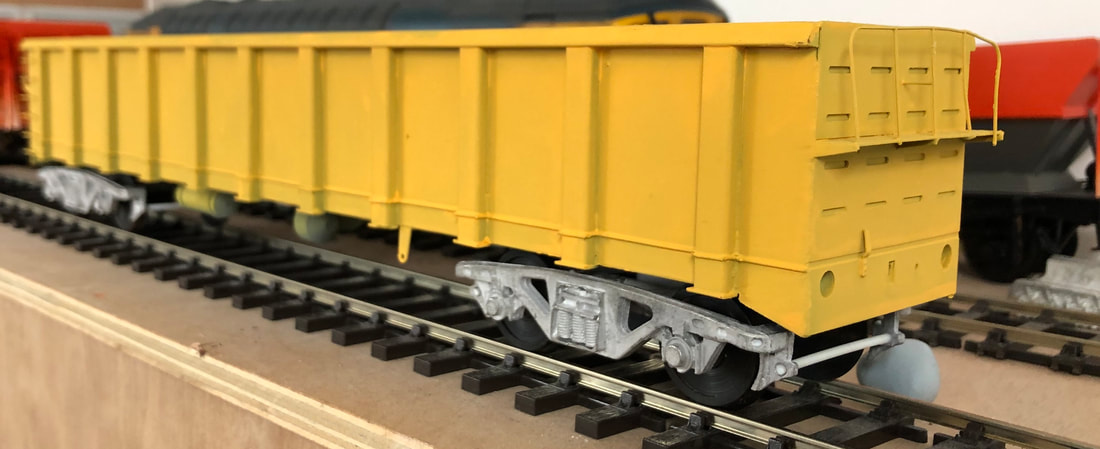
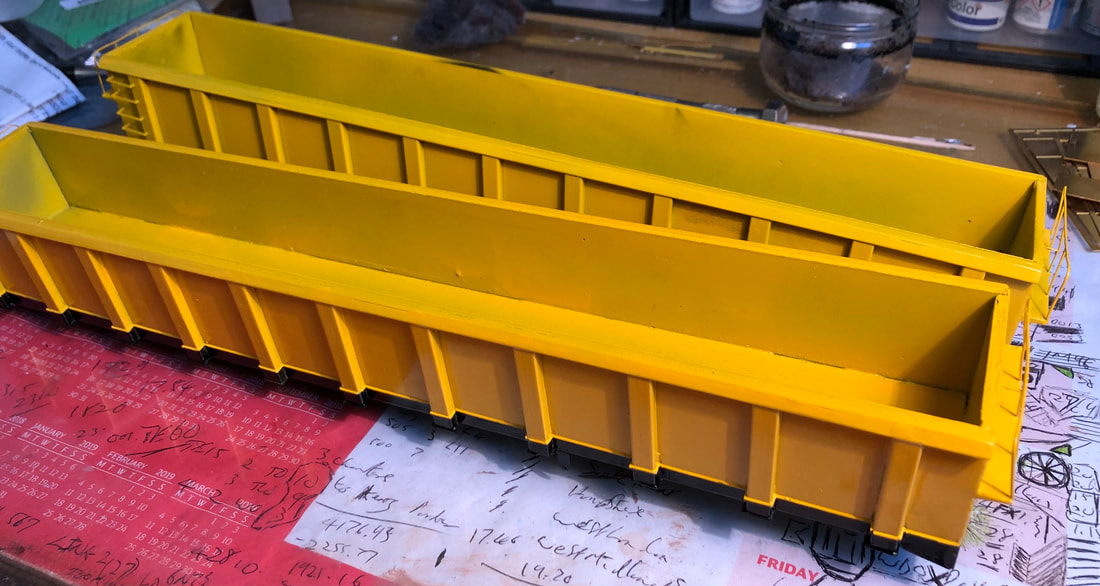
Next I painted the wagon bodies with a coat of yellow before more masking everything above the sole bar for a coat of black. Masking is a little difficult with all the ribs along the side of the wagon, but just take your time with some good masking tape (I use Tamiya tape to get as crisp lines as possible). The modern ‘dirt livery’ found on the KEA’s currently is probably easier to paint with no masking required! The yellow I have used may be slightly the wrong shade, most pictures I have found it seems to be a more orange but there are some which look much brighter. It may well just be dirt so once weathered will likely look more the part. A few bits and pieces touched up and the lamp irons picked out in white before a couple of coats of gloss varnish.
|
|
The pack of transfer from Railtec is as I have come to appreciate, somewhat comprehensive with may small details. Fitting these is time consuming but well worth the effort. Sat at the kitchen table (the light is better here than my workshop) I started with the TML logo's. Having the laptop to hand while using Paul Bartletts website and Flickr.com is invaluable at this stage. What I did note both with building these wagons and with fitting of the transfers it seems that no two wagons are the same. I do wonder if when they were built they were all initially built as 'outers' with buffers and draw gear being one of the last things to be fitted before release to traffic. The air tanks seem to be at different ends depending on the outer wagon you look at.
|

|
Final Assembly
|
Buffers – I took the buffers apart to paint the housings, again given a couple of coats of primer then hand painted with Humbrol Matt Black 33. I soldered a length or handrail wire (40mm between the screws) and slotted these through the holes for the buffers from the rear, then once dry glued the buffer housing in place. This stops the shaped buffer head spinning. Slotting the spring into the housing over the screw, you can then screw the buffer head in place making sure they are level.
Couplings - Dapol screw couplings are fitted through the slots on the buffer end of the wagons sprung and fixed at the rear with Kadee (#804) fitted a the opposite end with a small nut and bolt Brake pipes - these wagons are single piped and so simply need an air brake pipe at each end. Hand brake wheel - These are soldered together with a piece of wire long enough to fit between the mounting bracket. Primed, painted white and fitted. Bogies - lastly these are fitted to the wagon with bolts and washers to make sure there are the correct ride height as noted in the bogie section above. |

|
|
|

|
|
In Conclusion
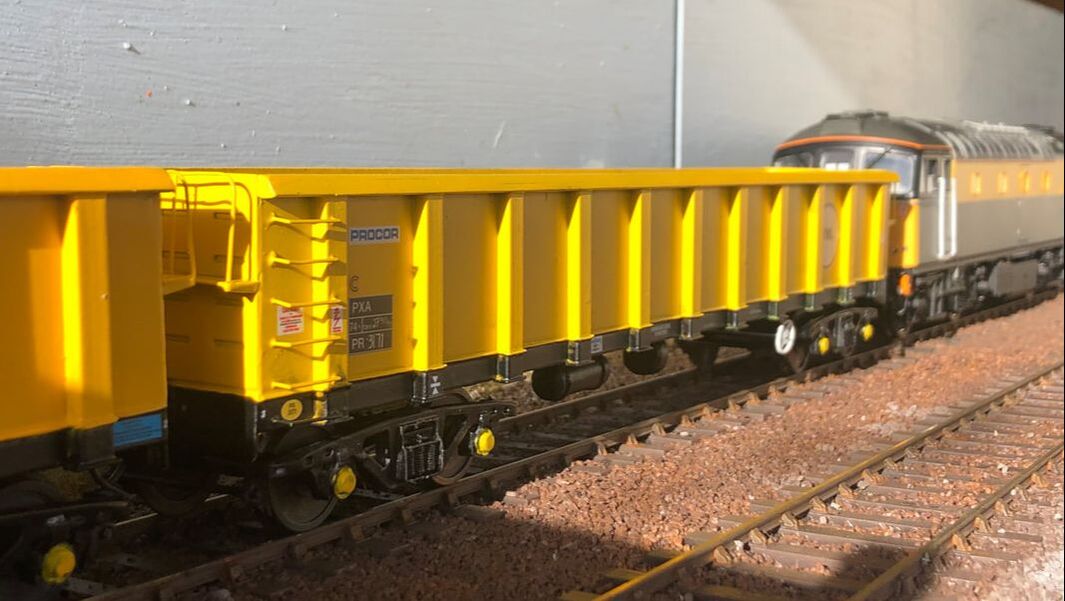
Paul’s intention with his kits is to allow the average modeller maybe looking at a first venture into O gauge from OO or N to achieve a good representation of the chosen prototype with as little effort as possible. The JXA, like the JNA is a very slight step up from the POA Blackadder & Railease POA/SSA with a five-piece body, white metal bogies and an etched overlay for the ends, but is still a relatively simple kit to put together. With a little time and effort, a great wagon with some presence can be achieved.
Impressionist Models PXA/KEA are available on the Intentio website along with Paul's other kits:
www.intentio.shop/
Impressionist Models PXA/KEA are available on the Intentio website along with Paul's other kits:
www.intentio.shop/
