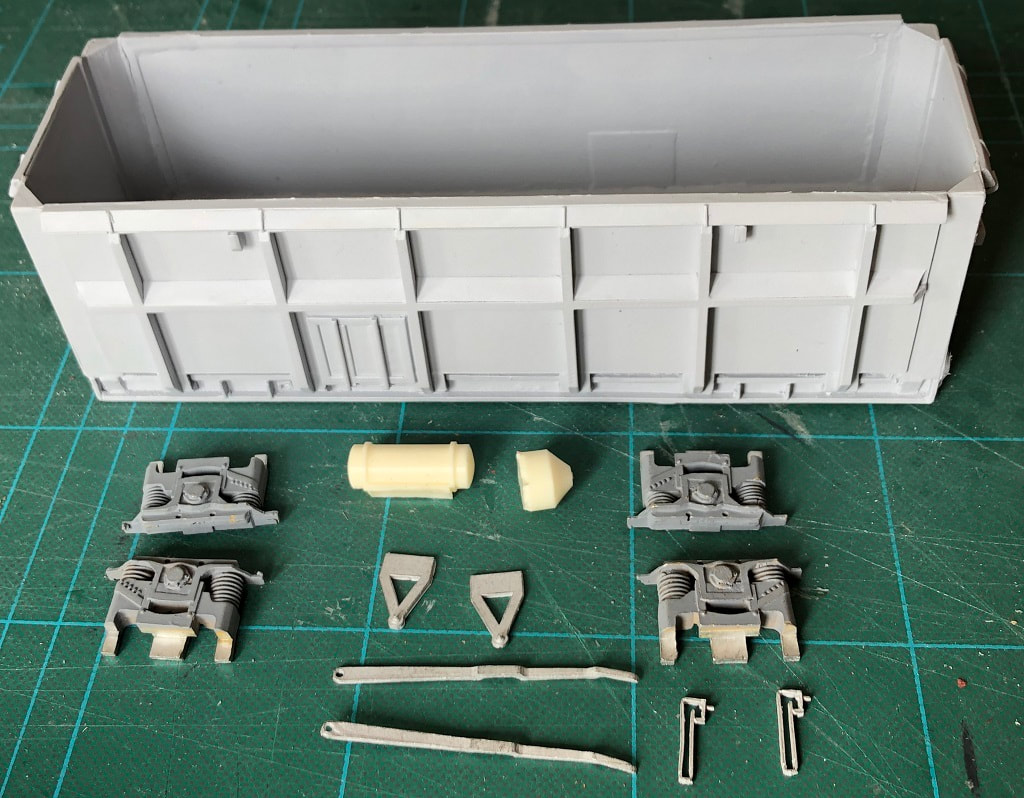
Out of the Box
Out of the box you get a resin body, air tank, distributer and brake cylinder. Etched Handbrake Levers, ‘V’ hangers & door bump stops along with pedestal suspension units. You can also get the correct BR round buffers with the kit or order directly from NMRS (PF019).
|
|
Body prep
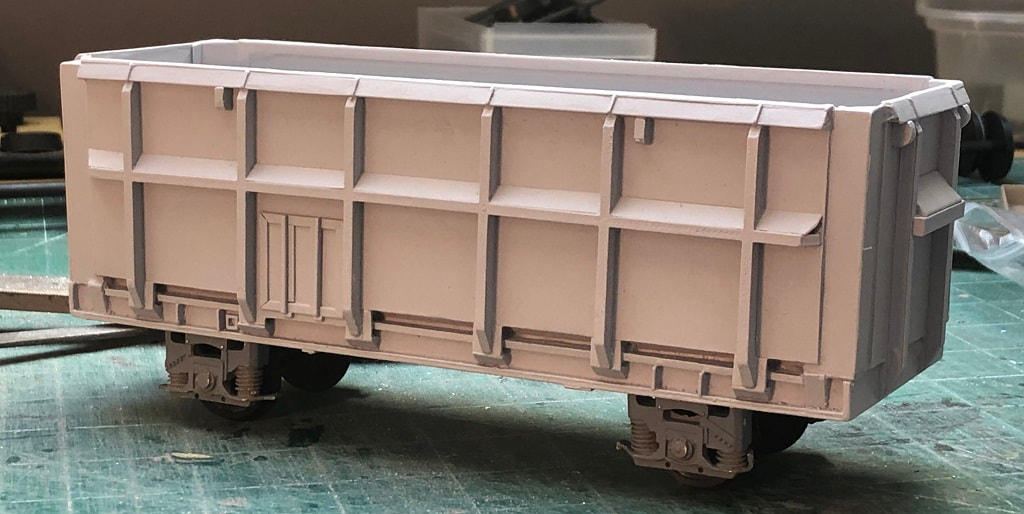
The body and main chassis details are all cast in one piece. There is some flash to clean off with a couple of files, but all in all the casting is very clean.
|
At this point it is worth drilling out the headstocks on the chassis to take your chosen couplings, buffers and brake pipes. The buffers Paul supplied with my kit have a 3.5mm shank so I marked the position on the buffer beam, firstly drilling a 1mm pilot hole, then with a 3mm bit and opening out to 3.5mm. Remember to drill back far enough accept the back of the buffers once depressed. I also drilled out a slot centrally to take a set of Dapol instanter couplings and finally a 2mm hole to the right of the slot for the coupling to take an air brake pipe and a 1mm hole on the left hand vertical bar for a lamp bracket.
|
|
|
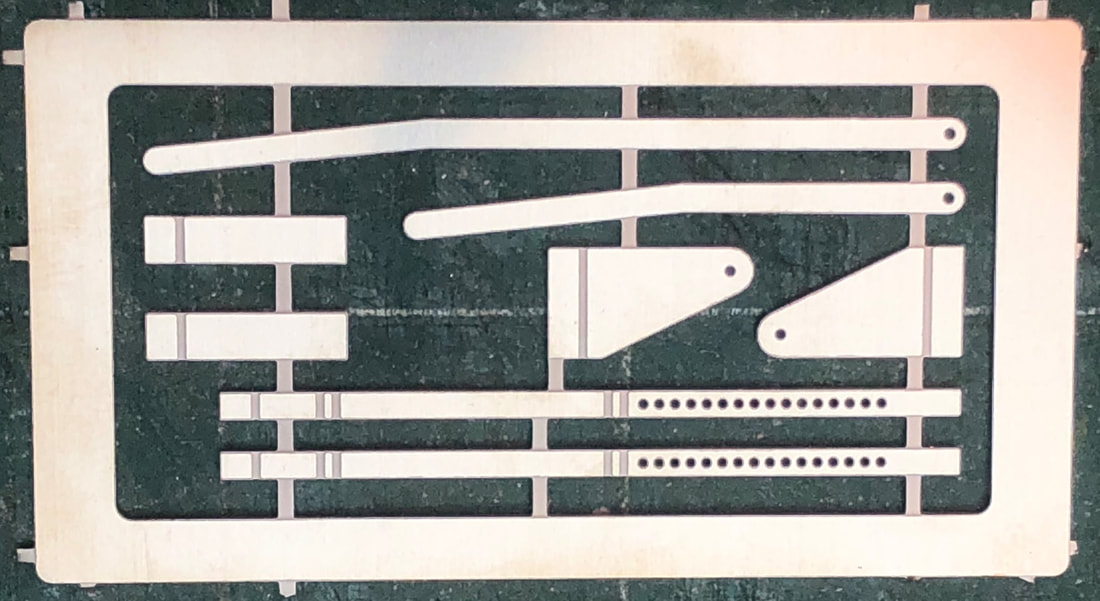
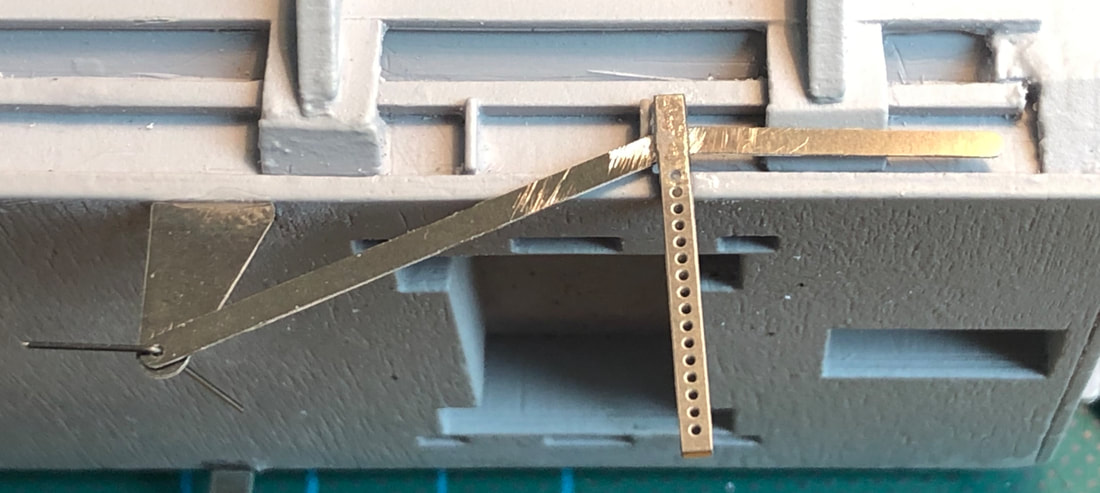
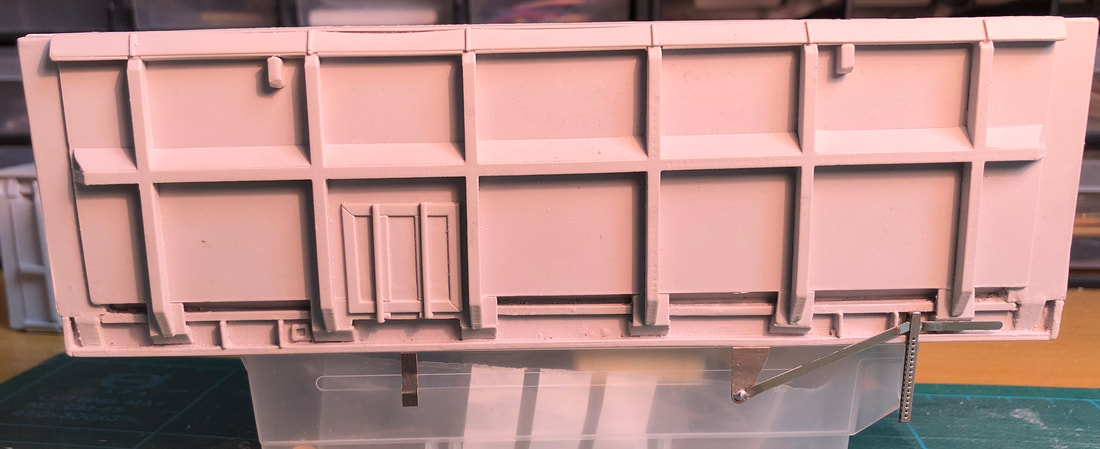
Paul now supplies an etch for the handbrake and associated fittings in place of the original white metal parts. The Railease wagon has what appears to be a unique style of ‘V’ hanger and the actual handbrake is more cranked than most wagons. With this in mind the parts were cut from the etch and bent/folder up as required. The handbrake guide is secured with spot of solder then glued to the chassis with Super glue. There are four pads on the underside of the wagon which are where the ‘V’ hanger and Bump Stop are positioned. I filed each of these off in turn, gluing the relevant parts to the underside of the wagon. The Bump Stop needs folding at the mounting point to a 90’ angle with the tail bending in a curved shape. This was achieved with a pair of long nose pliers. Using a suitable prototype photograph is useful to make sure everything is in the right place.
|
|
The etch Paul supplied me is off the first batch and so hadn’t been used on any wagons as yet. I found that the wagon really needed two Long handbrake leaves and not a short one and that they are not cranked quite as much as they needed to be. Paul is re-drawing the etch for future kits. To get over the cranking issue I cut each handbrake lever at the bend, filed each part to a tighter angle then re-soldered them. Lastly soldering them to the ‘V’ hanger with a small length or handrail wire.
This completes the work on the body and it can be put to one side for a wash and a coat of primer followed by painting. |
|
Suspension units
|
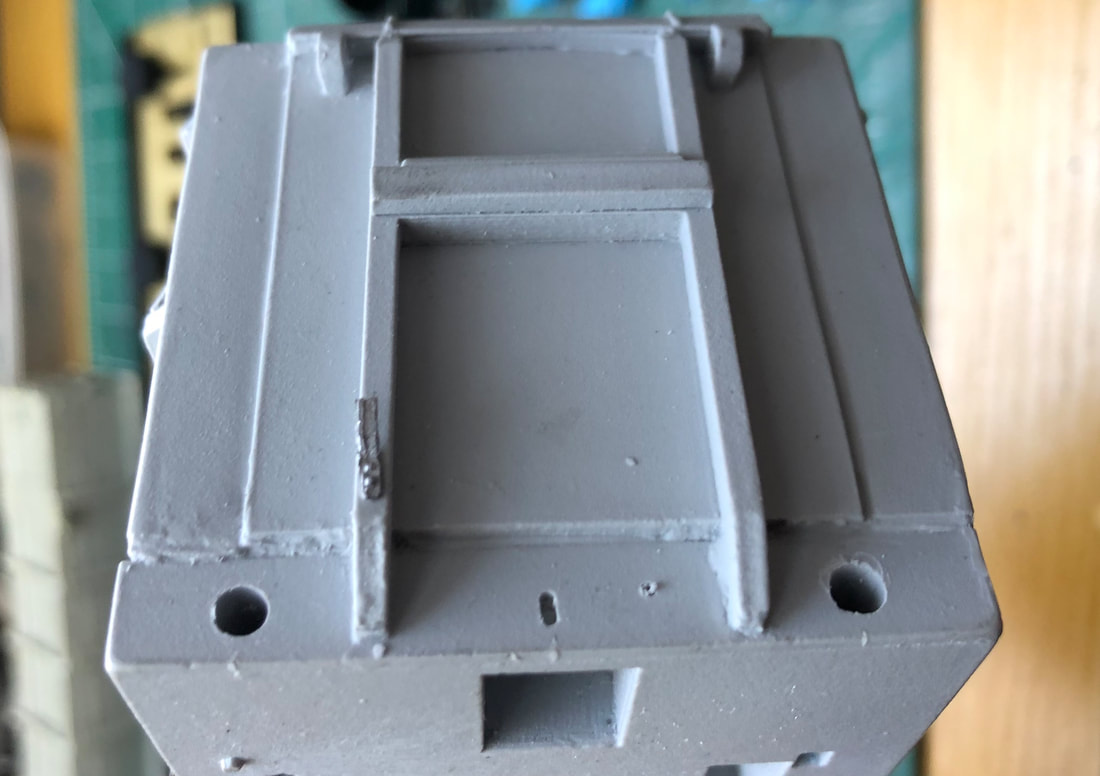
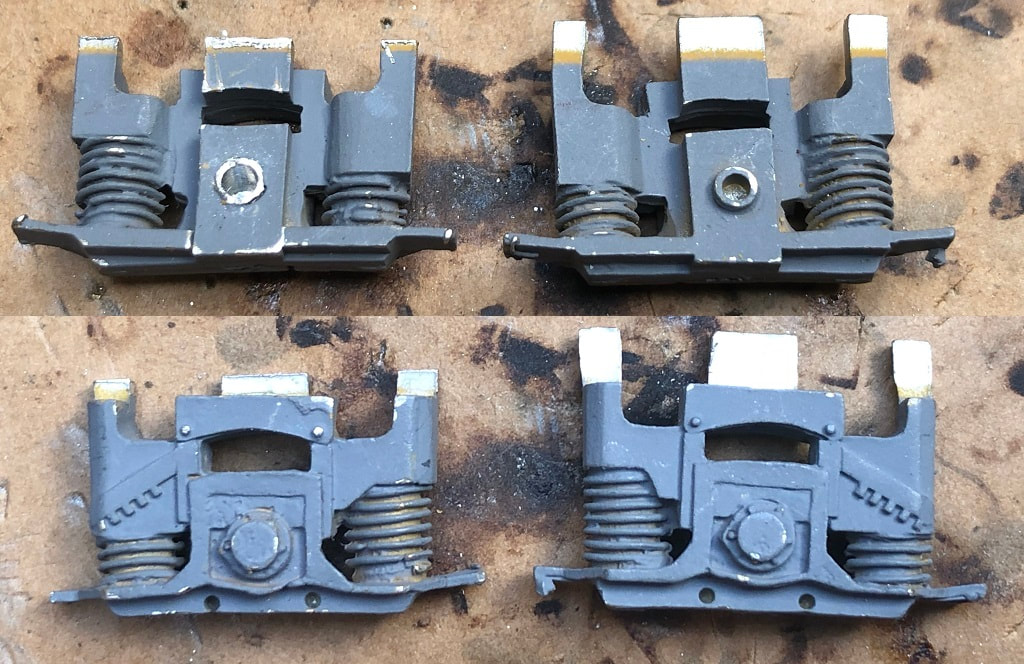
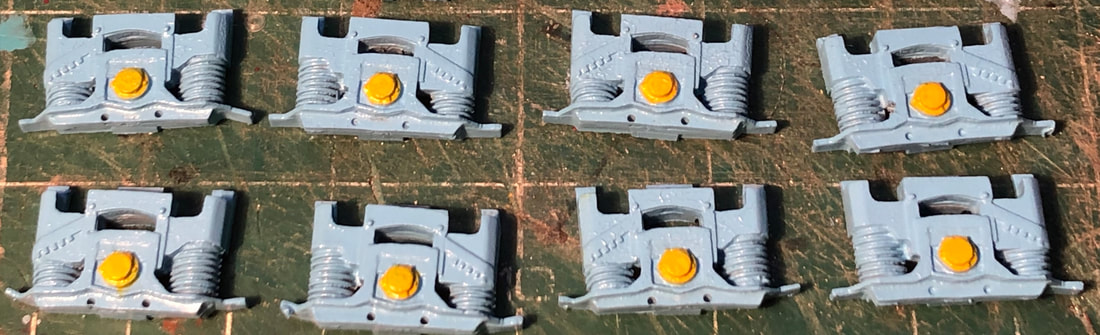
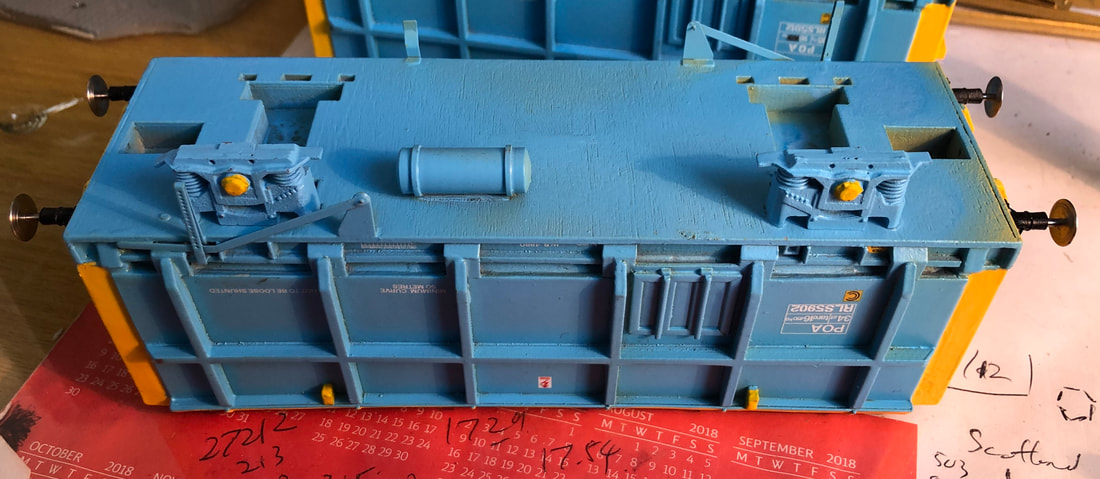
The pedestal suspension units need the mountings cutting down and the holes it the back’s opening out to take your choice of bearings. I am using Peartree 3’1” wheels which come with bearings, these need the holes in the suspension unit opening out to 2.5mm. There is plenty of depth to the suspension units to get the top hat bearing to sit snuggly against them but still be careful not to drill through the axle boxes. The picture to the right shows what needs to be done with the pedestal units. The right had unit is as supplied, with the left hand modified.
|
|
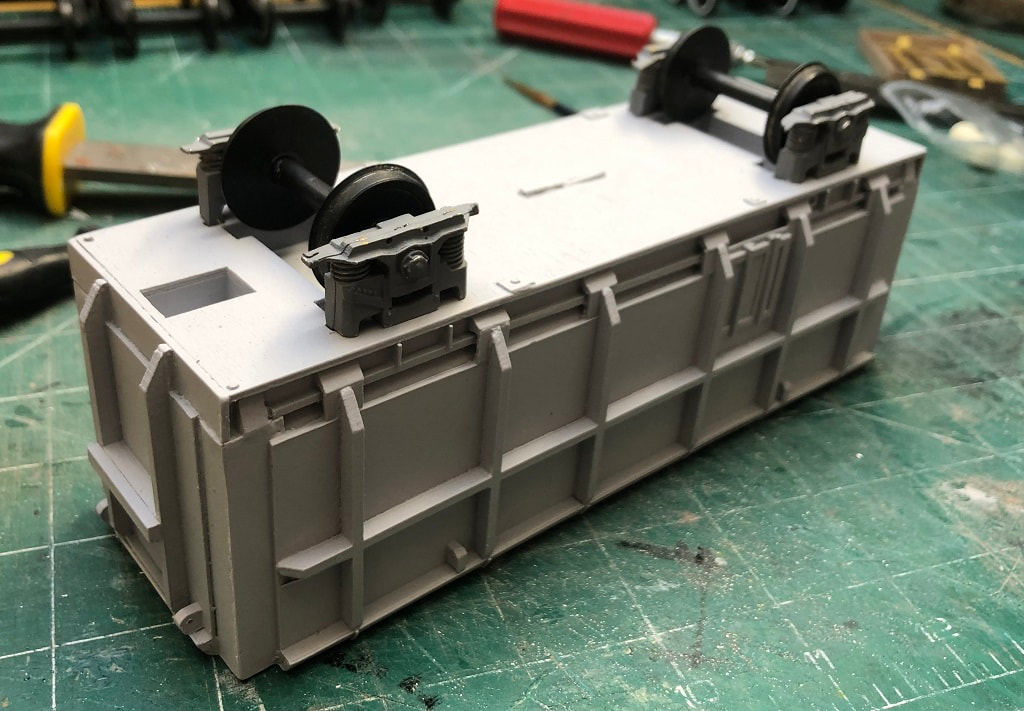
I next did a dry fit of the wheels and pedestals in the body. At this point I haven’t fixed them as it will be easier to paint them and the body separately.
|
|
Paint, Transfers & Final Finishing
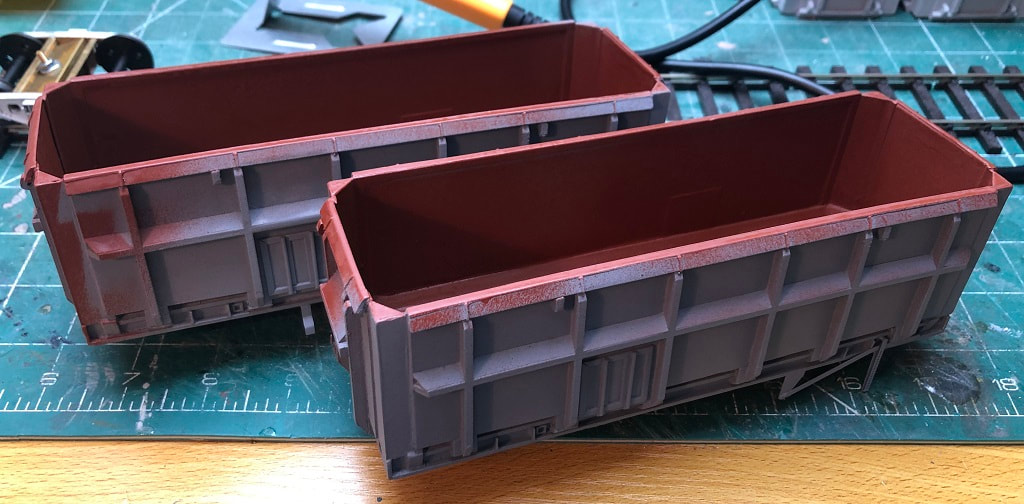
Paint for this wagon is a simple affair and easily achievable without the need for an air brush. I first gave the wagon bodies and pedestals a good wash and when fully dry a couple of coats of Grey primer, I normally use Halfords Primer but ran out during lock down so found a new source and these have been done with Tetrosyl Trade Spray grey primer which seems to be a good substitute, I’ve also used this to prime a couple of Heljan loco bodies and seems to be as good as Halfords own.
|
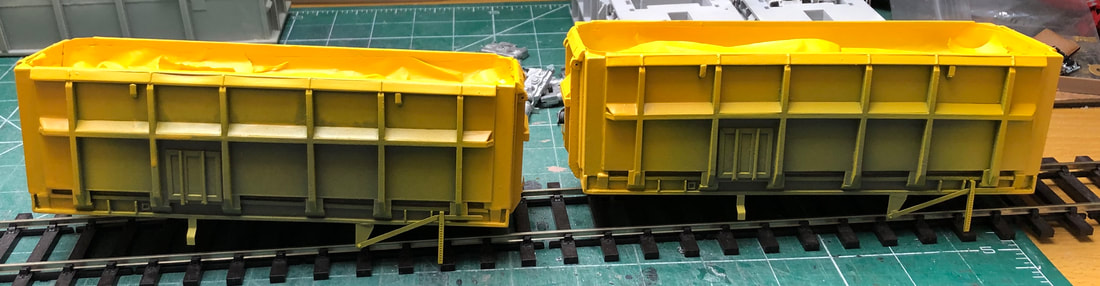
Next I painted the insides of the wagon bodies with a can of Railmatch Bauxite (purely as I had an unused can in stock with no plans for it, any dirty brown colour will do as it will get weathered eventually). Once this was masked off a coat of yellow for then ends and raves before more masking tape and a
|
|
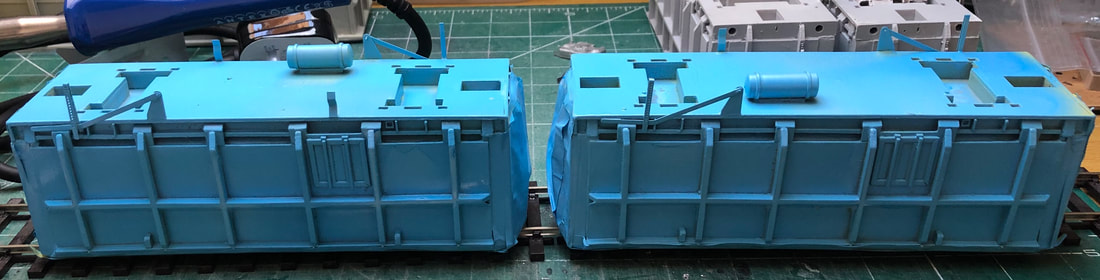
coat of Ford Olympic Blue (I used a can of Holts car paint). The pedestals also got a couple of coats of the blue paint & the axle boxes picked out in yellow. A few bits and pieces touched up and the lamp iron and hand brake leave picked out in white before a couple of coats of gloss varnish.
|
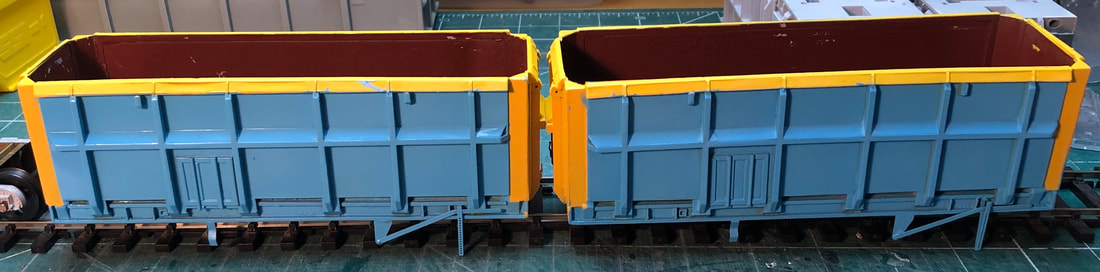
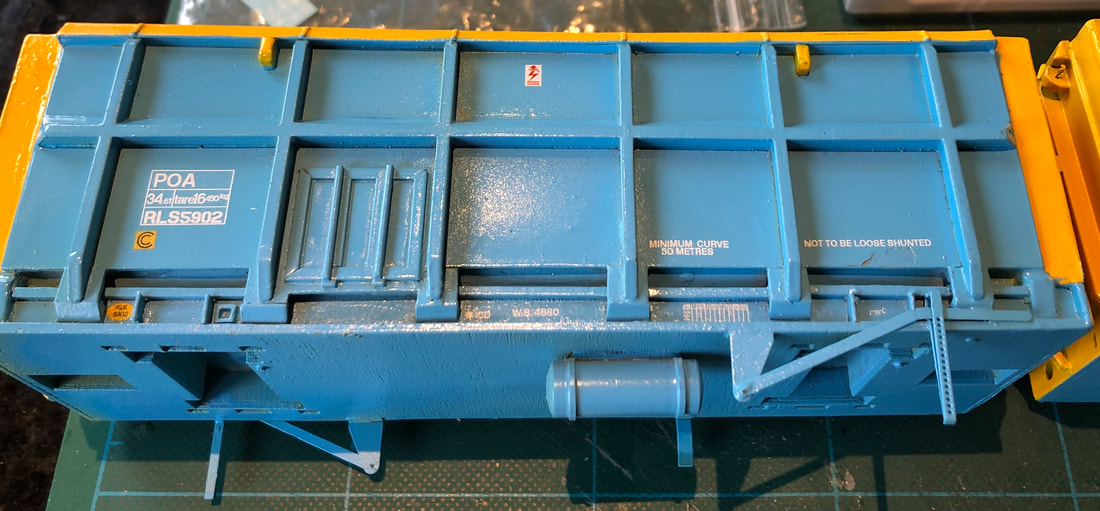
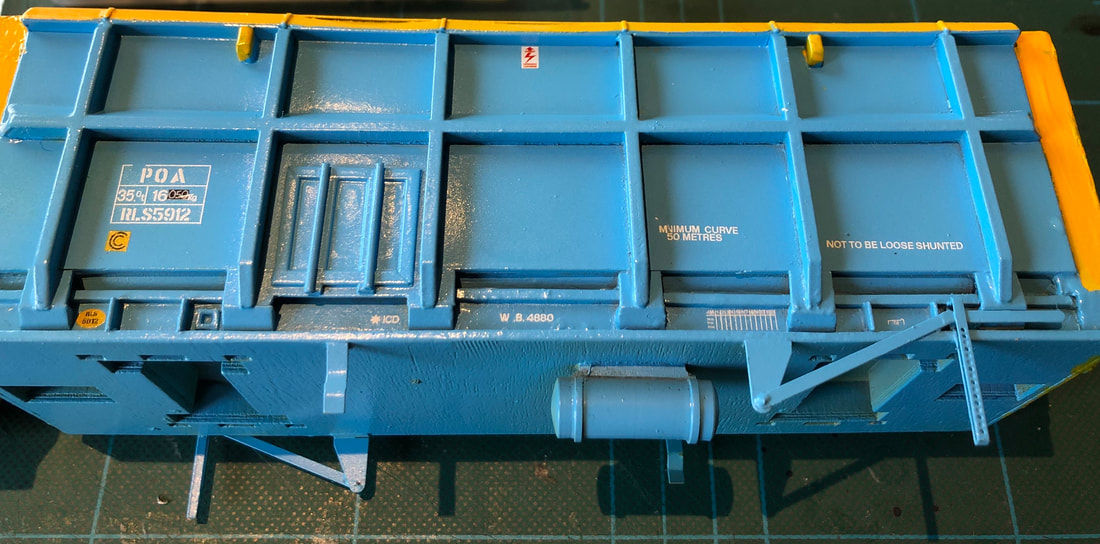
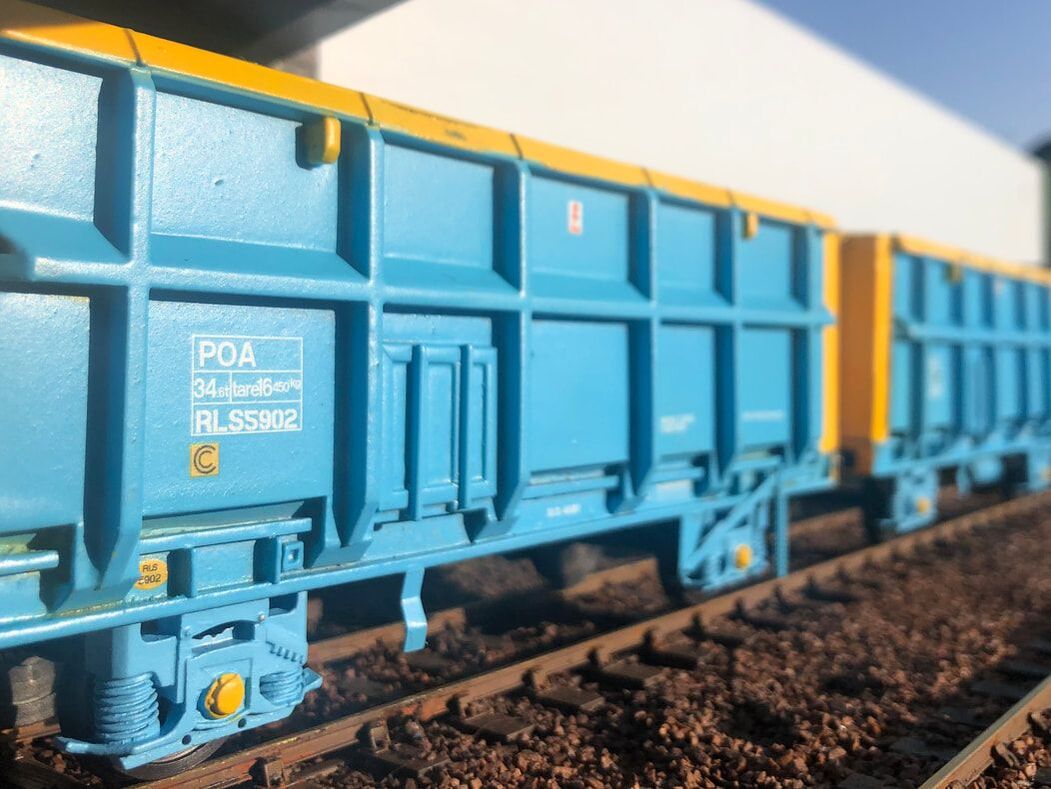
Transfers are readily available from Railtec range (8055) with numbers for eight wagons, you will need more additional markings if doing more than four wagons. I used pictures from the net to give me a guide as to where the various embellishments should go, Paul Bartletts site is a great resource for this. Most of the embellishments are relatively easy to fit, even down to the small ICD & Wagon plates. Once I was happy with the transfers, I gave the whole wagon three coats of Satin Varnish, making sure each coat was dry in between.
|
|
|
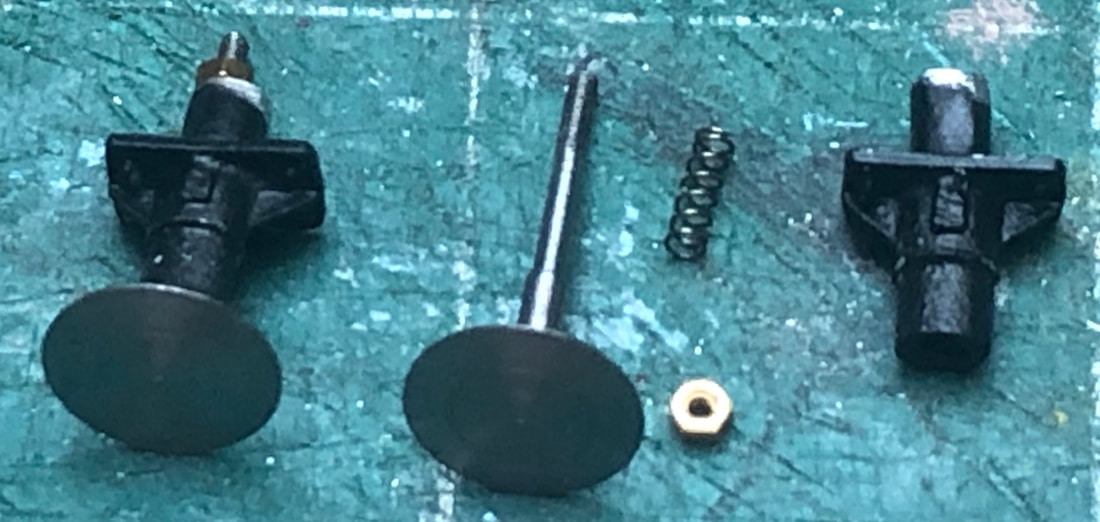
Buffers – I took the buffers apart to paint the housings, again given a couple of coats of primer then hand painted with Humbrol Matt Black 33. Once painted I re-built the buffers and set the travel of the buffer soldering the retaining nut on the end of the shank, once the buffers are fitted into the buffer beam you will not be able to get to it should it work its way loose.
|
|
Suspension units and wheels & final assembly
|
Once painted I secured a bearing in the back of each pedestal, then secured one in each locating point on one side of the wagon, making sure the correct pedestal is in the correct location. They are handed so be careful! I fitted one side of the wagon with pedestals then fitted the axle and the opposite pedestal. When I came to fit the pedestal on the opposite side I found it wasn’t as easy where the handbrake lever is so it may be an idea to fit the pedestals on opposite corners first fitting the one by the handbrake lever. Hopefully you will now have a nice freely rolling wagon! Lastly fit your choice of coupling and brake pipes.
|
In Conclusion
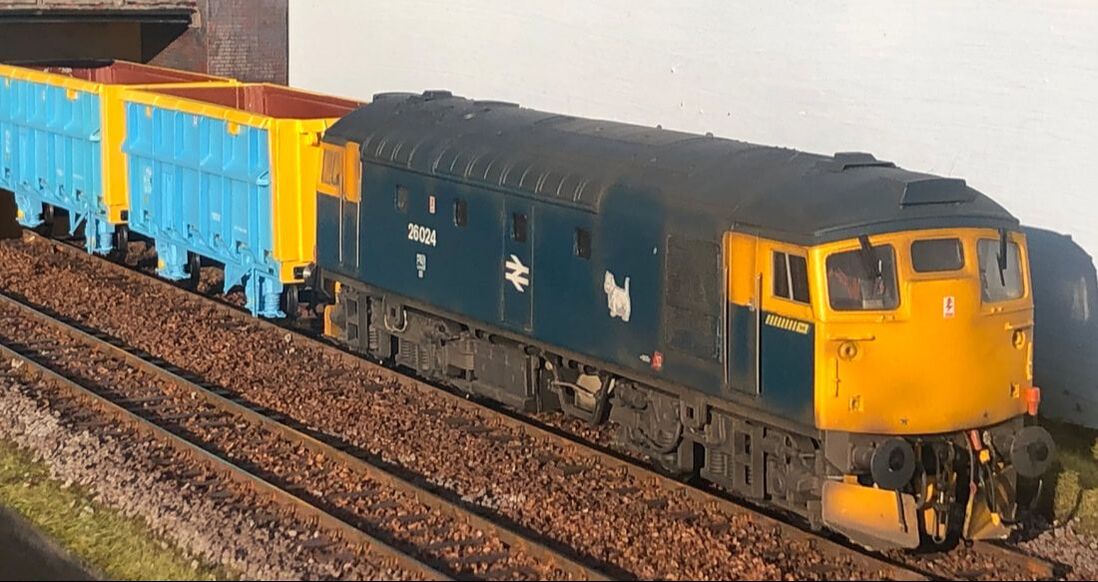
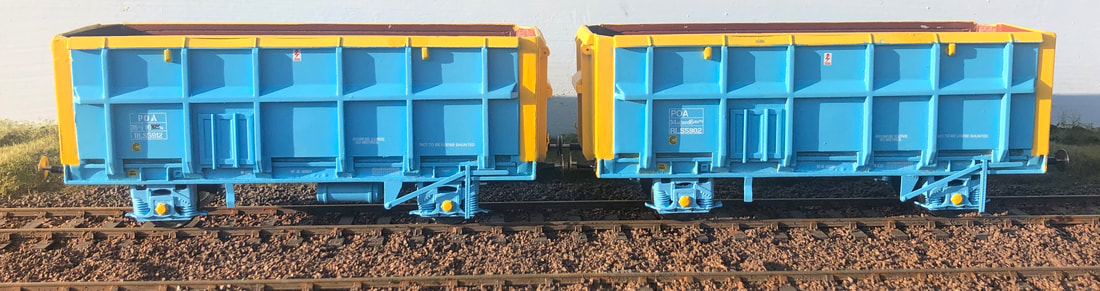
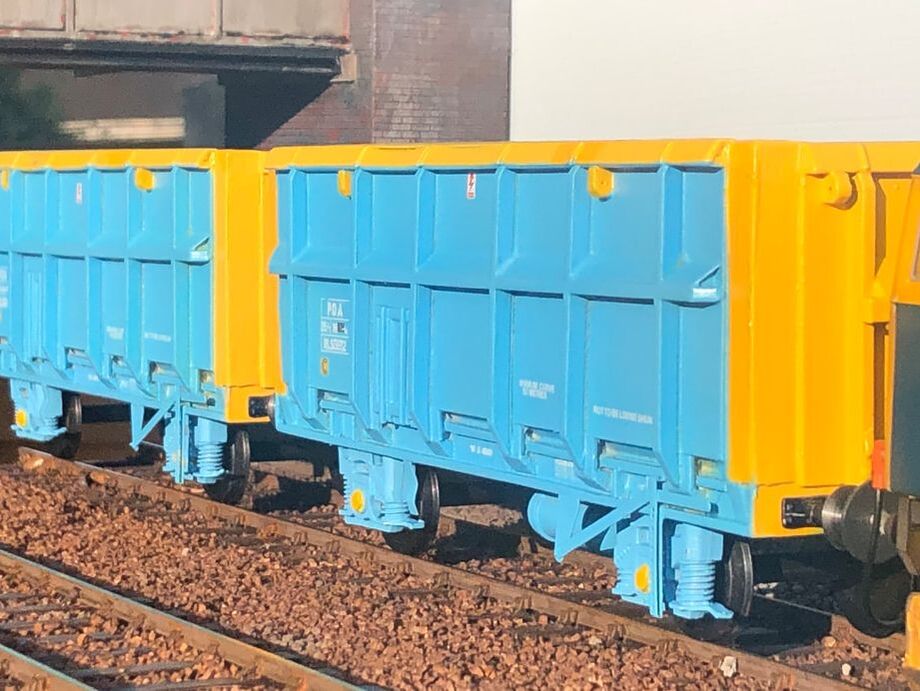
Paul’s intention with his kits is to allow the average modeller maybe looking at a first venture into O gauge from OO or N to achieve a good representation of the chosen prototype with as little effort as possible. With being a simple one-piece resin body and very little in the way of white metal or etched parts, a great little model can be achieved with very few skills. This kit as in fact even easier than Paul’s Blackadder kit as it requires no soldering at all (the etched brake parts can be super glued if need be), the most difficult part is drilling out the axle boxes for the bearings, but even that is easy with a Dremel or the like. Even the transfers are a simple affair as you do not need to add chevrons to the raves like the Blackadder. This is probably the easiest 7mm kit I have built to date and definitely a good wagon for the beginner.
http://www.nmrs-models.co.uk/
https://www.railtec-models.com/
https://www.dapol.co.uk/
http://modelrailwayparts.com/
Impressionist Models Railease POA/SSA's are available on the Intentio website along with Paul's other kits:
www.intentio.shop/
http://www.nmrs-models.co.uk/
https://www.railtec-models.com/
https://www.dapol.co.uk/
http://modelrailwayparts.com/
Impressionist Models Railease POA/SSA's are available on the Intentio website along with Paul's other kits:
www.intentio.shop/
|
|