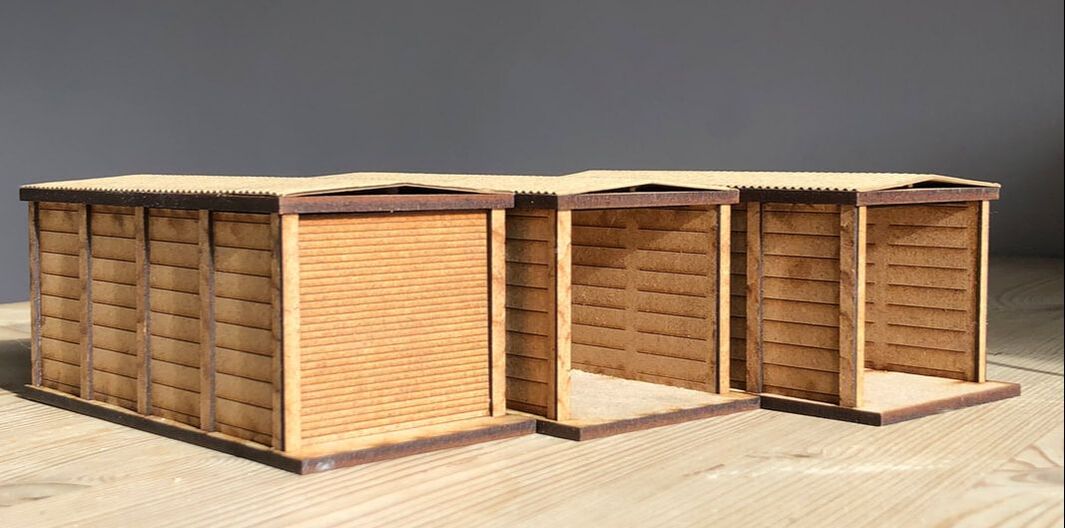
Intentio Concrete Garage
Intentio specialise in a range of replica model buildings with an emphasis on railway architecture made from laser cut MDF, Ply, and card. In addition to this they offer a bespoke service to design and create scale buildings to your specifications
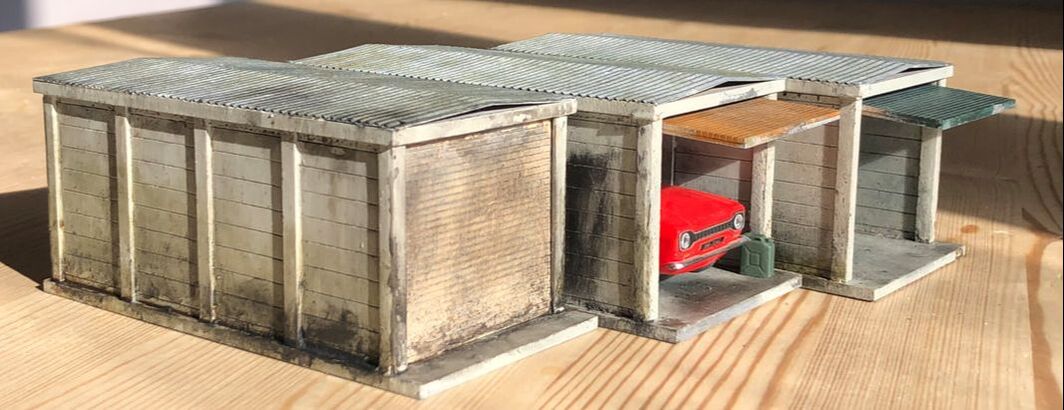
Here we build and paint their concrete garage kit which is available from their website and at shows.
Here we build and paint their concrete garage kit which is available from their website and at shows.
Out of the Box
A while ago I was discussing with Phil from Intentio requirements for various building for our new layout, there are a number of corners and streets that will need items that some of the Intentio kits will be good for, but they don’t quite fit! As the discussions continued, I mentioned that I was looking at doing some Gardens to back onto a cobbled street and It would be nice to add some prefab concrete garages in a couple of gardens. Later that evening Phil sent me a drawing that was perfect for what I was looking for. Being a fairly simple structure, it was a pretty quick process and the following day Phil sent me some pictures of a first test cut. Roll on a period of time where we have both been wrapped up in other bits and pieces, I have received a packed of some other bits but also included some garages!
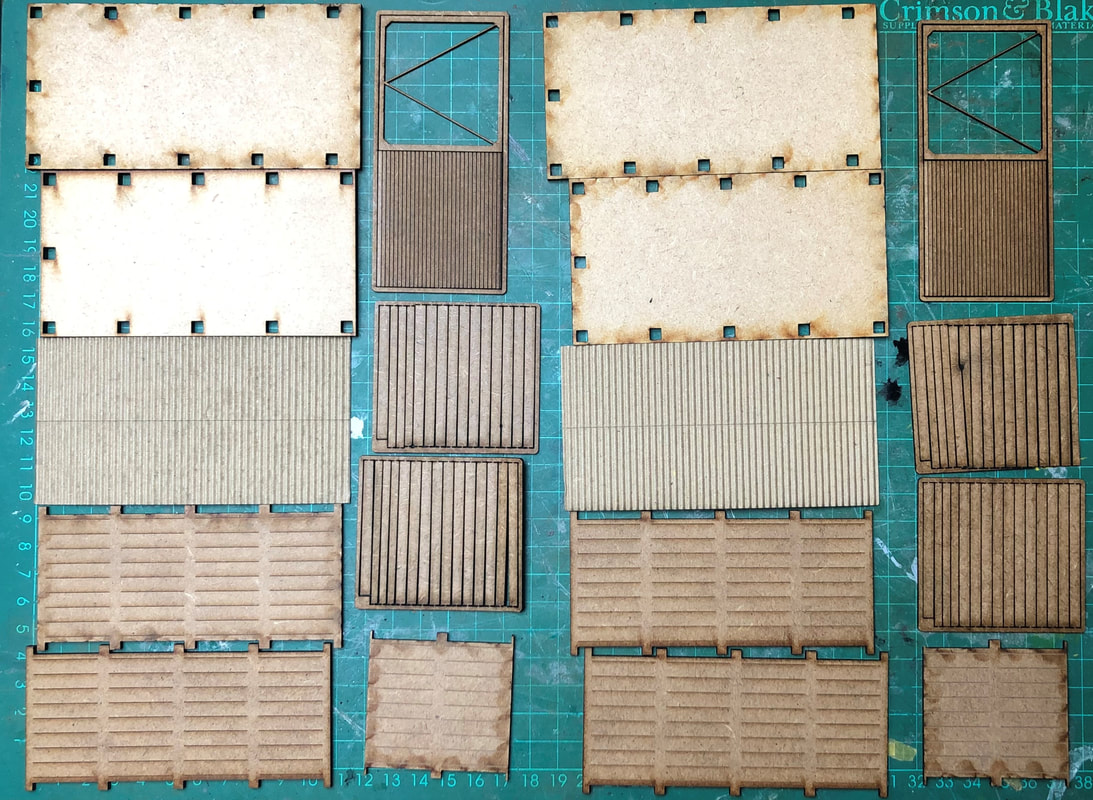
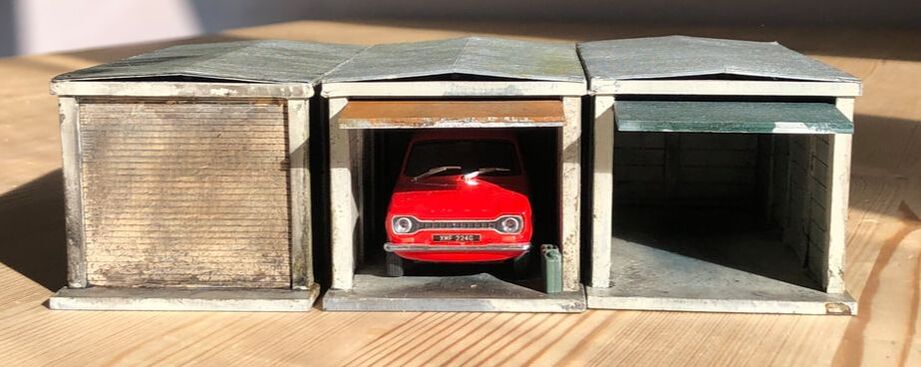
Note the above is TWO kits as I am batch building them.
As ever first thing I usually did was to lay out all the parts and check everything is there. This kit dos not come with instructions or a parts list however they are available on the website. With a picture of the made-up kit to hand I made a dry run slotting all the parts where they appeared to go, Intentio kits are normally fairly self-explanatory and it’s pretty simple to work out what goes where. All that is really needed to put this kit together is glue and paint, my chosen glue for card & wood-based kits is these days is ‘Gorilla Wood Glue’ which can usually be picked up from Aldi for a reasonable price.
Build
|
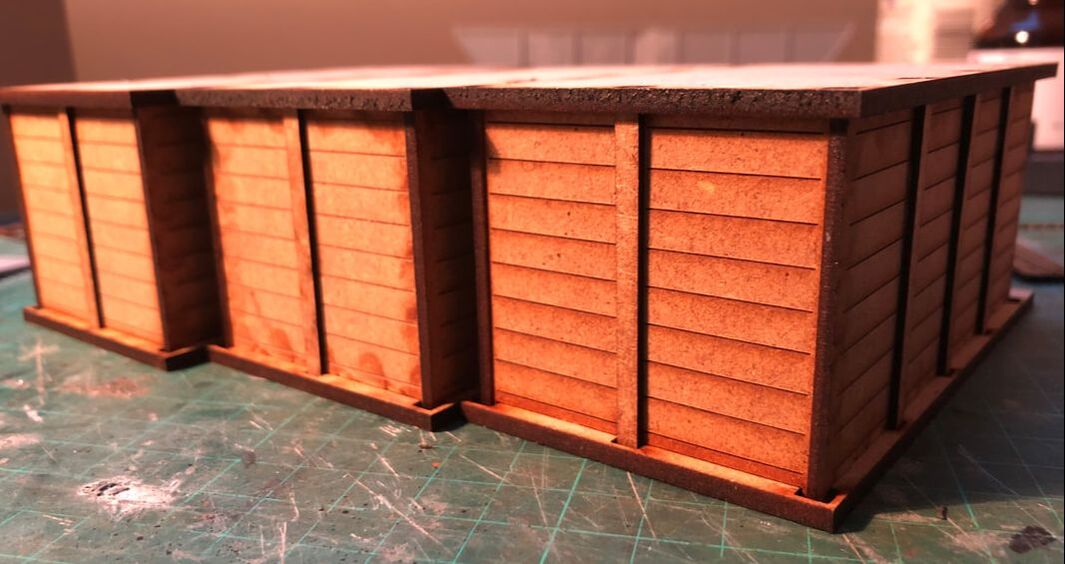
After assessing how the parts go together during my dry run, I started to piece together the sides and back. I added one pillar to the rear wall and three to the sides leaving the coders for now. Once stuck together I placed the sides and rear walls into the base plate then slotted the roof on and allowed to set. At this stage I didn’t glue the base or the roof on.
|
|
|
Once these pillars had set, I removed the walls and drilled a small hole in rear of the base as at some point I plan to fit lights in at least one garage. I then refitted the rear and side walls and glued them to the base. The kit can be supplied with either opening or fixed doors, one garage I fitted the fixed door at this stage, again using the roof to keep everything square.
|
|
When the walls had set to the base, I turned to looking at the corner pillars. Each pillar has a piece the same size as the rest of the uprights and a thinner piece to add ‘around the corner’, these will fit either way round. As I was putting three of these kits together in a batch, I decided to try fitting them both ways round. I don’t think it really matter. To fit them I again lifted the roof off and slotted them in place, again re-fitting the roof while they set.
|
|
|
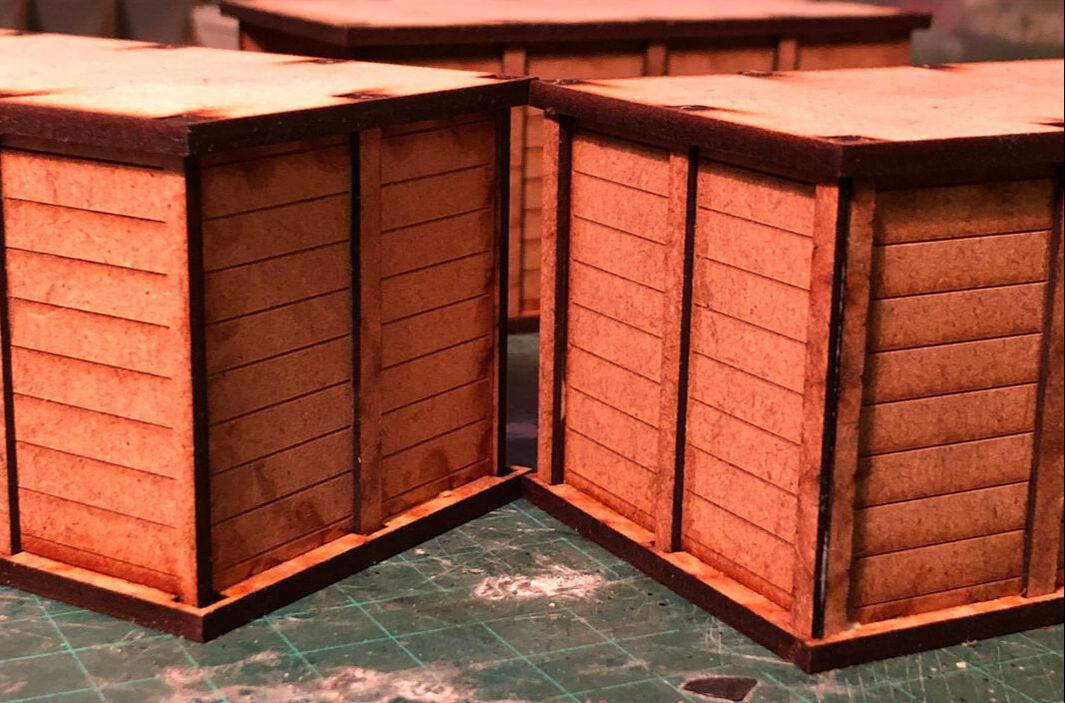
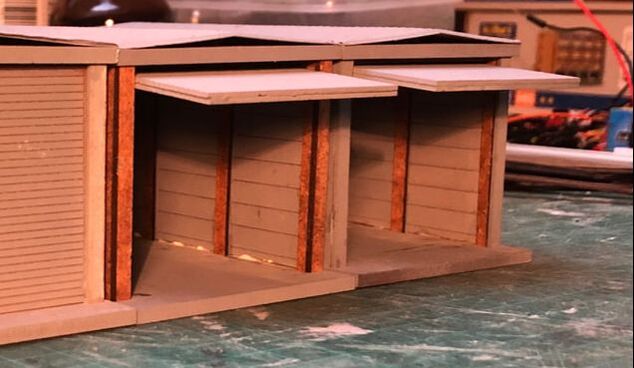
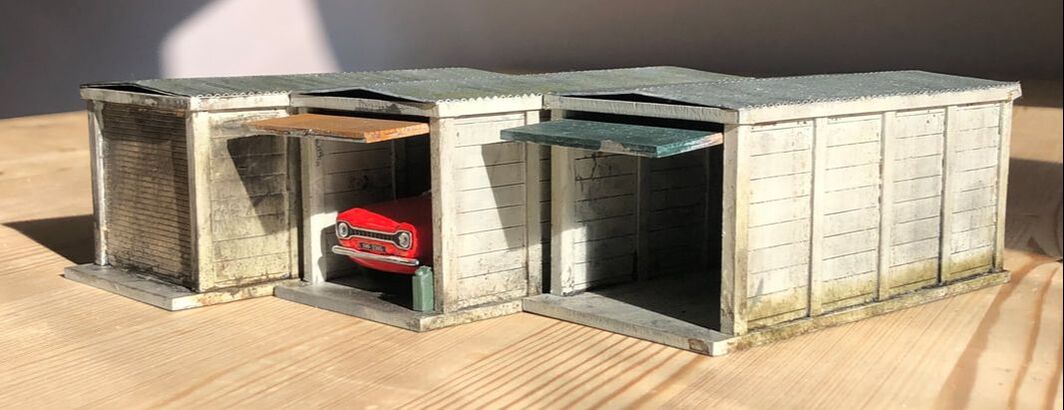
The open garage door is made of two pieces, the main door and a frame, these are simply glued together and clamped. For the roof I used the off cuts from the sprues to make a ridge and glued the supplied corrugate card to the top of the roof. At his stage the open doors and roof are still separate.
There is also a small piece to fit to the underside of the roof to assist in setting the open door. Depending on where you position this will determine how low the open door it. |
|
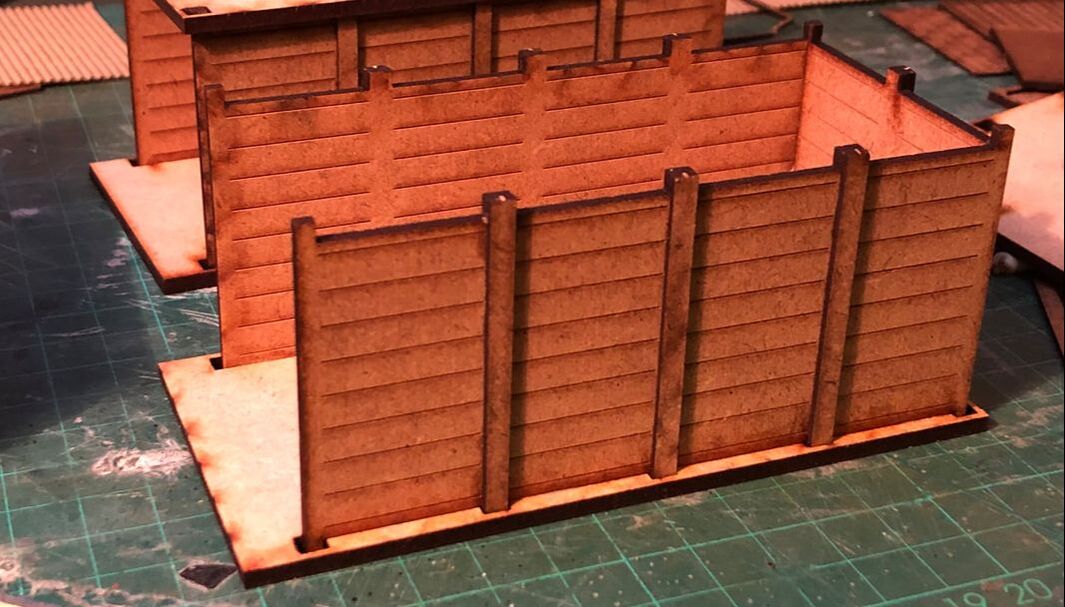
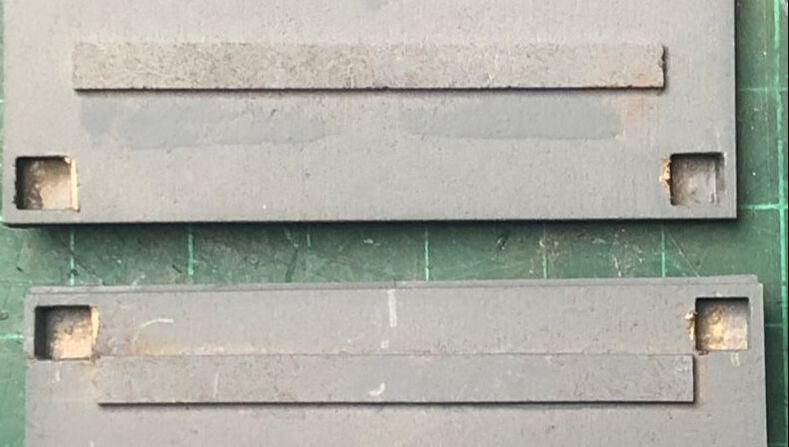
So who got this far before noticing my deliberate mistake? OK so it wasn’t deliberate, somehow I completely overlooked the fact there should be pillars on the insides of the garages! Now this isn’t so much of a problem with the closed garage but a bit of a clanger for the open ones. With a little gentle persuasion, I managed to prise the sides and ends off and fit the missing uprights! Cleaning the base and sides of glue before re-fitting them
|
|
Paint & Final Finishing
|
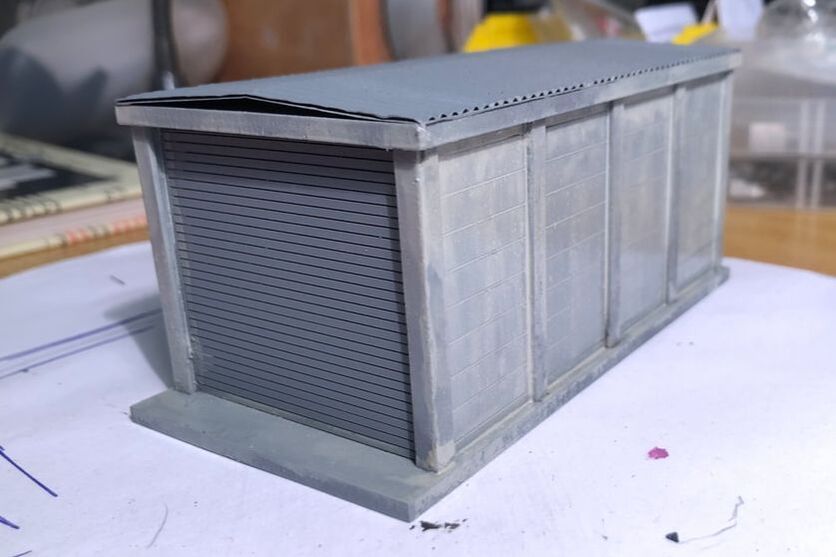
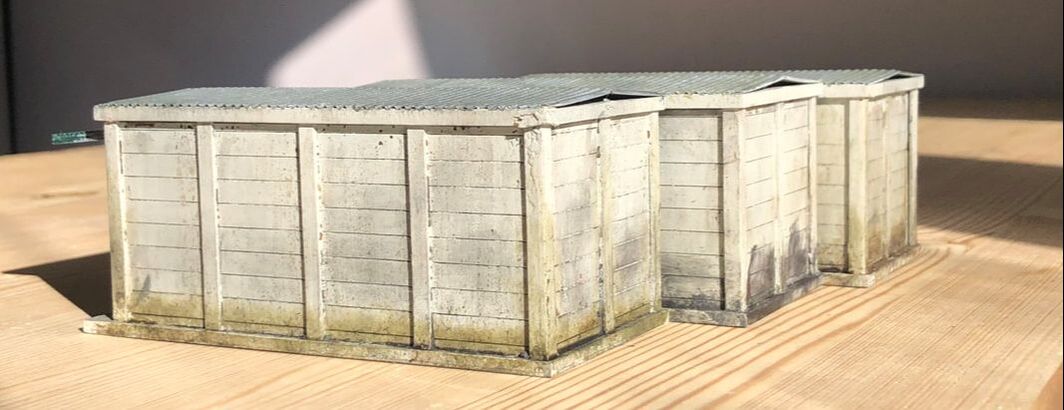
Initially the whole building was given a coat of Tetrosyl Grey primer which showed up the joins on the four corner pillars, these were then filled and sanded back before a further coat of primer. This was then followed by a couple of coats of Humbrol 166 (Light Aircraft Grey) with the door painted with whatever colour you fancy, a pinky-cream, Green and brown for me. The roof I would normally use a base coat of Humbrol 53 Gumental but as this had gone off I resorted to Humbrol 56 Aluminium.
|
|
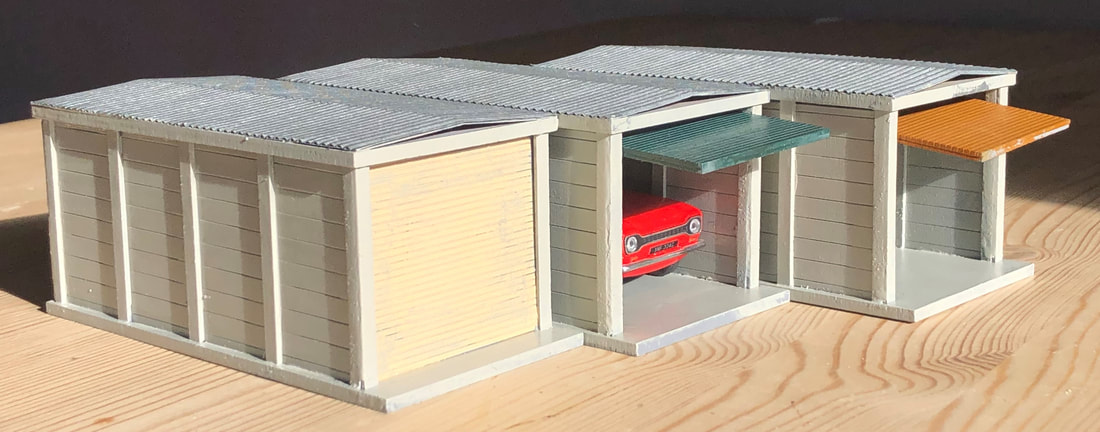
When it came to weathering, I dry brushed a dark dirty green colour around the base and on the roof to give a mossy/mouldy effect then subjected the buildings to a number of washes to weather it down, liberally painted on then wiped off with a downwards motion leaving more wash in the corners and crevasses. Games Workshop washes are ideal here, I used 'Earthshade' & Nulin Oil. Lastly some powders have been added and a coat of matt varnish to seal everything in. Once they are placed on the layout then they will be blended in with grasses and bushes, particularly the closed garage to give a somewhat unkempt look.
|
|
|
Conclusion
Conclusion: Another great little kit form Intentio that can bring a little life to your layout, perfect for a cameo in a corner of a layout with a classic car or motorbikes being worked on, or even in multiples as lock ups. A little forethought as to what order to put the kit together is helpful and planning how you intend to paint it.
The Intentio Garage can be bought from the Intentio website here along with numerous other kits and bits: https://www.intentio.shop
The Intentio Garage can be bought from the Intentio website here along with numerous other kits and bits: https://www.intentio.shop