Out of the Box.
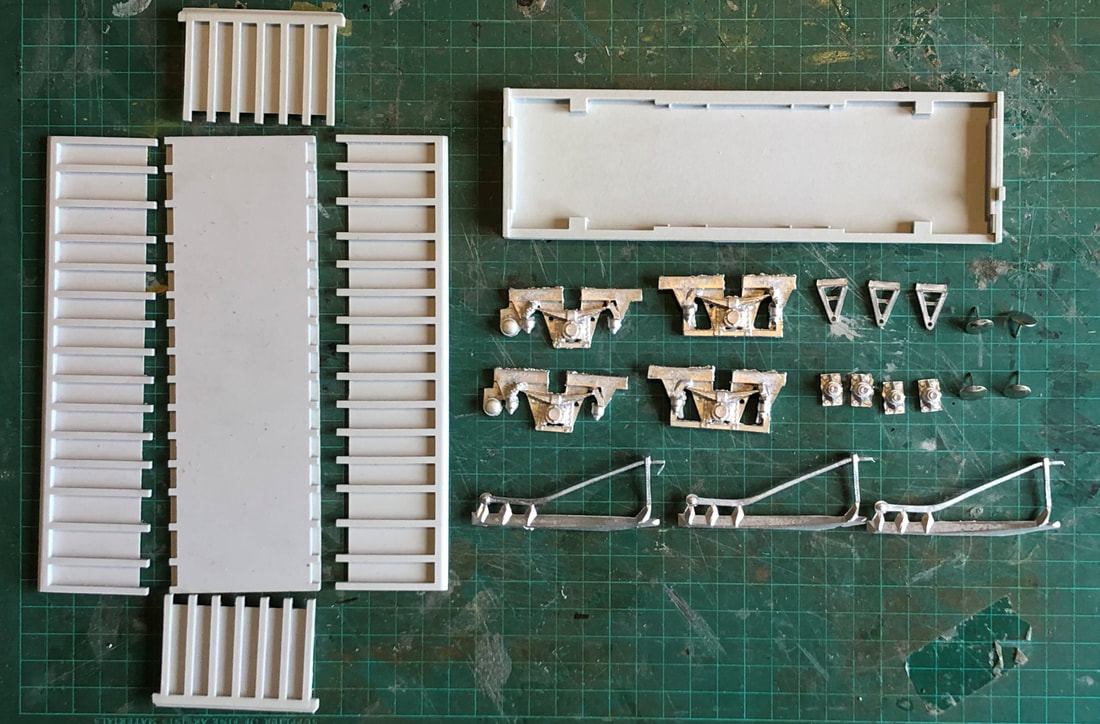
Out of the box you get a five-piece resin box body, a resin chassis, white metal hand brake levers (including ‘V’ hangers), suspension pedestals and a set of buffers with fixed heads. You will need couplings of your choice and 3’7” coach wheels, you can also add brake discs on opposite corners and sprung buffers if you so wish.
Body prep.
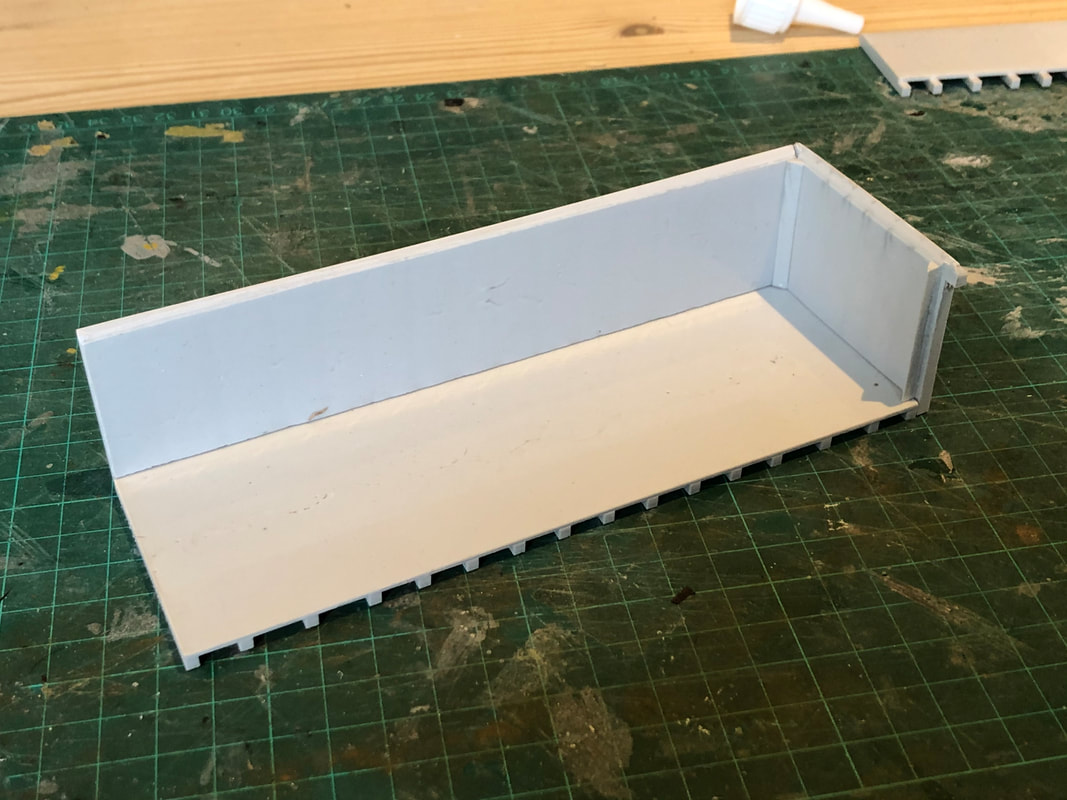
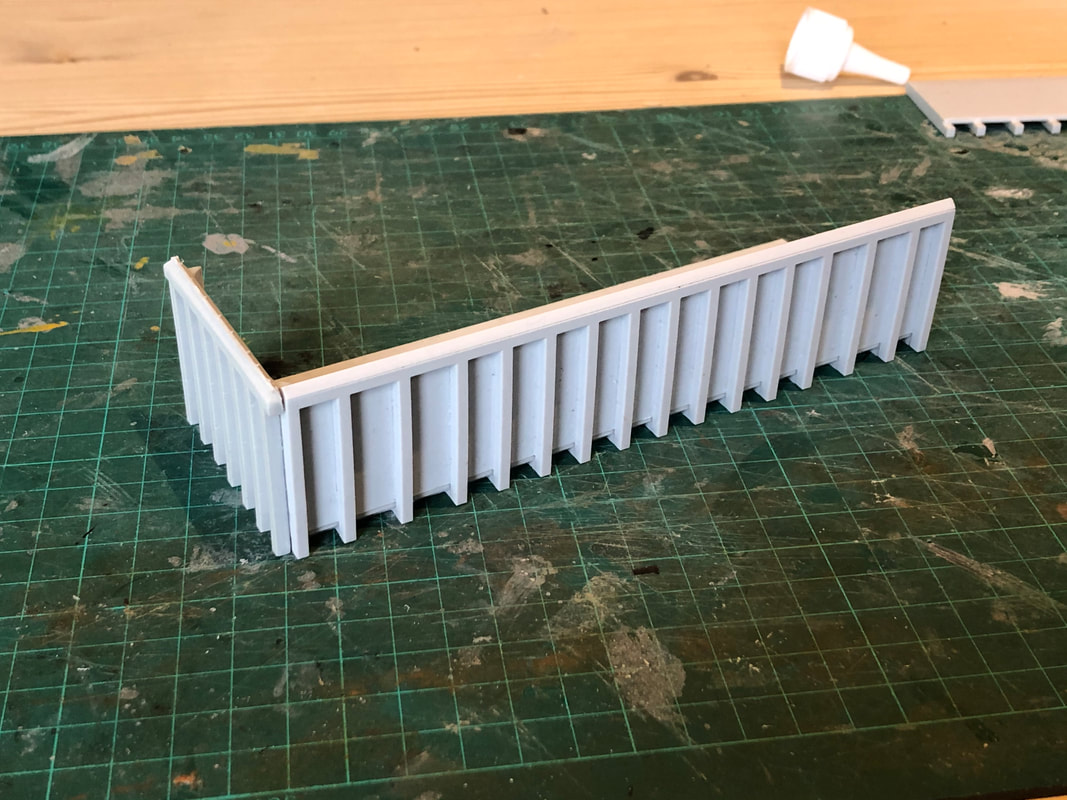
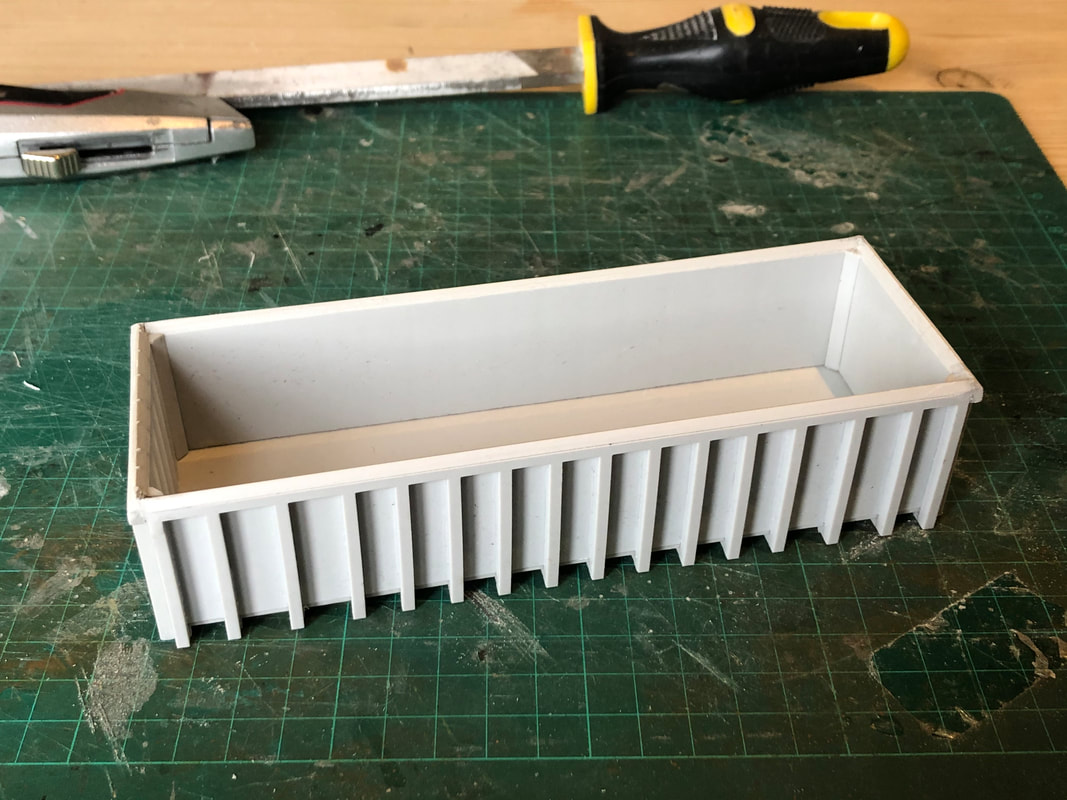
The five-piece body is made up of a fairly clean set of casting which need little tidying up before fixing together. Take the body floor and add one side fixing with Cyano, followed by an end ensuring everything is square, put this to one side before adding the opposite side. Once set firmly, if there is a little gap in the corners where the sides and ends meet use some filler and file back when dry until you are happy. As with the Buzz Models MEA I intend painting the body and chassis separately before finally fixing them together.
|
|
|
Chassis.
|
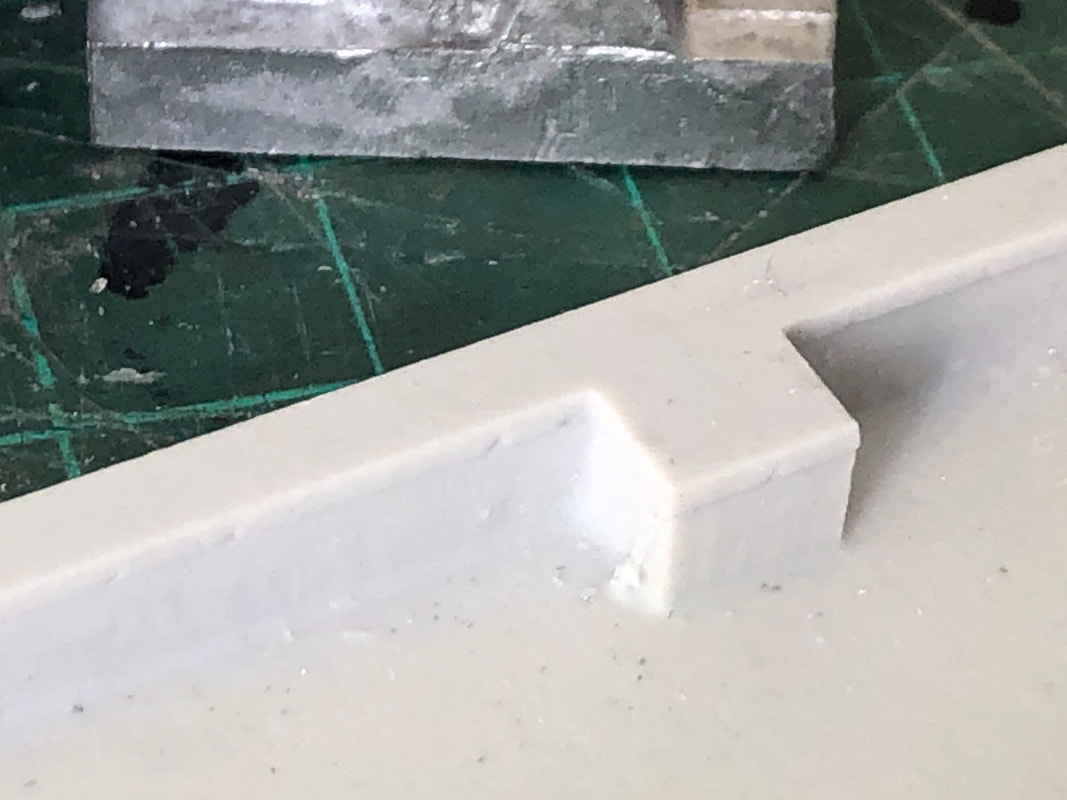
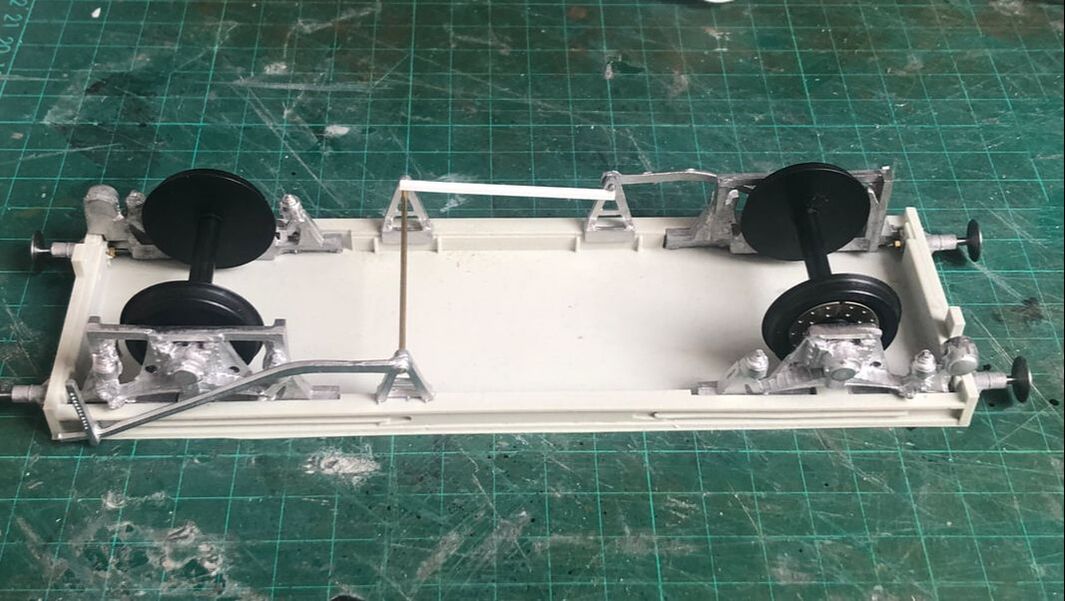
The one-piece resin chassis if a fairly simple affair with only a few white metal bits to add. Drill out for your chosen buffers or those that come with the kit, brakes Pipes, coupling hooks and clean up any flash. Later in the build I found that the suspension pedestals on the clasp brake wheel wouldn’t sit right, this was caused by a tiny amount of flash (see Picture).
|
|
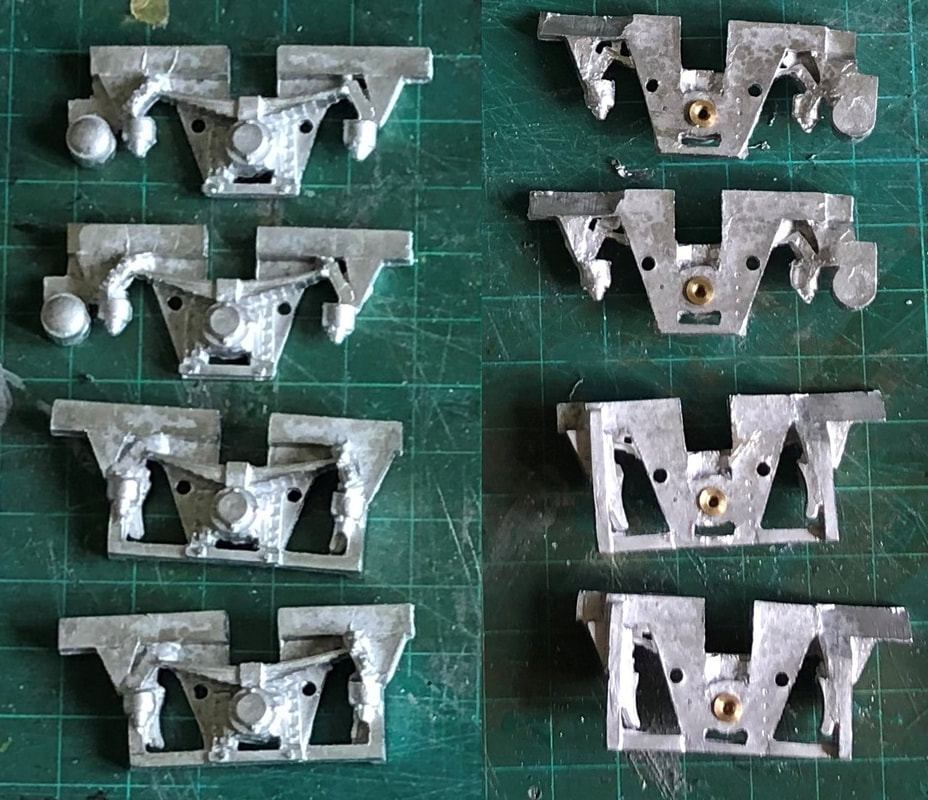
Clean up the pedestal suspension units and drill out the backs to take the wheel bearings (the Peartree wheels I am using come with 2.5mm bearings). With a tiny amount of Cyano, fix the bearing in place in the back of the pedestals. Note that they are handed, one of the unique features of HAA’s (and all the rebuilds & derivatives) is that the train brake only operates on two corners, these being disc brakes. The opposite two corners have the normal clasp brake arrangement but this is only for the hand brakes.
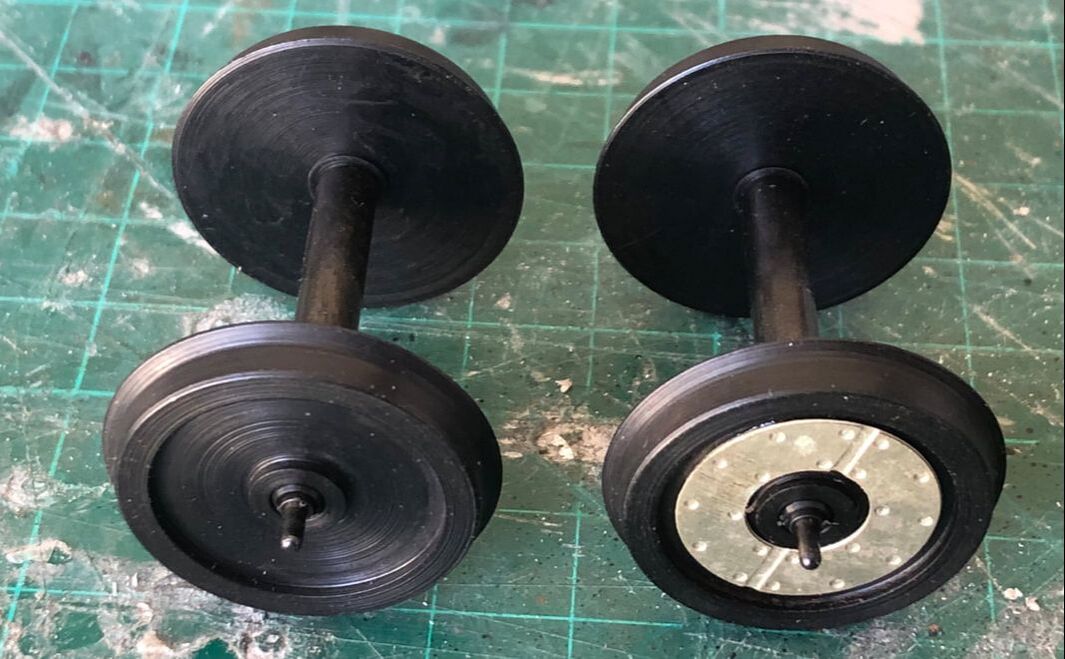
Wheels on this build are Peartree 3’7” coach wheels, there are plenty of other options out there but I wanted other wheels at the same time. Malcolm also does 3’1” disc brake wagon wheels which are my stock go to when building wagons even if I don’t need the discs. Any unused discs end up in the spares box for times like this! I fitted a disc to the outside face of ONE wheel on each wheel set, remember these wagons only have disc brakes on two corners! Make sure you have the correct pedestal and securely fit to one side of the wagon, repeating the operation for the opposite side with the wheel in place. Make sure you have the wheel set the right way round to match up the disc with the disc brake pedestal. With the wagon stood upright on its wheels, the disc brake should be to your left.
|
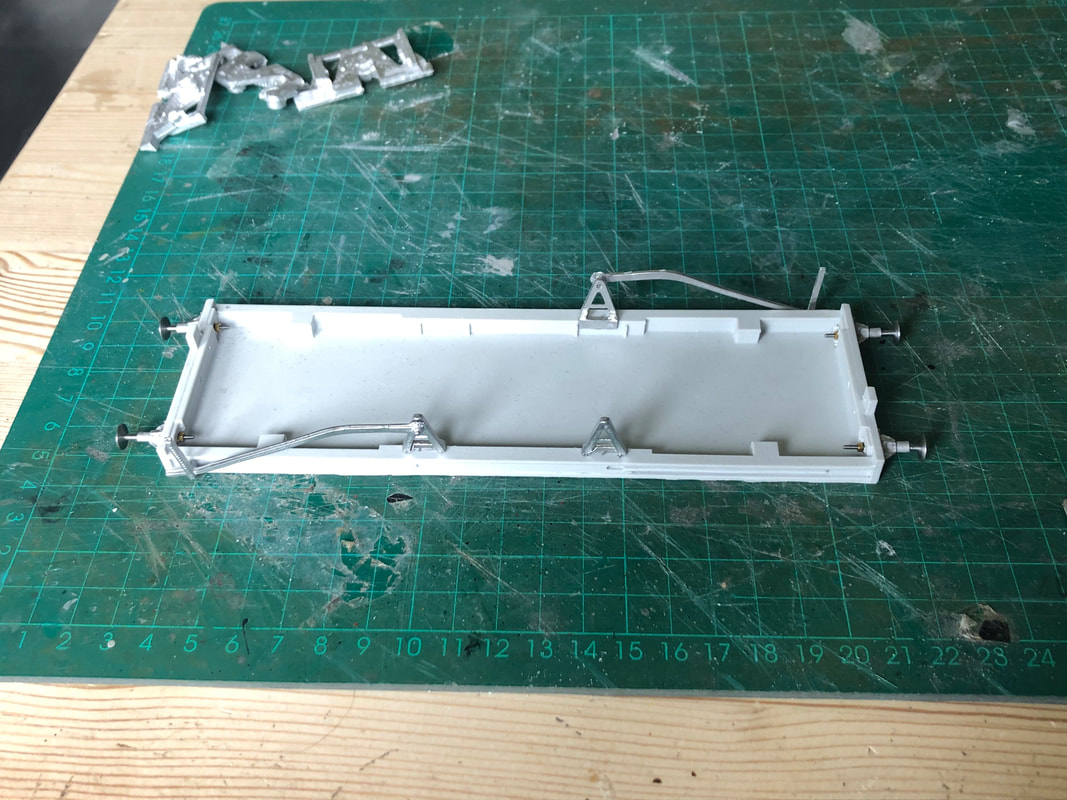
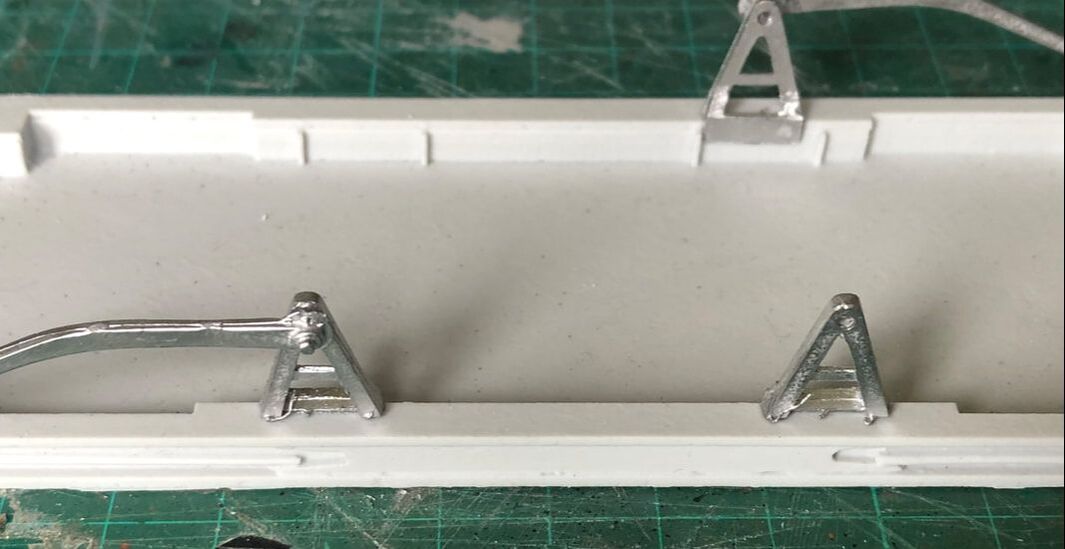
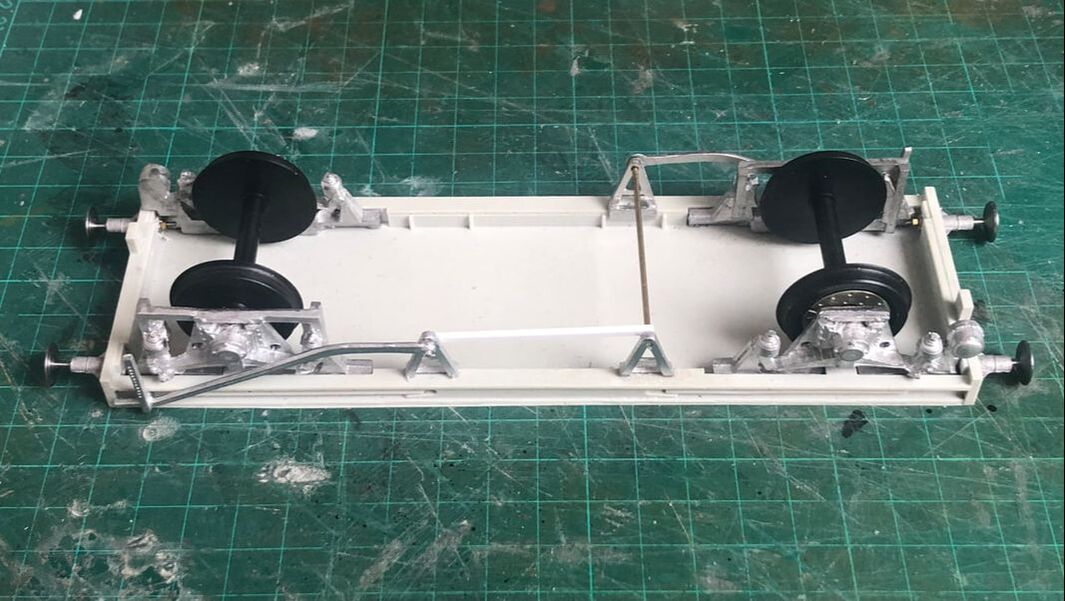
Add the white metal V hangers in the slots on the underside of the chassis, note unlike most wagons the MAA/MAB wagons have two V hangers on one side of the wagon and one on the opposite side. Until you add these then the chassis is identical both sides.
|
Paul supplies three handbrake leavers with this kit, one for each of two corners and one on to make the bridging piece to complete the linkage between the two ‘V’ hangers. The more I looked at pictures the more I wasn’t happy with this arrangement, on one hand it seems a waste of a white metal handbrake lever on and on the other hand it just didn’t look quite right. I cleaned up two handbrake levers then trimmed the mounting off one drilling out a 1mm hole. The lever with the mounting intact was then fixed to the wagon on the solebar of the side with two ‘V’ hangers to the right-hand side. I then cut 53mm length (length may vary slightly) of 1mm brass rod to join the two ‘V’ hangers that are opposite each other through into the handbrake leaver. Once set I then cut a suitable length of “I” beam to represent the middle linkage, this is then affixed behind the ‘V’ hangers above the handbrake leaver and bellow the brass rod.
|
|
The kit comes with white metal buffer housings with 10mm ‘drawing pin’ heads, these would need drilling out and the heads adding. I try where ever possible to fit sprung buffers to my stock just to get a little more play on any sharp corners, therefore I have replaced these with NMRS FO54 buffer housings but with 7mm heads rather than the usual 10mm ones. HAA’s (of which these wagons and the further re-builds to MHA’s) all had 13” OLEO’s which is nearer to 7mm. Graham Harrison of GJH plant has taken on some of the NMRS items and should be able to provide these if asked. If using sprung buffers disassemble them and fix the housings to the buffer beam. The heads can be re- added after painting, but it is a little tight!!
Paint, Transfers & Final Finishing.
The chassis had two good coats of Halfords primer followed by two coats of a basic gloss black. For things like this I tend to use a cheap (Pound shop) gloss auto paint. It’s always handy to have a couple of cans of black gloss in stock for jobs like this.
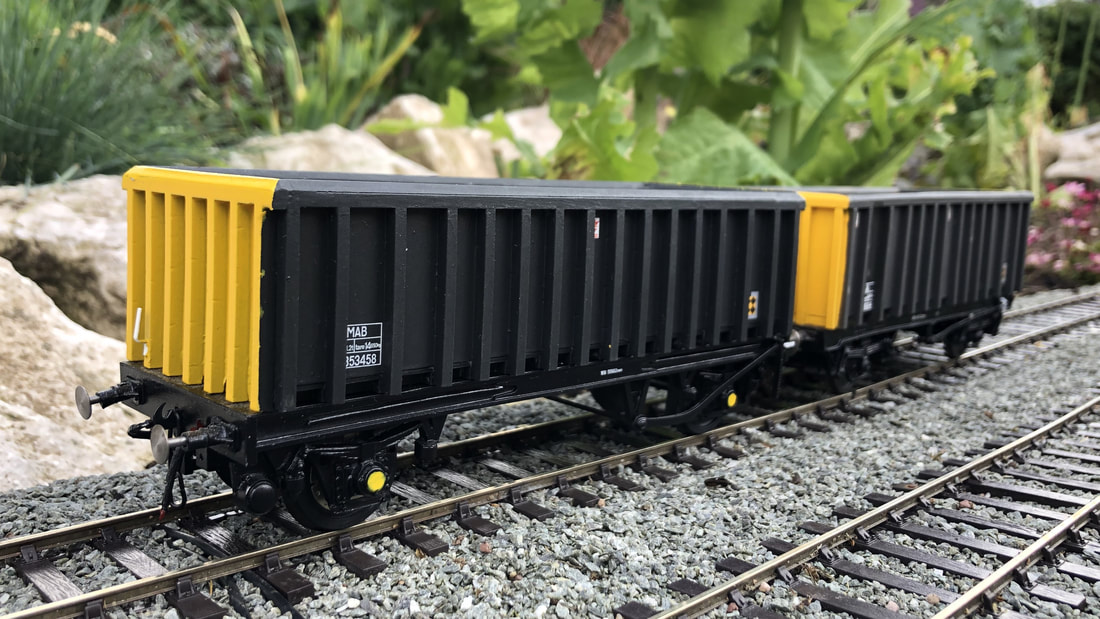
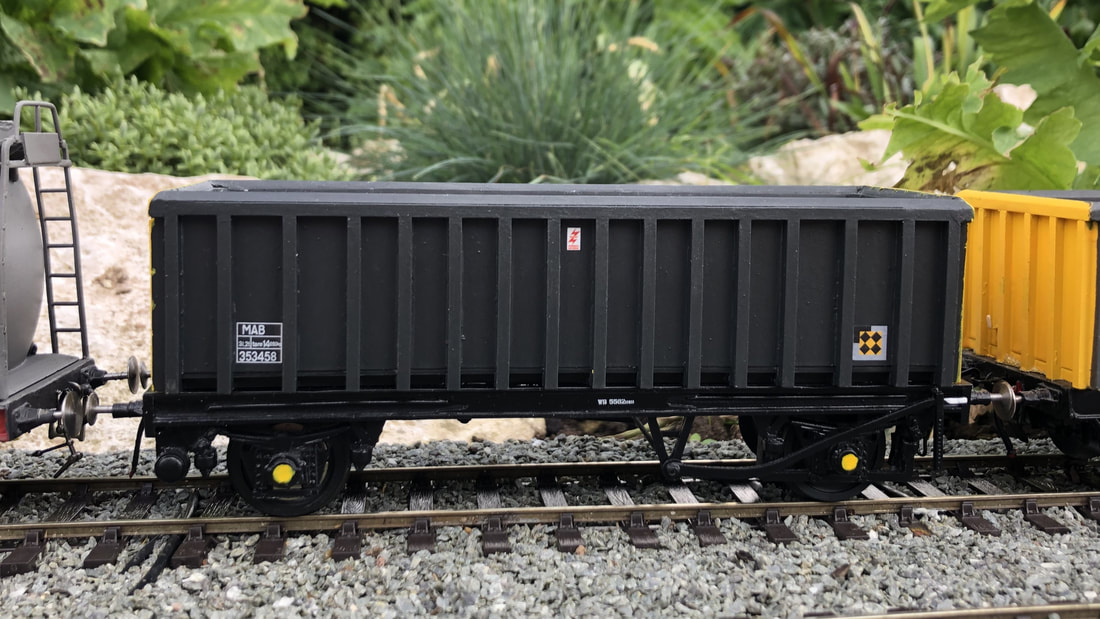
The body was then painted separate from the chassis again starting with a couple of coats of primer followed with warning panel yellow and Humbrol 67 hand painted with a random in stock brown for the interior then finished with Railtec Transfers. Steve does a pack for all five numbers of the MAB so I will likely do at least two more, pack 7mm-6981 will cover all five wagons.
Finally the body was glued onto the chassis, buffers re-fitted, GJH Plant Rubber Brake Pipes and Dapol instanter type couplings added.
|
|
In Conclusion.
This is the simplest of Paul’s kits to date, no soldering is required at all and it can be put together with some basic tools super glue in an evening. The prototype fleet of five wagons are an ideal subject and will nicely break up a rake of MEA’s giving some variation. This is an ideal starter kit for anyone wanting to build modern wagons in O gauge.
Prototype:
5xHAA MGR Hoppers converted in 1988/89 to MAB and fitted with though Vacuum pipes for working with the last of the Vac Braked coal fleet. Later recoded and renumbered to MAA when the through Vacuum pipe was removed.
351749 MAB (carried small Trainload Coal Logo’s) Became 392000 MAA (Assume given 392003 carried MAB this probably did with this number)
353237 MAB (carried small Trainload Coal Logo’s) Assume this became 392001 may have carried both MAA & MAB.
353458 MAB (carried small Trainload Coal Logo’s) Assume this became 392002 may have carried both MAA & MAB.
353700 MAB 392003 MAB (assume this later became MAA)
356725 MAB I assume this became 392004 & may have carried both MAA & MAB.
At least four MAA got cut down and became MHA 394406/7/8/10. I assume the 5th wagon got the same treatment and numbered 394409 but I can find no photographic evidence.