Inverness Highland Rail Snowploughs
|
|
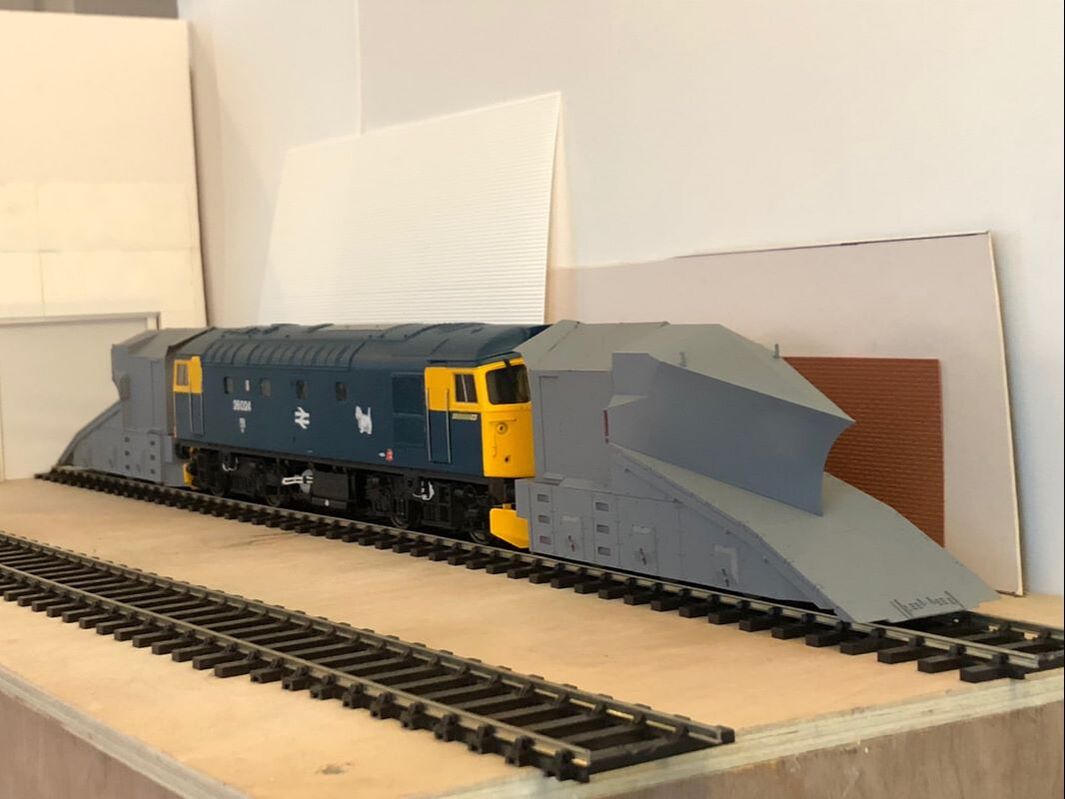
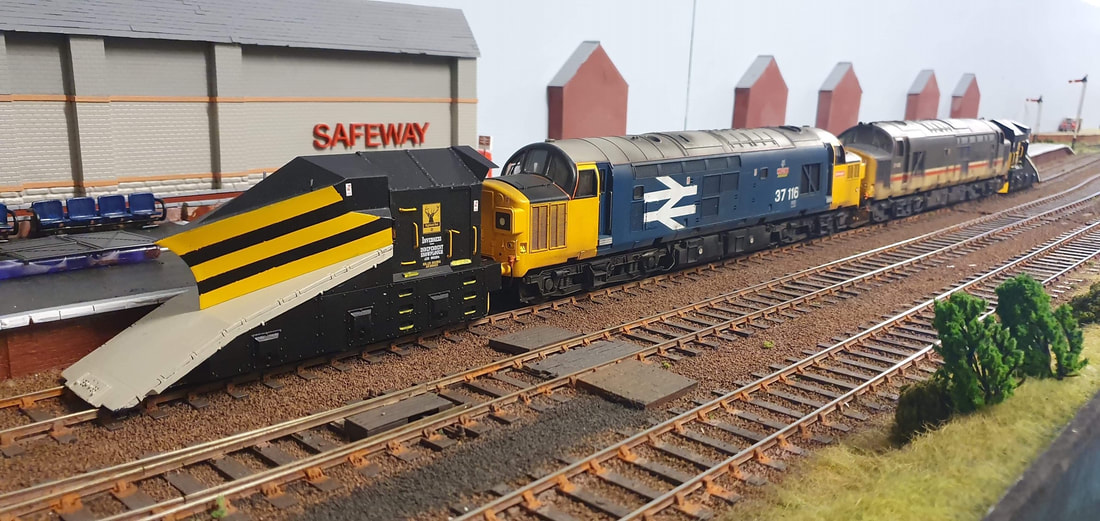
I have always liked the idea of a pair of Snowploughs and a number of years ago I built the Britannia Pacific 4mm ones to a very basic standard, on moving to 7mm I again wanted a pair of snowploughs but didn't fancy having to roll a brass kit to get the correct shape. Unfortunately by the time that I had jumped to 7mm JLTRT had gone by the wayside and so their resin ploughs were no longer available. Thankfully MM1 have taken on the mouldings for the range and although availability is in sporadic short runs the ploughs can be acquired. As soon as they appeared available again I jumped at the chance of getting a pair.
Build
|
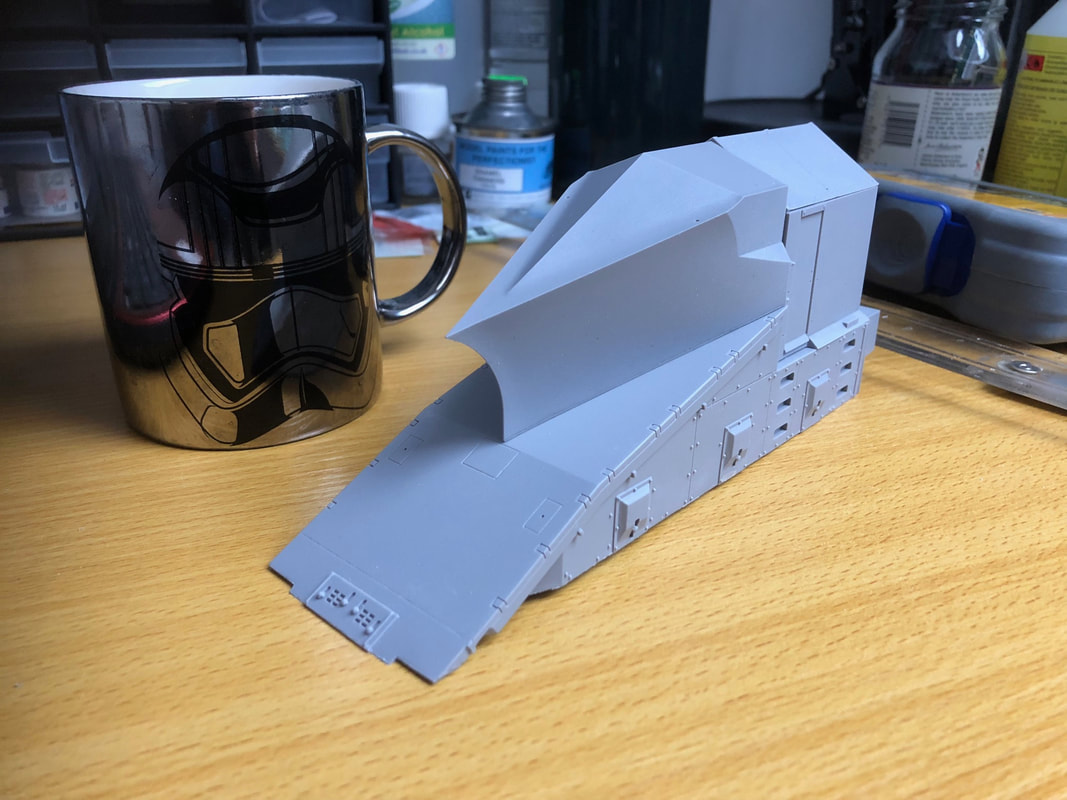
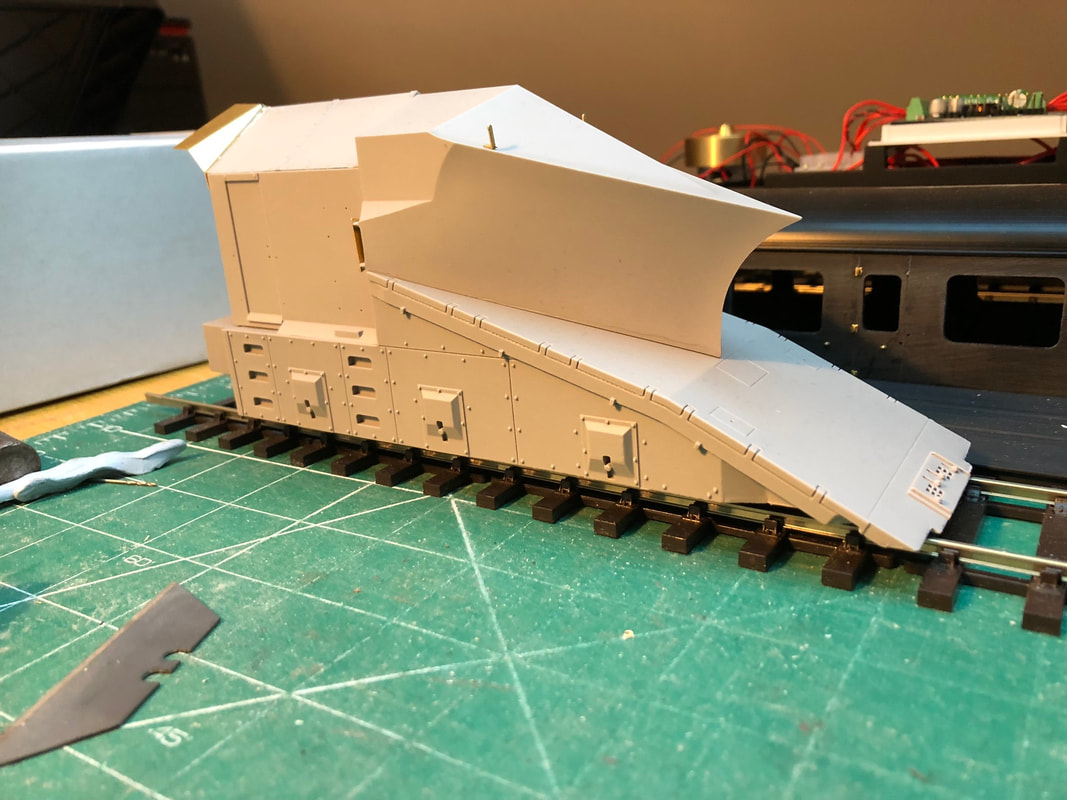
The main kit is made up of 7 resin parts, the horizontal blade, the vertical blade and five parts to build up the cab along with an etch and some lost wax brass details. The resin parts are all good and square just needing a little tidying up around the edges. I built the cabs up on a flat piece of glass then filled and filled and gaps. At this point I figures that it would make painting and masking easier by keeping the cab and both blades separate until final finishing. Lamp irons and brass parts were added to the cab and blades as per the instructions but checking prototype photographs as there is some variation between ploughs.
I also added the rubber bellows(?) under the dumb buffers out of thin brass as these parts are not provided in the kit and not fitted to every plough. |
|

|

The chassis is a one piece resin moulding with brass bearings. Each plough needs 2x3'9" and 1x3'7" wheels. the kit instructions recommend Slaters wheels (B7845 x2 & B7837 x1). but I opted to use Peartree wheels (3'7" Coach and 3'9" Diesel plain disc), Peartree wheels come in packs of two so one pack of 3'7 and two packs of 3'9" wheels did both ploughs. The brass bearings need opening out slightly until the axles turn freely within them, I used some rolled up sandpaper. I also found that when the bearings were inserted and the whells fixed to the axles that the gauge was very tight and the wheel struggle to turn. To solve this I strip the chassis back down and with two grades of sandpaper affixed to a block of wood I sanded back the face of the bearings until the wheel turned freely when the chassis was re-assembled.
|
There are two nuts which fit in the top of the horizontal blade which are used later to bolt the chassis too, these were fixed in place with a strong adhesive (I uses Evostick Impact Adhesive).
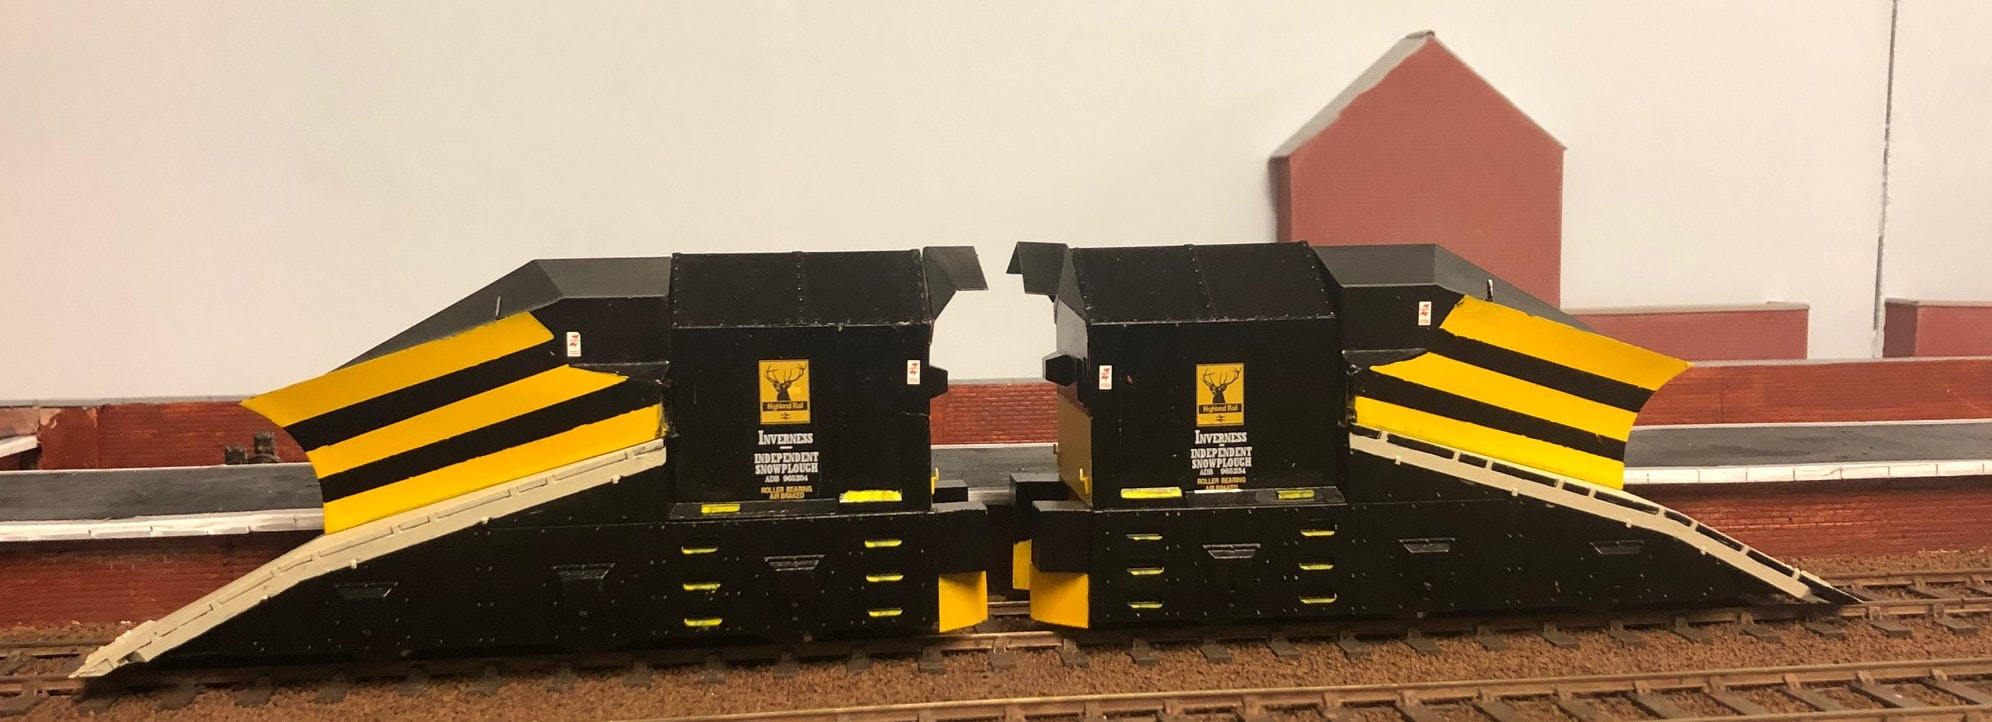
Paint & Transfers
|
At this point both ploughs were given a couple of coats of Halfords grey plastic primer before passing to Cameron for paint and transfers.
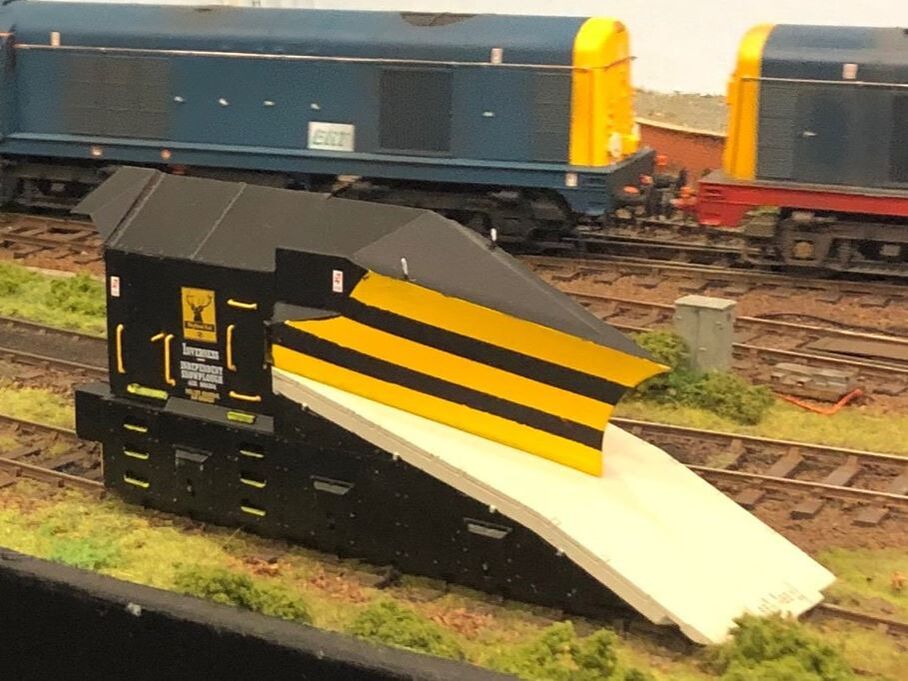
Initially the cab and vertical blade were painted yellow with the back of the cab and the chevrons masked off before a coat of black. During the period I have chosen for this pair of ploughs the main horizontal blade appears to be Railfreight grey which was painted fist before masking and a top coat of black applied. All of which followed by a coat of gloss varnish. With the main body of the ploughs still being in three constituent parts made painting and masking much easier. Lastly transfers we're added from Railtec (warning flashes) and Precision Labels (the bespoke Inverness logos's and lettering) before a final coat of satin varnish. As the snowploughs seem to be kept relatively clean these will not get weathered. |
|
Final Finishing
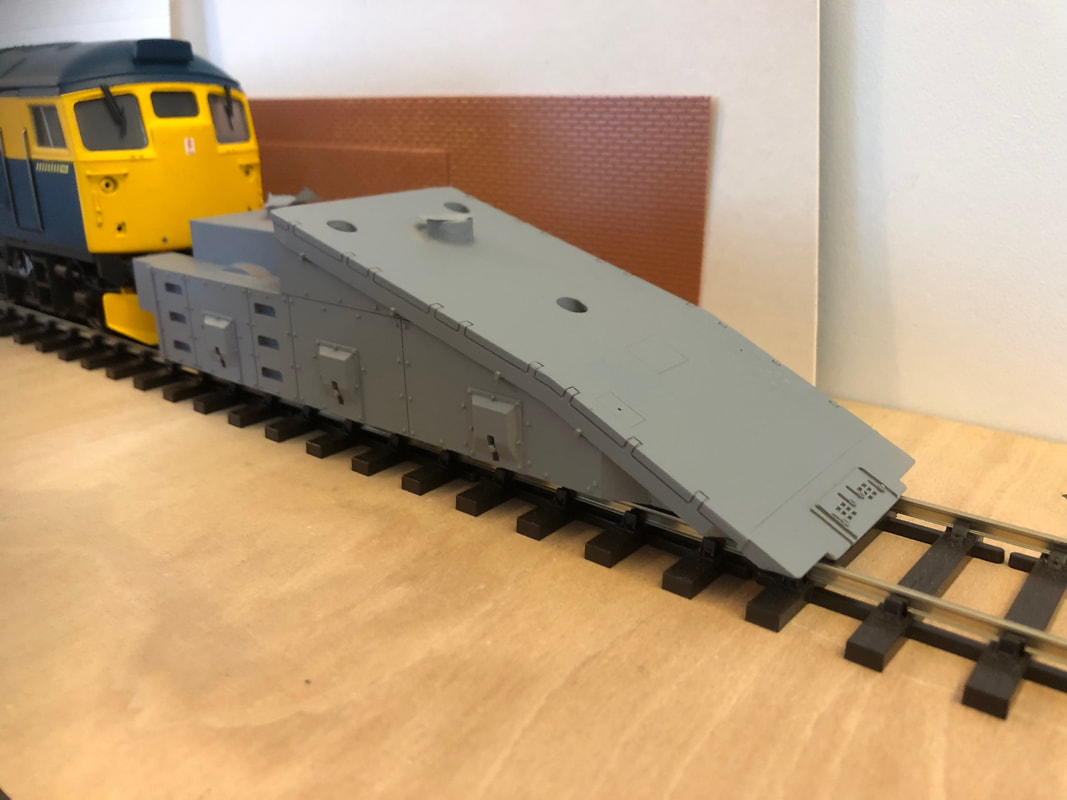
Once Cameron had finished the paintwork and transfers I had both ploughs back for fitting handrails and final assembley. Holes were drilled out to accept the wire provided by MM1 and handrails bent to shape. Before fitting these were primed and painted yellow. I opted not to use the supplied door handles as looking at pictures the Inverness pair during the period I am modelling they appear to be a standard door handle so used my method of cut down staples. With handrails fitted the three main building blocks were tacked together with a sparing amount of super glue so as not to damage the paint work, the chassis then attached using the bolts provided. Lastly I fitted a couple of spare Heljan air brake pipes, Dapol screw couplings (MM1 supply couplings and vac brake pipes but I decided to swap them out) and the fall plate over the dumb buffers.
|
|

Items used in the above build have been supplied from the following:
https://mm1models.co.uk/
http://www.precisionlabels.com/
https://www.railtec-models.com/
https://www.dapol.co.uk/
http://www.modelrailwayparts.com/index.html (Peartree Wheels)
https://mm1models.co.uk/
http://www.precisionlabels.com/
https://www.railtec-models.com/
https://www.dapol.co.uk/
http://www.modelrailwayparts.com/index.html (Peartree Wheels)